
If you want a real tomato harvest instead of the three sad transplants the garden center has left by June, the single best move is to start tomato seeds indoors. I learned that the hard way. My first spring I bought four-dollar seedlings that were already root-bound and yellow, planted them out, and got maybe two dozen tomatoes off the whole patch. The next year I sowed my own, and the difference was honestly embarrassing — I had more ripe fruit than I could give away. But here’s the catch I didn’t see coming: the seeds are the easy part. The year I sowed them too early they grew into tall, pale, floppy things that keeled over the moment I put them outside. That mistake is called “leggy,” and it’s almost always fixable if you know the timing. In this article I’ll walk you through exactly when to sow, how to raise sturdy seedlings under lights, and the hardening-off step that keeps them from dying the second they meet real weather.
Quick answer: sow tomato seeds indoors about six weeks before your last expected spring frost, in a fine seed-starting mix, two seeds per cell, barely covered with soil. Keep them warm (70-80°F) until they sprout, then give them strong light for 14-16 hours a day so they don’t stretch. Water from the bottom, pot them up once they have true leaves, and about a week before planting out, start hardening them off — moving them outside for a few hours a day, increasing the time over 7 to 10 days. Skip that last step and even healthy seedlings can wilt and die in a single afternoon of sun and wind. Everything below explains the why and the how.
- 1. Why Start Tomato Seeds Indoors
- 2. Timing: Counting Back From Your Last Frost
- 3. What You Need Before You Sow
- 4. Sowing the Seeds Step by Step
- 5. Light and Temperature: The Two Levers
- 6. Watering and Feeding Without Killing Seedlings
- 7. Potting Up and Reading the Seedlings
- 8. Hardening Off: The Step Most People Skip
- 9. Troubleshooting: Symptoms, Causes and Fixes
- 10. FAQs
- 11. Sources and Further Reading
Why Start Tomato Seeds Indoors
The head start that changes your harvest
Tomatoes are warm-season plants with a long way to go before they fruit. From a sown seed to a ripe tomato is roughly 100 to 140 days depending on the variety, and most of that has to happen after the soil warms up. If you wait for warm weather to sow, your season simply runs out before the fruit ripens. Starting indoors lets you bank those weeks while it’s still cold outside, so the plant is already sturdy and a foot tall by the time the garden is ready. That head start is the difference between a plant that sets fruit in July and one that’s still flowering when the first frost arrives.
I switched to indoor sowing the year my garden center sold out of the variety I actually wanted — a small paste tomato for sauce. Once I started from seed I could grow exactly what I liked instead of whatever was left on the rack, and I could grow ten plants for less than the price of two transplants. The trade is time and a little equipment, but for a crop you eat all summer, it pays for itself by August. If you’ve only ever bought seedlings, try it once; the control you get over variety, timing and plant health is the reason most serious growers never go back.
When “indoors” actually beats the garden center
Not every crop is worth starting inside. Radishes, carrots and beans hate being moved and should go straight in the ground. Tomatoes, though, are the poster child for indoor starting because they transplant so willingly and reward the extra lead time. The math is simple: a six-week-old indoor seedling planted after frost will outproduce a four-inch store-bought transplant by a wide margin, because it never lost time sitting on a shelf.
One honest caveat: if you live somewhere with a very long, hot season and you only want a couple of plants, buying transplants is perfectly fine and far less work. I still buy a backup plant some years. But if you want volume, variety or earliness, starting seeds indoors wins every time. The rest of this guide assumes you’ve decided the indoor route is worth it — which, for tomatoes, it usually is. Let’s get the timing right first, because that’s where most beginners go wrong.
Timing: Counting Back From Your Last Frost
Find your last spring frost date
Everything about tomato timing hangs on one number: your average last spring frost date. This is the date after which a killing frost is unlikely in your area, and it’s published by local extension services for nearly every county. The University of Illinois Extension tomato guide and the Michigan State University home gardening vegetable pages both walk through regional planting windows, and your state’s cooperative extension site will have a frost-date calculator. Write that date down — it’s your anchor for everything else.
When I started, I guessed my frost date and sowed two weeks early “just to be safe,” which is exactly how I ended up with leggy monsters in April with nowhere to go. The lesson stuck: the frost date isn’t a suggestion, it’s the backstop. If you don’t know yours, look it up before you open a seed packet. A plant started on the right date and planted on time will almost always outperform one started early and babied for an extra month indoors, because tomatoes simply don’t thrive when kept inside too long.
The six-week rule (and when to bend it)
The standard advice is to sow six weeks before your last frost date. That gives the seedling time to germinate, grow true leaves, and get potted up once, without becoming overgrown. For most indeterminate (vining) tomatoes, six weeks is the sweet spot. Determinate (bush) types can even go a touch later, around five weeks, because they’re smaller and mature faster.
Where do you bend the rule? If you have a short, cool season, push to seven weeks so the plant is bigger at transplant. If you have strong grow lights and plan to pot up twice, you can also stretch to seven weeks safely. What you must not do is sow ten or twelve weeks early expecting a bigger plant — it doesn’t work that way, and you’ll get a root-bound, stressed seedling instead. The Oregon State University Extension gardening pages reinforce this: timing to your local conditions beats any fixed calendar date. Mark “sow” and “plant out” on a calendar the day you find your frost date, and the rest of the season gets a lot calmer.
What You Need Before You Sow
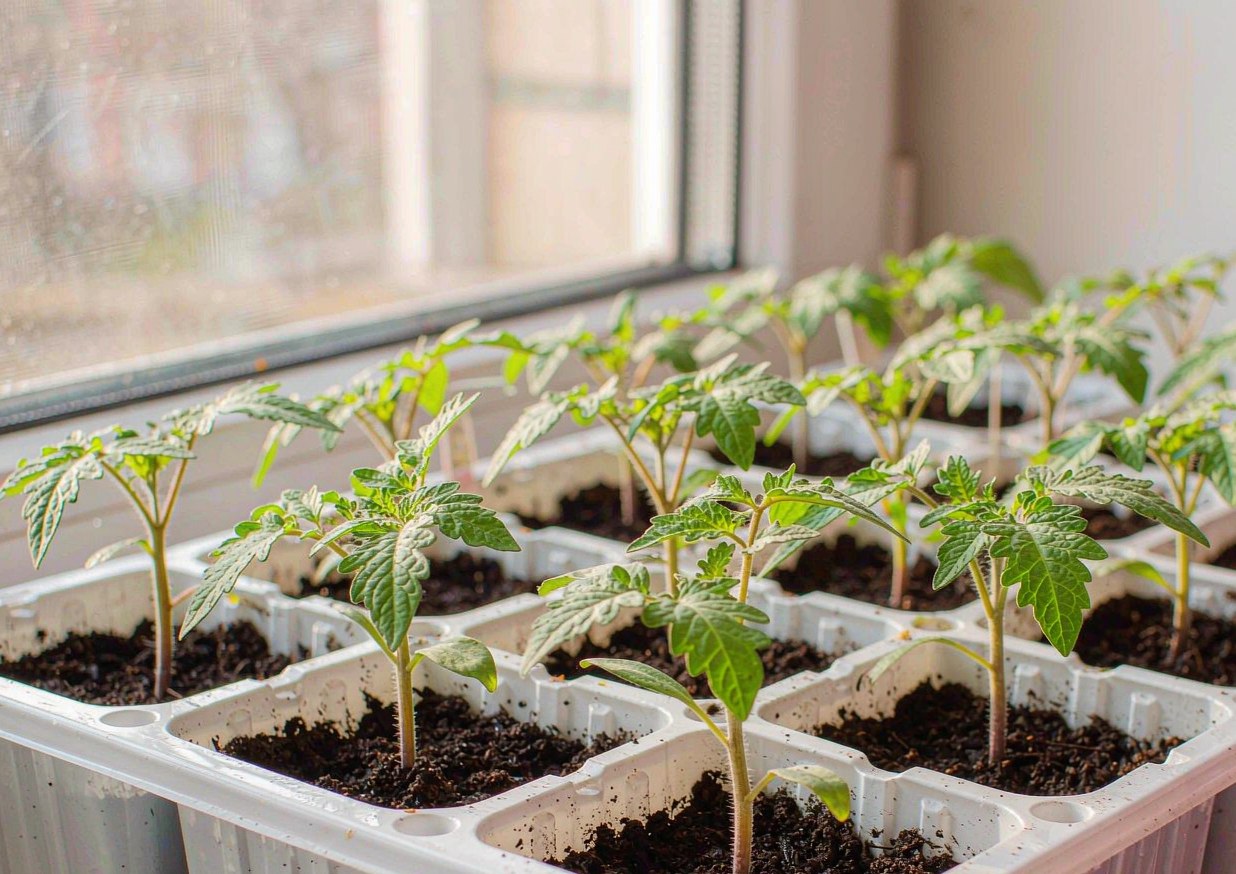 Photo provided by the author
Seed-starting mix vs. potting soil
The single most common early mistake is sowing into regular garden soil or heavy potting mix. Tomato seeds need a fine, loose, low-nutrient medium that holds moisture without compacting, and garden dirt is none of those — it packs down, harbors disease, and drowns tiny roots. A proper seed-starting mix is sterile, light and made for germination. It costs a few dollars a bag and prevents a whole category of failure.
I use a peat-free seed-starting mix now, but any bag labeled for seeds works. The key is “sterile” — that’s what keeps damping-off (a fungus that topples seedlings at the soil line) from wiping out a flat overnight. Reserve your regular potting mix for the potting-up stage, not for the initial sow. Spend the extra step on clean mix and you remove the risk that bothered me most in year two, when a whole tray collapsed in 24 hours from a disease I’d brought in from the yard.
Containers, seed trays and labels
You don’t need fancy gear. A cell tray (the kind with dozens of little compartments) is ideal because each seedling gets its own space and you disturb the roots less at transplant. You can also use solo cups with holes punched in the bottom, yogurt pots, or any clean, shallow container. What matters is drainage — tomatoes hate wet feet from day one.
Two things I never skip now: labels and a tray liner. Label every cell with the variety and date the moment you sow, because by week three you will not remember which cell is which — I once grew a mystery tomato all season and never knew what I was eating. And put the cells in a watertight tray so you can bottom-water without flooding the shelf. A cheap humidity dome or a loose plastic cover helps hold moisture until sprouting, but remove it the day the first seedling appears or you invite mold. None of this is expensive, and most of it is reusable for years.
Sowing the Seeds Step by Step
Depth, spacing and the “two seeds per cell” trick
Tomato seeds are tiny, and the rule is to cover them with about twice their width of mix — roughly a quarter inch. Too deep and they run out of energy before breaking the surface; too shallow and they dry out. I press the mix flat in each cell, drop the seeds on top, and sift a thin layer over them, then mist gently so nothing shifts.
Here’s the trick that saves grief: sow two seeds per cell, then snip the weaker one at soil level once both sprout. This guards against duds — every cell ends up with a plant, and you’re not left with gaps. The NC State Extension Gardener Handbook covers seed viability and spacing in its vegetable chapter, and the principle is universal. Don’t pull the loser out by the stem (you can damage the survivor’s roots); just cut it. One strong seedling per cell is exactly what you want going into the light stage.
Heat, light and the damping-off risk
Tomato seeds germinate fastest at 70-80°F. A warm windowsill or a seedling heat mat gets them up in 5 to 10 days; a cold room can take three weeks or fail entirely. I use a heat mat under the tray for the first week — it’s the single biggest accelerant for germination and costs little to run.
But heat without air circulation is how damping-off moves in. Keep a small fan on low nearby once sprouts appear, and don’t let the dome stay on past sprouting. The moment the first green loop shows, light becomes the priority and the cover comes off. Good airflow plus a sterile mix plus not overwatering is the three-part defense I wish someone had spelled out to me before I lost a tray. Get those right and germination is almost boring — which is exactly what you want.
Light and Temperature: The Two Levers
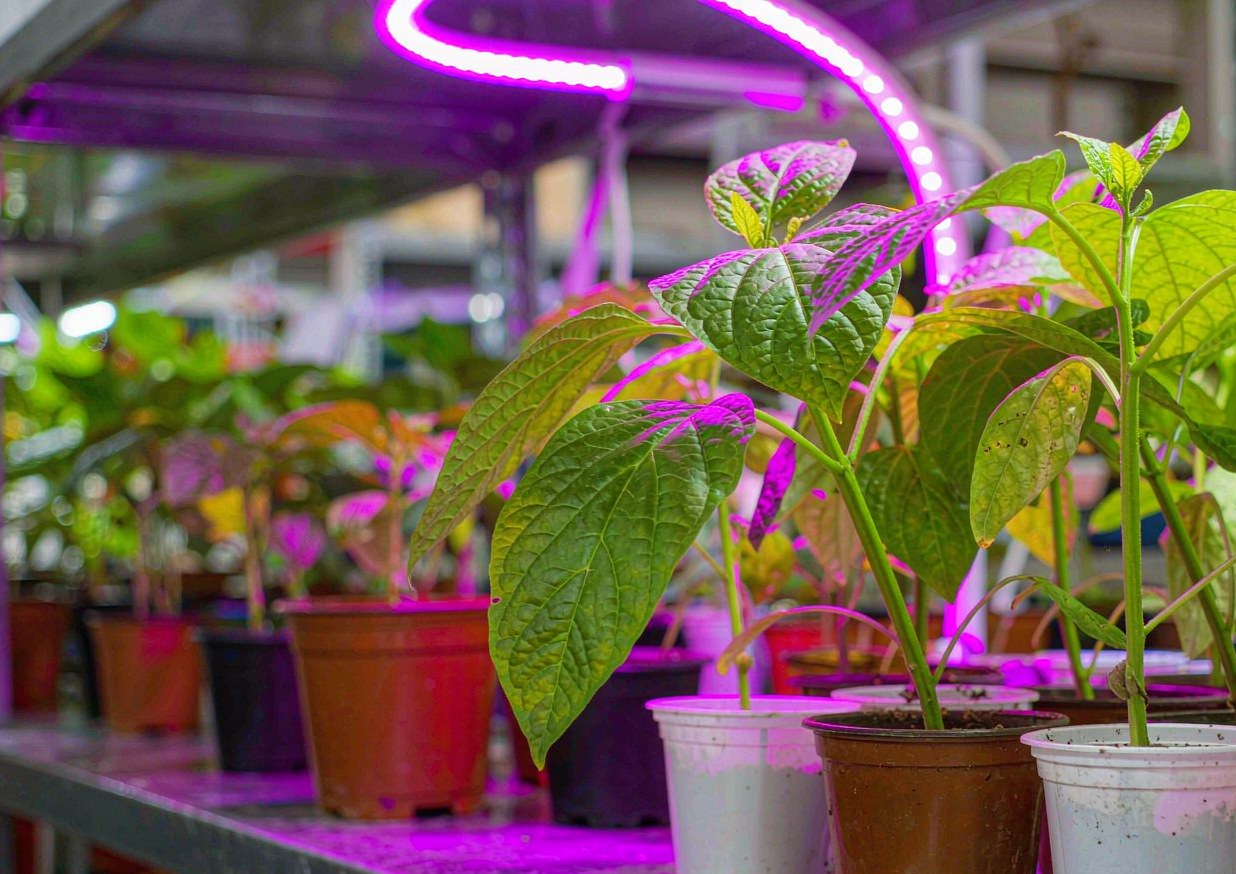 Photo provided by the author
Why a sunny window isn’t enough
If there’s one thing that turns a good seed-starting plan into a sad, stretched mess, it’s weak light. A bright south window looks generous to us, but to a tomato seedling it’s dim and one-directional, so the plant stretches toward it and becomes leggy — tall, pale and weak at the base. My first batch lived on a windowsill and looked like spaghetti by week four.
The fix is intense, close, long light. Seedlings want roughly 14 to 16 hours a day of bright light, and a window rarely delivers that consistently, especially in early spring when days are short. If you only have a window, rotate the tray daily and accept that you’ll need to pot up carefully, but know the plants won’t be as stocky as lit ones. For reliable results, supplemental light isn’t optional — it’s the lever that separates sturdy transplants from floppy ones. Don’t rely on the glass; give them the photons directly.
Grow lights and how far to hang them
A grow light for seedlings doesn’t have to be fancy. A basic fluorescent or LED shop light with a decent color spectrum works; purpose-built seedling LEDs are brighter and cooler but cost more. The critical detail is distance: hang the light just 2 to 4 inches above the seedlings and raise it as they grow, keeping that small gap. Too far and they stretch; too close and they scorch.
I run an inexpensive LED panel on a timer for 15 hours a day, and the difference versus my window-only year is night and day — short, purple-stemmed, leafy little plants instead of pale spindles. A good extension guide on light and schedules will confirm the 14-16 hour window. Timers are worth every cent here because consistency matters more than intensity spikes. Set it, forget it, and check the gap weekly. That one habit fixed the leggy problem that had embarrassed me two springs running.
Watering and Feeding Without Killing Seedlings
Bottom watering vs. top watering
How you water seedlings matters as much as how often. Top watering with a hard stream washes seeds around and compacts the surface; bottom watering lets the mix drink from below through the drainage holes, which keeps the top drier and discourages fungus gnats and damping-off. I set the cells in their tray, pour water into the tray, and let them wick up for 20 to 30 minutes, then dump the excess.
The trap is letting the tray sit full — that’s how you get soggy roots and disease. I water when the surface of the mix just starts to look dry, not on a rigid schedule, because heat and light change how fast it dries. Feel the top with a finger; if it’s still cool and damp, wait. Consistent slight moisture, never saturation, is the goal. Once I switched to bottom watering and stopped guessing, the gnats and the collapsing stems both went away. It’s less work and better outcomes — my favorite kind of fix.
When to start fertilizing
Seed-starting mix is intentionally low in nutrients, which is fine until the seedling grows its true leaves (the second pair, the ones that look like real tomato leaves). At that point the stored seed energy is running low and a light feed helps. I start a half-strength balanced liquid fertilizer (something like 10-10-10 or a seaweed solution) once a week after true leaves appear.
The mistake is feeding too early or too strong. Before true leaves, fertilizer just burns tender roots and salts the mix. After potting up into real potting mix, you can go to full-strength weekly. Watch the color: a healthy seedling is medium green; a pale, washed-out one is hungry, a purple-tinged one may need phosphorus. I keep it simple — half-strength weekly from true leaves onward — and the plants tell me if they need more. Overfeeding is easier to do than underfeeding, so when in doubt, ease off.
Potting Up and Reading the Seedlings
Recognizing true leaves and legginess
The first leaves you see are cotyledons — smooth, seed-looking leaves that aren’t true leaves. The real tomato leaves come next, usually the second pair, and that’s your signal the plant is ready for more room. Legginess shows up as a long, thin, pale stem with a big gap between the mix and the first leaves; it means the plant reached for light it didn’t get.
If you catch legginess early, you can fix it by planting deeper at the next stage — tomatoes form roots along any buried stem, so a leggy seedling just gets buried up to its leaves and stands corrected. The NC State handbook notes this stem-rooting habit, which is unique and handy. I used to panic at leggy seedlings; now I just plant them deeper and move on. Reading the plant this way — true leaves, stem color, leaf spacing — turns guesswork into a checklist you can act on.
Moving to bigger pots (potting up)
About two to three weeks in, a seedling in a small cell runs out of room — you’ll see roots at the drainage holes or the plant stalling. That’s the cue to pot up into a 3- to 4-inch pot of real potting mix. Gently tease the root ball out, set it deeper than before (again, burying leggy stem), water it in, and keep it under light.
Potting up once, sometimes twice, keeps the plant growing steadily instead of becoming root-bound and stressed before transplant. I aim for a plant that’s 6 to 10 inches tall, stocky, dark green, with a thick stem by planting time — not a tall, thin one. A well-timed transplant into the garden then takes off because the plant was never starved for space. This stage is where “good seeds” become “great transplants,” and it’s mostly about not letting them sit cramped.
Hardening Off: The Step Most People Skip
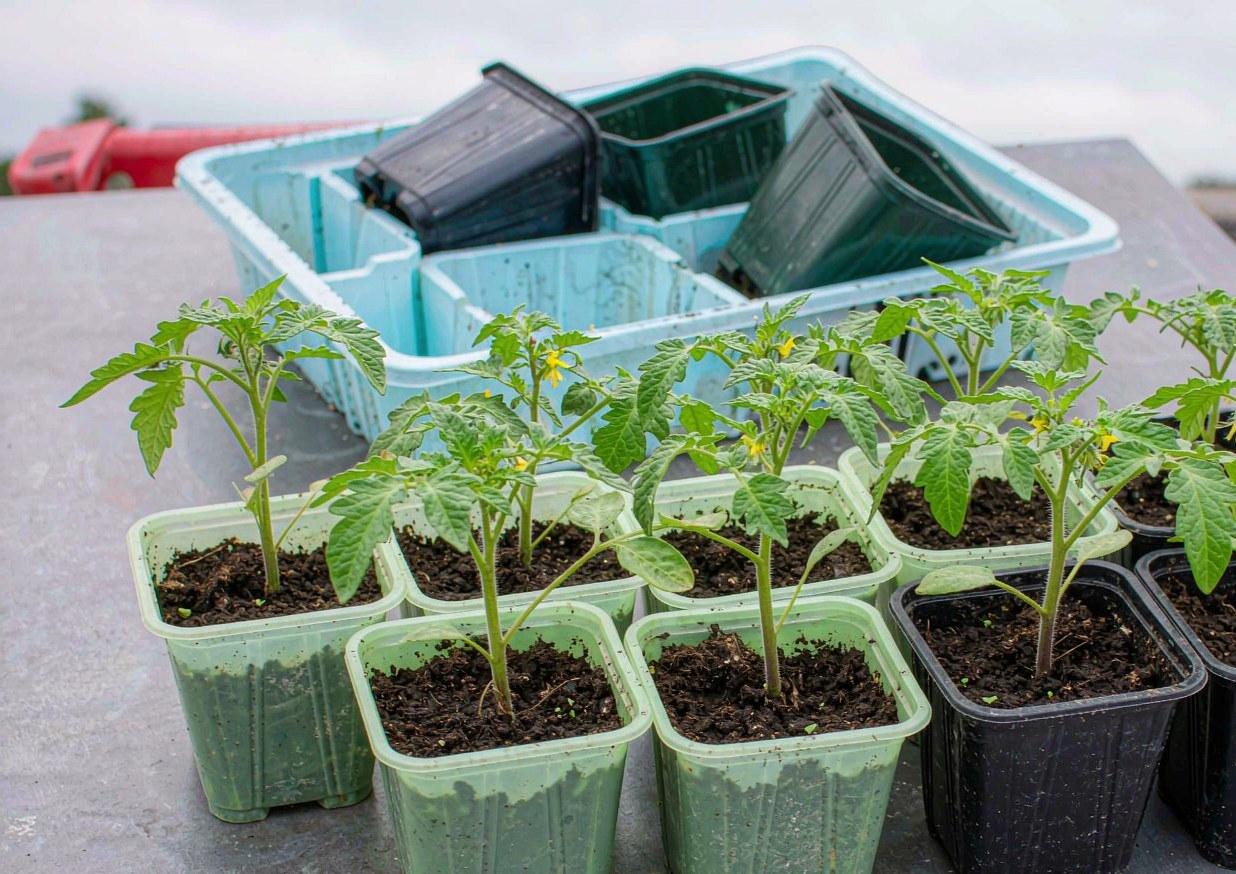 Photo provided by the author
What “hardening off” actually does
Hardening off is the gradual process of introducing indoor seedlings to the real world — sun, wind, temperature swings and drier air — so they don’t go into shock. A plant raised in steady 70°F under a light has zero defense against a breezy 55°F afternoon, and if you skip this, leaves can scorch or wilt within hours. This is the step I ignored that first leggy year, and I watched healthy plants crumple the day after planting.
What’s happening is the plant is building thicker leaf cuticle and tougher stems through short, repeated exposure. It’s like acclimating to cold water one toe at a time instead of jumping in. The Oregon State guidance and most extension services treat hardening off as non-negotiable for tender crops. Give it the week it needs and transplanting becomes almost anticlimactic — the plants just keep growing. Rush it and you can lose weeks of work in an afternoon.
A 7-to-10 day schedule that works
Start hardening off about a week to ten days before your planting date. Day 1-3: put the plants outside in a shady, sheltered spot for 2 to 3 hours, then bring them back in. Day 4-6: increase to 4 to 6 hours, introducing gentle morning sun. Day 7-10: full day outside, including some direct sun, and if nights stay above 50°F, leave them out overnight before the final planting.
Bring them in if a cold snap or hard rain is forecast — this isn’t a test of toughness, it’s a gradual ramp. I keep a close eye on the forecast during this window because one late cold night can undo it. By the end, the plants look tougher, slightly darker, and unfazed by a breeze. Plant them out on a calm, cloudy afternoon if you can, water well, and they’ll barely notice the move. This schedule has saved every seedling I’ve started since the year I learned it the expensive way.
Troubleshooting: Symptoms, Causes and Fixes
Most tomato-seedling problems show up in the first month, and nearly all trace back to one of six causes. This is the table I keep by the seed shelf.
| Symptom | Likely cause | Fix |
|---|---|---|
| Seedlings tall, pale, thin at base | Not enough light; light too far away | Lower grow light to 2-4 in; increase to 15 hrs/day; plant deeper at pot-up |
| Stem collapses at soil line, falls over | Damping-off fungus | Improve airflow, remove dome, bottom-water, use sterile mix; discard affected cells |
| Nothing sprouts after 3 weeks | Soil too cold; old seeds | Use heat mat (70-80°F); test seed viability; re-sow with fresh seed |
| Lower leaves yellow, plant stalls | Nutrient shortage after true leaves | Start half-strength balanced liquid feed weekly |
| Seedlings wilt the day after planting out | Skipped or rushed hardening off | Harden off 7-10 days; plant on cloudy afternoon; shade for 2 days |
| Mushy, dark roots; sour smell | Overwatering / sitting in tray water | Empty tray after bottom-watering; let surface dry between waterings |
FAQs
How many weeks before last frost should I start tomato seeds?
The standard is six weeks before your average last spring frost date for indeterminate varieties, and about five for compact determinates. Count back on a calendar from that frost date, not from when you “feel like planting.” Starting too early is the more common error: a seedling kept indoors for ten or twelve weeks becomes root-bound and stressed, not bigger and better. If you have strong lights and plan to pot up twice, you can stretch to seven weeks in a short-season climate. The goal is a stocky 6- to 10-inch plant at transplant, not a tall, leggy one. Find your frost date first, mark sow and plant-out dates, and the timing takes care of itself.
Do I really need a grow light, or will a windowsill work?
A bright south window can work, but it usually produces weaker, leggier plants because spring light is dim and one-directional. If you want sturdy transplants reliably, a grow light 2 to 4 inches above the seedlings for 14 to 16 hours a day is the single best investment. I run an inexpensive LED panel on a timer and the plants come out short, purple-stemmed and leafy instead of pale and stretched. If you only have a window, rotate the tray daily and keep it as close to the glass as possible, but expect to pot up more carefully. For most people, a basic light pays for itself in saved plants the first season.
Why are my tomato seedlings so tall and floppy?
That’s legginess, and it almost always means not enough light. The plant stretches toward a dim or distant source, growing a long thin stem with a big gap before the first leaves. The fix is twofold: lower your light immediately and, at the next potting-up, plant the seedling deeper — tomatoes root along buried stem, so a leggy plant simply gets buried up to its leaves and stands corrected. Prevent it next time by keeping the light 2 to 4 inches above the foliage from day one. A small fan for air circulation also thickens stems. Once you’ve seen the difference close light makes, you’ll never leave the gap wide again.
What is hardening off and can I skip it?
Hardening off is gradually exposing indoor seedlings to outdoor sun, wind and temperature swings over 7 to 10 days so they don’t go into shock when planted. You really shouldn’t skip it — plants raised in steady indoor conditions can scorch or wilt within hours of sudden exposure, and I lost a whole batch that way one year. Start in shade for a few hours, increase sun and time daily, and bring them in if cold or heavy rain is forecast. By the end they look tougher and slightly darker. Plant on a calm, cloudy afternoon and they’ll barely notice the move. It’s a small time cost that protects weeks of effort.
Are tomato plants safe around pets?
This is worth stating plainly: the leaves and green (unripe) fruit of tomato plants contain solanine and related compounds that are toxic to dogs and cats, while ripe red fruit is generally considered safe in small amounts. If you have pets, keep seedlings and plants where they can’t chew the foliage, and don’t let them nibble green tomatoes. This is general information, not veterinary advice — I’m not a vet. If you think a pet has eaten tomato leaves or unripe fruit, call your veterinarian or the ASPCA Animal Poison Control Center at (888) 426-4435 rather than waiting to see what happens.
Sources and Further Reading
- ASPCA — Toxic and Non-Toxic Plants List
- Oregon State University Extension — Gardening
- NC State Extension Gardener Handbook
- Michigan State University — Home Gardening: Vegetables
- University of Illinois Extension — Tomato
About the author
Samantha has been gardening and arranging her own cut flowers for more than ten years, and has built more than 30 centerpieces from grocery-store bunches, clippings off the cedars behind her house, and a handful of dollar-store experiments that didn’t work. She writes practical, low-cost guides for beginners, including the versions that failed. Prices quoted in her articles are what she actually paid at US grocery and craft stores; nothing is sponsored and no brand pays for a mention. She is not a certified florist, a veterinarian or a horticulturist, and says so wherever a topic touches on plant safety or pet health.
Published: Oct 27, 2026 · Last updated: Oct 27, 2026.
{
“@context”: “https://schema.org”,
“@graph”: [
{
“@type”: “Article”,
“headline”: “How to Start Tomato Seeds Indoors (and When to Harden Them Off)”,
“description”: “Sow tomato seeds indoors about six weeks before your last spring frost in a sterile seed-starting mix, give 14-16 hours of bright light, then harden seedlings off over 7-10 days before planting out.”,
“image”: [
“images/tomato-hero-clean.jpg”,
“images/tomato-seed-tray-clean.jpg”,
“images/tomato-hardening-off-clean.jpg”
],
“author”: { “@type”: “Person”, “name”: “Samantha” },
“publisher”: { “@type”: “Organization”, “name”: “REPLACE_WITH_SITE_NAME” },
“datePublished”: “2026-10-27”,
“dateModified”: “2026-10-27”,
“mainEntityOfPage”: {
“@type”: “WebPage”,
“@id”: “https://REPLACE_WITH_DOMAIN/how-to-start-tomato-seeds-indoors-hardening-off”
}
},
{
“@type”: “FAQPage”,
“mainEntity”: [
{
“@type”: “Question”,
“name”: “How many weeks before last frost should I start tomato seeds?”,
“acceptedAnswer”: {
“@type”: “Answer”,
“text”: “About six weeks before your average last spring frost date for indeterminate varieties, and about five for compact determinates. Count back from the frost date on a calendar. Starting too early is the more common error; a seedling kept inside ten or twelve weeks becomes root-bound and stressed. With strong lights and two pot-ups you can stretch to seven weeks in a short season. Aim for a stocky 6- to 10-inch plant at transplant.”
}
},
{
“@type”: “Question”,
“name”: “Do I really need a grow light, or will a windowsill work?”,
“acceptedAnswer”: {
“@type”: “Answer”,
“text”: “A bright south window can work but usually produces weaker, leggier plants because spring light is dim and one-directional. For sturdy transplants, a grow light 2 to 4 inches above the seedlings for 14 to 16 hours a day is the best investment. An inexpensive LED panel on a timer yields short, leafy plants instead of pale, stretched ones. If you only have a window, rotate the tray daily and keep it close to the glass, but expect to pot up more carefully.”
}
},
{
“@type”: “Question”,
“name”: “Why are my tomato seedlings so tall and floppy?”,
“acceptedAnswer”: {
“@type”: “Answer”,
“text”: “That is legginess, almost always caused by too little light. The plant stretches toward a dim or distant source, growing a long thin stem. Fix it by lowering the light immediately and, at the next potting-up, planting the seedling deeper — tomatoes root along buried stem, so a leggy plant gets buried up to its leaves. Prevent it by keeping the light 2 to 4 inches above the foliage from day one and running a small fan for air circulation.”
}
},
{
“@type”: “Question”,
“name”: “What is hardening off and can I skip it?”,
“acceptedAnswer”: {
“@type”: “Answer”,
“text”: “Hardening off is gradually exposing indoor seedlings to outdoor sun, wind and temperature swings over 7 to 10 days so they do not go into shock when planted. Do not skip it; plants raised indoors can scorch or wilt within hours of sudden exposure. Start in shade for a few hours, increase sun and time daily, and bring them in if cold or heavy rain is forecast. Plant on a calm, cloudy afternoon. It is a small time cost that protects weeks of effort.”
}
},
{
“@type”: “Question”,
“name”: “Are tomato plants safe around pets?”,
“acceptedAnswer”: {
“@type”: “Answer”,
“text”: “The leaves and green (unripe) fruit of tomato plants contain solanine and related compounds that are toxic to dogs and cats, while ripe red fruit is generally considered safe in small amounts. Keep seedlings and plants where pets cannot chew the foliage and do not let them eat green tomatoes. This is general information, not veterinary advice. If you think a pet has eaten tomato leaves or unripe fruit, call your veterinarian or the ASPCA Animal Poison Control Center at (888) 426-4435.”
}
}
]
}
]
}