
If you want a fresh evergreen wreath on your front door or above the mantel this season, the version you make yourself will look better and last longer than almost anything at the big-box store — and it will cost a fraction of the price. I say that as someone who has now built close to forty of them, and also as someone who completely ruined my first three. The very first wreath I wired together looked fine for about two days, then the branches went crispy, the bow slid off, and by day four it was shedding needles all over the welcome mat. I almost gave up and bought one. The good news is that the mistakes are small and repeatable, and once you know the handful of things that actually keep cut greenery alive indoors, a fresh wreath will easily carry you from late November through New Year’s. In this article I’ll walk you through the exact method I use now, including the failures, so you can skip the expensive learning curve.
Quick answer: a fresh evergreen wreath that lasts indoors comes down to three things. First, build it on a wire or straw frame and attach short bundles of foliage with floral wire rather than glue, so the stems can still take up a little moisture. Second, use long-lasting evergreens — fir, pine, cedar and boxwood hold up best indoors — and skip anything with berries unless you’ve confirmed it’s pet-safe. Third, mist the wreath daily and keep it out of direct sun and away from heat vents; a wreath treated this way stays green and fragrant for three to five weeks. Everything below explains the why and the how.
- 1. Making a Fresh Evergreen Wreath
- 2. Choosing Your Evergreens and Comparing Types
- 3. Free and Foraged Materials From Your Yard
- 4. A Wreath Built Around a Bow and Ribbon
- 5. Design Techniques for a Full, Even Wreath
- 6. Common Beginner Mistakes That Make It Dry Out
- 7. Styling and Hanging It Indoors
- 8. A Checklist for Keeping It Fresh
- 9. Ideas That Stretch Your Budget Further
- 10. Eco-Friendly Wreaths
- 11. Using the Same Skills Beyond December
- 12. Troubleshooting: Symptoms, Causes and Fixes
- 13. FAQs
- 14. Sources and Further Reading
Making a Fresh Evergreen Wreath
Why build your own instead of buying one?
When the season gets close, you want something on the door that says “welcome,” right? A fresh evergreen wreath does that faster than almost anything else, and building it yourself beats buying one on three counts: cost, longevity and the fact that you control exactly what goes in it. Store-bought fresh wreaths are often shipped dry and sit under retail lights for weeks, so by the time you hang them they’re already half spent. I set a homemade wreath on my own door every year, and the one I wired together from clippings off the cedars behind my house outlasted a $40 imported one by nearly two weeks.
I understand why beginners hesitate — my first attempt looked like a lopsided bird’s nest rather than a wreath. But the method is forgiving. Once you have a frame, a roll of floral wire and a pile of cut greenery, the whole thing comes together in about thirty minutes. The reason a homemade wreath lasts is that you can mist it; a sealed, glued, mass-produced one can’t drink at all. Adjust the tightness of your wire bundles and the direction you lay the stems and suddenly it looks like a florist made it. Even though it feels like a lot at first, these steps will carry you through.
Start with the right frame
When you’re choosing a base, a wire wreath frame is the most versatile, but a straw frame is more forgiving for beginners because you can poke stems directly into it. For a door wreath roughly 12 to 18 inches across, I always recommend a wire frame in the 14-inch size — it’s light, cheap (about $2–$4), and it lets the greenery do all the visual work.
So how do you actually begin? Wire frames need you to attach bundles with floral wire wrapped around the ring; straw frames let you insert cut stems straight into the straw with a little floral pin. On my second ever wreath I used a straw frame and it was dramatically easier than the glued wire frame I’d fought with first — the stems stayed put and I wasn’t wrestling with slipping wire. One year I tried a foam frame because it was what the craft store had left, and it crumbled and shed white bits everywhere, so I steer clear of floral foam now. Material matters: wire gives you a clean, modern look, straw gives you a fuller, softer wreath, and both are reusable for years if you pull the old greenery off after the season. Match it to how much time you have and you’ll never feel stuck.
Choosing Your Evergreens and Comparing Types
Everything I build starts from the same short list of foliage. None of it is exotic, and most of it is either free from your own yard or a few dollars at a garden center:
- Fir — soft, flat needles, excellent indoor needle retention
- Pine — long needles, classic scent, holds up well if not too dry
- Cedar — feathery, aromatic, one of the longest-lasting branches
- Boxwood — small leaves, dense, great for a refined look
- Magnolia or eucalyptus — optional accents for color and texture
- Floral wire, wire cutters, pruning shears — the only tools you need
- Ribbon — wired ribbon holds its shape best for a bow
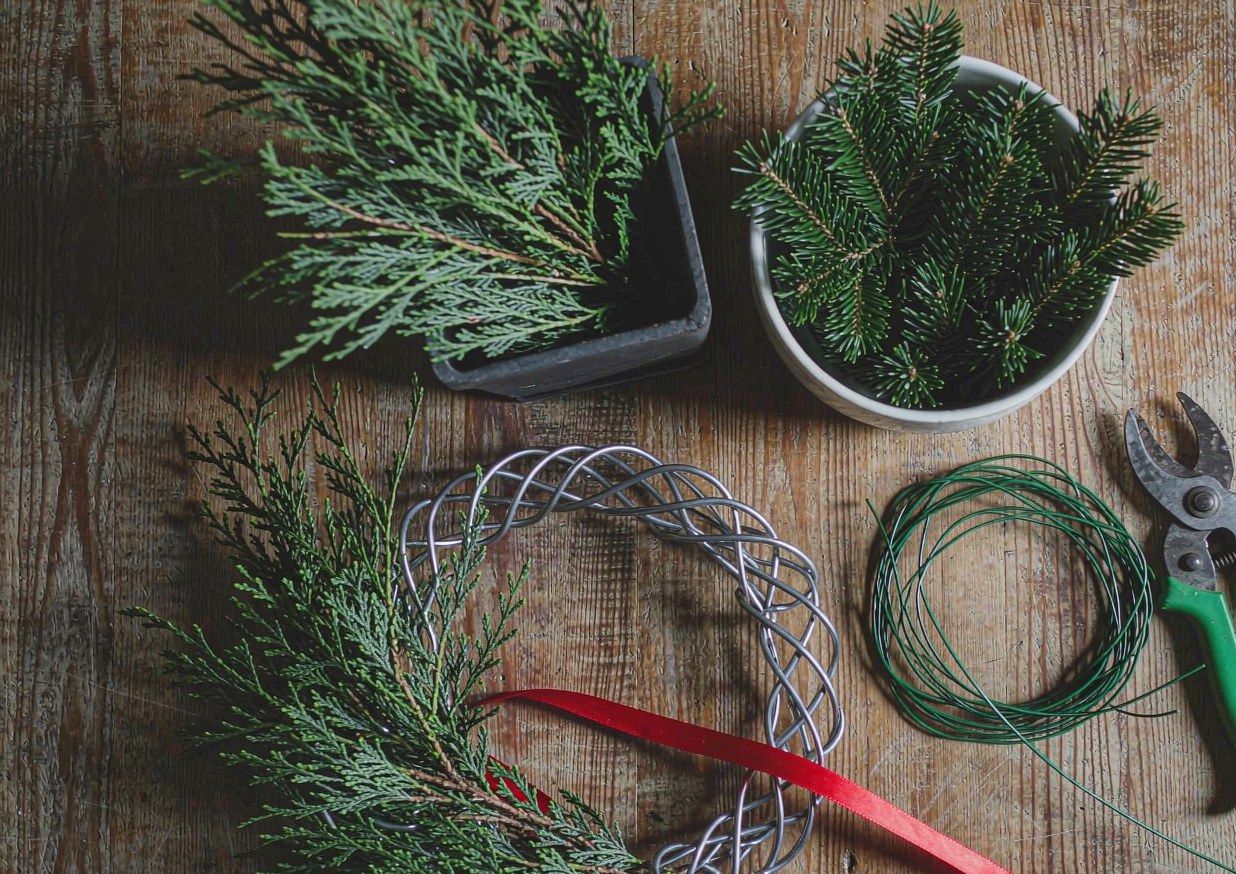 Materials for a fresh evergreen wreath
Which branches last longest indoors?
Fir, cedar and boxwood are the workhorses of a wreath that has to survive warm, dry indoor air. Pine smells amazing but drops needles faster than the others, so I use it as an accent rather than the backbone. If you want the longest possible life, cedar is the one I trust most — it stays supple and fragrant for a month inside.
Here’s a question for you: would you rather have maximum scent or maximum longevity? My answer is both, by mixing. Cedar and fir give me the structure and the staying power, and a few sprigs of pine or rosemary give me the smell. The best wreath I made last year was 70% cedar, 20% fir, and 10% pine, and it was still green and fragrant on New Year’s Day. You can look up the exact care needs of any species you’re tempted to add in the Missouri Botanical Garden Plant Finder, which has care sheets for nearly every ornamental evergreen. That hybrid approach lets you scale everything to whatever you can find this week, so give it a try.
Fresh vs. faux greenery: which should you choose?
Fresh foliage is easy to find in winter, but the cost climbs if you buy it pre-cut by the bunch. A bag of mixed evergreen tips at a garden center usually runs $6 to $12 and is enough for one or two wreaths.
The table below lines up the main differences between fresh and faux greenery for a wreath. Prices reflect typical US retail at garden centers and craft chains.
| Item | Fresh foliage | Faux foliage |
|---|---|---|
| Upfront cost | $6–$12 per wreath | $8–$16 per wreath |
| Lifespan | 3–5 weeks indoors | Several years (storage-dependent) |
| Maintenance | Daily misting | None (occasional dusting) |
| Realism | Very high, real scent | Moderate (premium faux looks real) |
As you can see, fresh foliage carries the better look and scent, but faux wins on cost per year, which suits anyone who wants the same wreath every season. Most of the time I build fresh — the scent is the whole point of a holiday wreath — but I keep a faux backbone wreath for years and just refresh it with fresh clippings each December. For guidance on what grows well in your area, the Oregon State University Extension gardening pages are a solid, free reference. Try a couple of combinations and see which balance feels right for your budget.
Free and Foraged Materials From Your Yard
Using evergreen clippings safely
If you have evergreens in your yard, you already own most of your wreath. Trimmings from arborvitae, fir, pine or cedar are exactly the natural material a fresh wreath wants, and they cost you nothing but the snipping.
The one thing I check before cutting anything is toxicity, especially in a home with pets. Yew is gorgeous — those red berries look made for the holidays — and it is genuinely dangerous to dogs, cats and horses. A friend of mine worked yew branches into a door wreath and then spent a panicked evening at the vet after her retriever chewed a sprig. Always confirm the species first: I check the ASPCA toxic and non-toxic plant list before anything new comes indoors. For my own wreaths I mostly use cedar, fir and pine, which look right, smell right and aren’t an issue for pets. Trim with clean pruners, cut the ends at an angle, and strip every needle that would sit below where you wire it so the bundles stay clean.
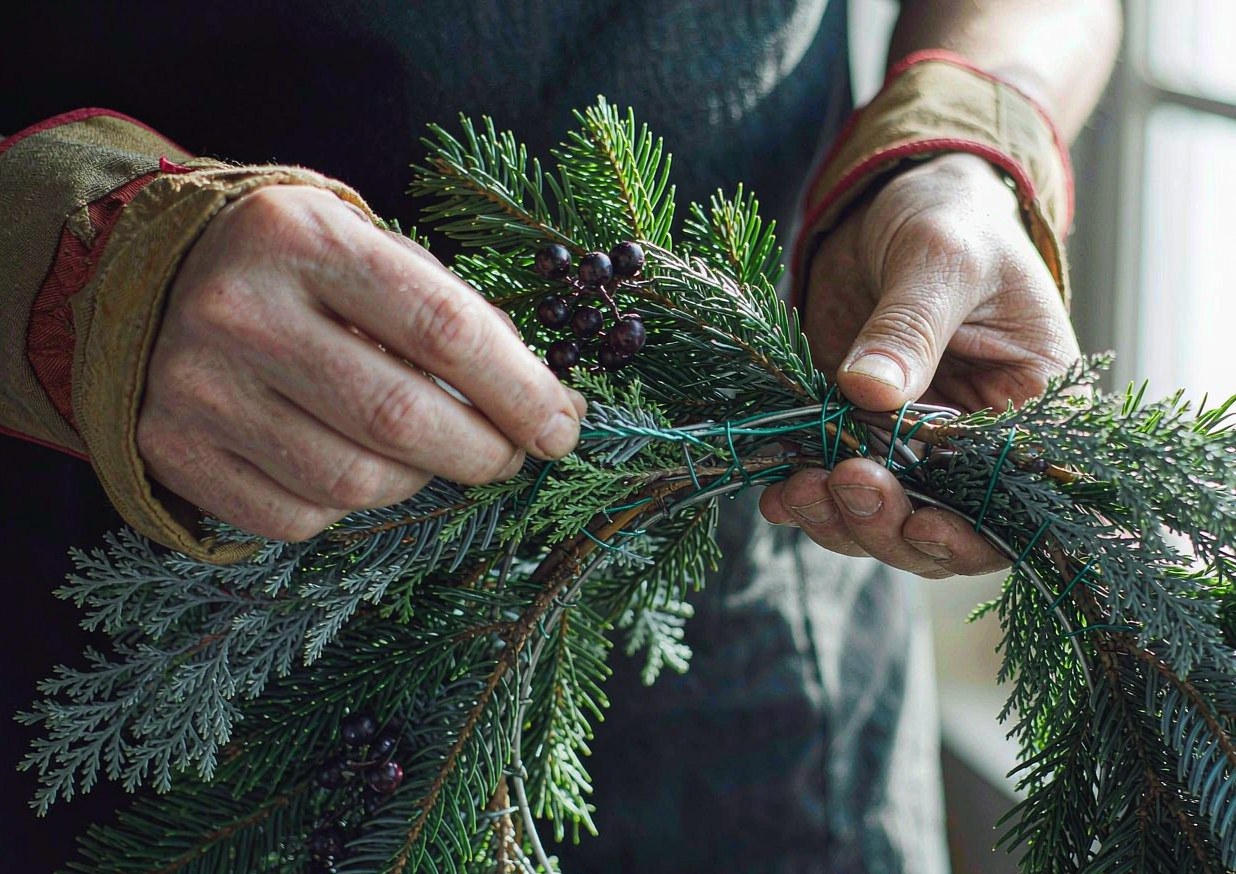 Wiring bundles of greenery onto the frame
What to avoid: toxic berries and stems
The classic holiday plants — holly berries, mistletoe and yew — are all beautiful and all problematic if a pet or a small child chews them. Even a few holly berries can cause real trouble.
I avoid anything questionable in a wreath that hangs where pets brush past or where a toddler can reach. One friend decorated with holly berries on a low wreath and her dog ate several, which meant an emergency vet visit and a bill she still complains about. Check any new plant against the ASPCA list before it comes inside. Reliable, pet-safe options I use constantly: cedar, fir, pine, boxwood, rosemary and eucalyptus (eucalyptus is mildly toxic if ingested, so keep it out of reach but it’s fine as a wreath accent). Choose from that list and you can put safety first without giving up a single bit of the look.
A Wreath Built Around a Bow and Ribbon
Choosing ribbon that holds its shape
Once the greenery is on, a bow is what turns a green ring into a wreath. The decisive factor is the ribbon itself — wired-edge ribbon holds loops and tails; cheap craft ribbon collapses within a day.
So how do you pick? I use a wired burlap or velvet ribbon about 2.5 inches wide. It makes a bow with real volume and the wires let me shape each loop by hand. One year I used a smooth satin ribbon because it was what the dollar store had, and by the next morning the bow had gone flat and slid to one side — it looked like a limp noodle. Wired ribbon is the difference between a wreath that reads as “handmade with care” and one that reads as “half-finished.” A 3-yard roll costs about $4 and does two or three wreaths, so there’s no reason to cheap out here.
Wiring the bow on (don’t glue it)
The most common bow failure is gluing instead of wiring. Glue lets go as the greenery dries and shifts, and then the bow hangs by a corner.
Whenever I attach a bow, I leave long wire tails on its back and thread them around the wreath frame at the bottom-center, then twist tightly. That connection rides through wind, door-slams and daily misting without moving. A friend glued hers on and found it dangling by one corner after a week — she had to re-do the whole thing. Also worth knowing: tie the bow on last, after the greenery is complete, so you can position it over the wire ends and hide them. Get the ribbon right and you can make something genuinely eye-catching out of a few dollars of greenery.
Design Techniques for a Full, Even Wreath
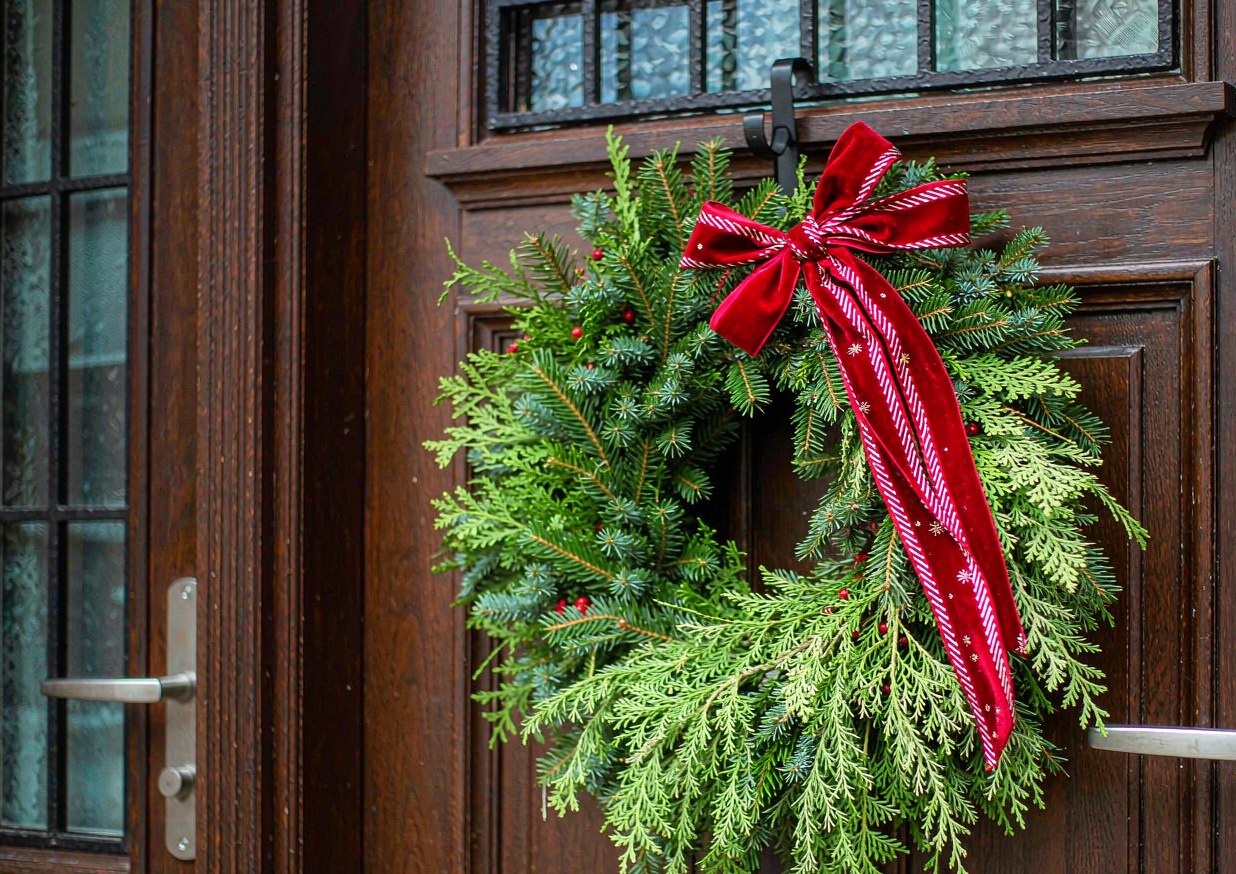 A finished fresh evergreen wreath
Getting full coverage right
When you build a wreath, coverage is what separates a pro look from a homemade one. Too little foliage and the frame shows through; too much and it looks like a hedge.
Here’s a second question for you: how do you get even coverage? The method I recommend is to overlap small bundles like shingles — lay each new bundle pointing in the same direction (clockwise), covering the cut ends of the one before it. For my first wreath I just stuck stems in every direction and the frame poked through in five places. I pulled it apart and rebuilt it shingle-style, and it came out full and even on the second try. Aim for bundles about 6 to 8 inches long and 4 to 6 stems each, and you’ll get a dense ring without a single gap. Play with that one technique and you’ll land on a version that feels like yours.
Working in small bundles
In any wreath, bundle size does as much work as the greenery choice. Big, fat bundles look clumsy; small, tight ones look refined.
Most years I wire bundles of 4 to 6 stems, no longer than 8 inches, and I step back every few bundles to check the ring from across the room. That staggered, shingled arrangement produces a natural, full look that reads like professional floral design. A couple of practical rules help here: build the whole ring in one direction, keep bundle size consistent, and tuck the very last bundle under the first so there’s no visible seam. Get the bundle size right and you can make something genuinely polished out of $10 worth of clippings.
Common Beginner Mistakes That Make It Dry Out
Letting the cut ends seal over
The biggest mistake in a fresh wreath is cutting greens days before you build, then letting the cut ends seal in air. Sealed stems can’t take up the mist you spray on them.
When I build a wreath, I cut my greenery the same day, and if a bundle has been sitting more than a few hours I re-snip an inch off the butt at an angle right before wiring. That fresh cut re-opens the stem to moisture. My very first wreath was built from greens I’d cut three days earlier and left in a dry bucket, and it crisped in two days — I couldn’t work out what I’d done wrong. Now that I cut fresh and re-snip, I get a solid month out of cedar. If you skip the fresh cut, the wreath can also brown unevenly, so aim to build within a day of cutting.
Forgetting to mist it
The other common mistake is hanging it and forgetting it. Without moisture, even cedar dries in a warm house.
I mist my wreath every morning — thirty seconds with a spray bottle — and that single habit is the reason my cedar wreaths reach New Year’s. One year I got busy and skipped misting for a week; the pine accents browned and the whole thing looked tired by mid-December. Keep a spray bottle by the door so it becomes a reflexive morning step. Watch that one habit and rather than rebuilding it every few days, you’ll get a wreath that looks good for the whole run-up to the holidays.
Styling and Hanging It Indoors
Pairing candles and ribbon safely
Once your wreath is on the door or the wall, adding candles or ribbon multiplies the impact — but fire safety matters with dried material nearby.
I nearly always wind a little extra ribbon through the wreath or set a couple of small candles nearby. The combination creates a warm, welcoming atmosphere that’s perfect for having people over. Just be careful with open flame: keep candles at least 12 inches from greenery, never leave them burning unattended, and consider LED candles instead — battery-powered ones last for dozens of evenings and remove the risk completely. The NFPA candle safety guidance is worth a skim before you light anything next to dried material. Add that boundary and enjoy a wreath that feels genuinely special and stays safe.
Matching the wreath to your space
The size of your wreath should follow the size of your door or wall. Too large and it dominates; too small and there’s no point.
On my front door I keep anything I build between 14 and 18 inches, which reads as a real focal point without looking cartoonish. Above a mantel I’ll go a touch larger, up to 22 inches, because there’s more room and nobody walks into it. A friend once put a 24-inch wreath on a narrow apartment door and it swallowed the whole entry, so learn from that one. There’s a simple rule of thumb that works well too: the wreath shouldn’t be wider than about half the door’s width, or it looks like it’s wearing the door. Scale it to your space and you’ll get the impact without the awkwardness.
A Checklist for Keeping It Fresh
Misting and hydration
If you want a wreath to last, daily hydration matters as much as how you build it. A thirty-second mist each morning is the single biggest factor in needle retention.
To keep a wreath going, I mist it every morning and re-cut a fresh inch off any stem ends that look sealed if I’m refreshing it mid-season. That one minute of effort roughly doubles the life. It also helps to keep the wreath away from direct sun, heating vents and fruit bowls — ethylene from ripening fruit ages greenery faster. For the storage of any leftover cut branches, wrapping the stems in a damp paper towel in the fridge keeps them fresh for days. Handle hydration right and you won’t need to rebuild your wreath before the holidays are over.
Checking it daily
Before a wreath goes on any door, confirm the basics. In a home with pets or children, this step matters more than the design does.
I run through a short checklist every few days. First, look for any branch that’s browning and replace it. Second, confirm the wire and bow are still secure — a loose bow flops. Third, check that the hanger hasn’t slipped and that the wreath isn’t leaning into a heat source. Follow those three and you’ll have a fresh-looking wreath all season. I’ve used this checklist for years and haven’t had a single wreath collapse since. Even beyond freshness, it’s worth checking two more things first: is the door surface clean where it rests, and is the ribbon still shaped? A quick daily glance solves both.
Ideas That Stretch Your Budget Further
Making the most of free clippings
If you’re watching your budget, yard clippings are genuinely the best material there is. A few snips off your own cedars and pines cost nothing.
Why bother? Because free material means you can experiment without guilt. I once built a whole wreath from clippings off the hedge my neighbor was having trimmed — they were about to mulch it — and it looked far more expensive than it was. Do check that what you’re cutting is yours or permitted, though, and confirm it isn’t a toxic species. Two upgrades take it further: strip the lower needles so bundles stay clean, and mix in one bought accent (magnolia or eucalyptus) for color. Give your own yard a try and the cost per wreath drops to nearly zero.
Reusing the frame year after year
If longevity is what you’re after, reusable frames belong in your plan. A wire or straw frame costs a few dollars once and lasts many seasons.
| Item | Wire frame | Straw frame |
|---|---|---|
| Price | $2–$4 | $3–$6 |
| Reuses | Many years | Several years |
| Best for | Clean modern look | Full soft look |
| Prep each year | Wipe and re-wire | Pull old stems, re-pin |
As the table shows, wire frames are cheaper and longer-lived, but straw frames are easier for a first-timer. I keep three wire frames in the garage and just rebuild greenery onto them each December. If you skip the reusable route, you’ll spend more every year; if you commit to one good frame, you’ll be ready in minutes each season. Pick the frame once and essentially you’ll have a wreath system, not a one-off.
Eco-Friendly Wreaths
Skip the floral foam
If you want a genuinely sustainable wreath, start by avoiding floral foam (the green brick). It’s a non-recyclable plastic that sheds micro-particles and crumbles into everything.
Have you ever used a foam wreath form and noticed the gritty white dust? I did once, years ago, and the mess alone convinced me to switch. Wire and straw frames hold greenery perfectly without it, and at the end of the season the greens go straight into the compost bin. The NC State Extension Gardener Handbook covers composting yard waste if you want the details. Start with a foam-free frame and you’ll end up with something better for the planet and easier to clean up.
Compostable materials only
For winter, build around materials that can go back into the soil. Cedar, fir, pine and twine are all compostable; plastic ribbon and foam are not.
Last season I built a wreath using only cut evergreens, cotton twine and a raffia bow, and when January came I pulled it apart and composted every stem. The whole project produced almost no trash. The catch is that some ribbons are synthetic, so choose cotton, raffia or jute if you want the bow to compost too. I usually keep one nice wired ribbon to reuse and use raffia for the fully compostable version. Choose compostable materials and you get a wreath that disappears responsibly when the season ends.
Using the Same Skills Beyond December
Spring and fall wreaths
Everything above applies just as well outside December. Swap in fresh spring or autumn foliage and you have a wreath for any season using exactly the same wiring method.
Why does it transfer so cleanly? Because bundling and wiring aren’t holiday rules — they’re craft rules. One spring I built a wreath from fresh eucalyptus and ivy and tried the same clockwise overlapping I use at Christmas, and it came out balanced and soft in the same way. There’s one adjustment worth making, though: spring stems are far softer than winter ones, so handle them gently when you wire. I also keep the bundles a touch smaller so the delicate leaves don’t crush. Take these wreath skills into spring and you’ll get far more use out of one frame.
Gift wreaths and host gifts
For gifting, a small fresh wreath is an easy, personal host gift. A 10-inch cedar wreath with a simple raffia bow costs about $3 to make and looks like a $25 item.
Last month I made three mini cedar wreaths for friends and the reaction was better than anything I’d bought. The reaction is what does the heavy lifting — it grounds everything and makes it feel personal rather than random. The catch is that a gift wreath should be misted and boxed carefully so it arrives fresh, so I wrap it in a slightly damp paper towel inside a paper bag. Change the occasion by season and essentially you’ll have one wreath method that covers the whole year.
Troubleshooting: Symptoms, Causes and Fixes
Most wreath problems show up within a week, and nearly all of them trace back to one of six causes. This is the table I wish I’d had when I started.
| Symptom | Likely cause | Fix |
|---|---|---|
| Needles shed within 2–3 days | Stems cut days earlier and dried; never misted | Re-cut ends at an angle, mist daily, build from fresh-cut greens |
| Frame shows through | Too few bundles / wrong direction | Add a second layer, overlap bundles clockwise like shingles |
| Bow flops or slides | Unwired ribbon or glued instead of wired | Use wired-edge ribbon, wire it through the frame, not glue |
| Browns fast on one side | Hung in sun or above a heat vent | Move to a cool, shaded door or wall away from heat |
| Pet chewed a sprig | Toxic species (yew/holly/mistletoe) used | Remove toxic greens; call vet or ASPCA (888) 426-4435 |
| Looks flat from across the room | Every bundle cut to the same length | Layer longer stems behind, shorter in front, step back to check |
FAQs
How long does a fresh evergreen wreath really last indoors?
With daily misting and a cool, shaded spot, a wreath built from cedar, fir or boxwood stays green and fragrant for about three to five weeks. Pine is the weakest link and may drop needles after two to three weeks, which is why I use it as an accent rather than the backbone. The two habits that actually move the needle are misting every morning and keeping the wreath away from heat vents and direct sun. My own cedar wreaths have regularly lasted from Thanksgiving to New Year’s. If your indoor air is very dry, a light mist morning and evening stretches the life further.
What greenery should I avoid if I have pets?
Avoid yew, holly berries and mistletoe — all three are holiday classics and all are problematic if a dog, cat or child chews them. Yew in particular is dangerous to dogs, cats and horses. A friend used yew in a low wreath and ended up at the emergency vet. I stick to cedar, fir, pine, boxwood, rosemary and (kept out of reach) eucalyptus. Before anything new comes indoors, I check it against the ASPCA toxic and non-toxic plant list. To be clear, that’s general information and not veterinary advice — if your pet actually eats something, call your vet or the ASPCA Poison Control hotline at (888) 426-4435.
Do I need a wire frame or can I use a straw one?
Either works, and a straw frame is the easier starting point because you poke cut stems straight into it with floral pins. A wire frame is lighter, cheaper and reusable for more years, but it requires you to wire each bundle on. I keep both: straw for quick builds, wire for the wreaths I want to last and re-use. Avoid floral foam forms — they’re not reusable, they crumble, and they’re not compostable. Whatever you pick, make sure it’s at least 12 inches across for a door, or 10 inches for a gift size.
How do I stop the bow from falling apart?
Use wired-edge ribbon and wire the bow to the frame rather than gluing it. Cheap unwired ribbon collapses within a day as the greenery settles and dries; wired ribbon holds its loops. After you make the bow, leave long wire tails on the back and thread them around the wreath frame at the bottom-center, then twist tightly. One friend glued her bow on and found it hanging by a corner after a week. Wire it and it rides through wind, door-slams and daily misting without moving.
Any tips to make a fresh wreath last even longer?
Daily misting and fresh-cut stem ends are what actually move the needle. Every morning I mist the wreath and, if I’m refreshing it mid-season, I re-cut about an inch off any stem ends that look sealed. That single habit roughly doubles needle life. The second thing is placement — keep it out of direct sunlight, away from heating vents and drafts, and away from fruit bowls, since ripening fruit releases ethylene that ages greenery quickly. Finally, build from greens cut within a day of assembling. Do those three things and your wreath should hold up for the whole season.
Sources and Further Reading
- ASPCA — Toxic and Non-Toxic Plants List
- ASPCA — Animal Poison Control
- Missouri Botanical Garden — Plant Finder
- NFPA — Candle Fire Safety
- NC State Extension — Extension Gardener Handbook
- Oregon State University Extension — Gardening
About the author
Samantha has been gardening and arranging her own cut flowers for more than ten years, and has built more than 30 centerpieces from grocery-store bunches, clippings off the cedars behind her house, and a handful of dollar-store experiments that didn’t work. She writes practical, low-cost guides for beginners, including the versions that failed. Prices quoted in her articles are what she actually paid at US grocery and craft stores; nothing is sponsored and no brand pays for a mention. She is not a certified florist, a veterinarian or a horticulturist, and says so wherever a topic touches on plant safety or pet health.
Published: Nov 2, 2026 · Last updated: Nov 2, 2026.
{
“@context”: “https://schema.org”,
“@graph”: [
{
“@type”: “Article”,
“headline”: “How to Make a Fresh Evergreen Wreath That Lasts Indoors”,
“description”: “Build a fresh evergreen wreath that stays green for 3-5 weeks: use a wire or straw frame, long-lasting cedar/fir/boxwood, wire the bundles on, and mist daily away from heat. Pet-safe tips included.”,
“image”: [
“images/wreath-hero-clean.jpg”,
“images/wreath-materials-clean.jpg”,
“images/wreath-process-clean.jpg”
],
“author”: { “@type”: “Person”, “name”: “Samantha” },
“publisher”: { “@type”: “Organization”, “name”: “REPLACE_WITH_SITE_NAME” },
“datePublished”: “2026-11-02”,
“dateModified”: “2026-11-02”,
“mainEntityOfPage”: {
“@type”: “WebPage”,
“@id”: “https://REPLACE_WITH_DOMAIN/fresh-evergreen-wreath-that-lasts-indoors”
}
},
{
“@type”: “FAQPage”,
“mainEntity”: [
{
“@type”: “Question”,
“name”: “How long does a fresh evergreen wreath really last indoors?”,
“acceptedAnswer”: {
“@type”: “Answer”,
“text”: “With daily misting and a cool, shaded spot, a wreath built from cedar, fir or boxwood stays green and fragrant for about three to five weeks. Pine is the weakest link and may drop needles after two to three weeks. The two habits that move the needle are misting every morning and keeping the wreath away from heat vents and direct sun.”
}
},
{
“@type”: “Question”,
“name”: “What greenery should I avoid if I have pets?”,
“acceptedAnswer”: {
“@type”: “Answer”,
“text”: “Avoid yew, holly berries and mistletoe — all are holiday classics and all are problematic if a dog, cat or child chews them. Yew is dangerous to dogs, cats and horses. Stick to cedar, fir, pine, boxwood, rosemary and eucalyptus kept out of reach. Check any new plant against the ASPCA toxic and non-toxic plant list. This is general information, not veterinary advice: if your pet eats something, call your vet or the ASPCA Poison Control hotline at (888) 426-4435.”
}
},
{
“@type”: “Question”,
“name”: “Do I need a wire frame or can I use a straw one?”,
“acceptedAnswer”: {
“@type”: “Answer”,
“text”: “Either works, and a straw frame is the easier starting point because you poke cut stems straight into it with floral pins. A wire frame is lighter, cheaper and reusable for more years, but it requires wiring each bundle on. Avoid floral foam forms — they are not reusable, they crumble, and they are not compostable. Use at least a 12-inch frame for a door.”
}
},
{
“@type”: “Question”,
“name”: “How do I stop the bow from falling apart?”,
“acceptedAnswer”: {
“@type”: “Answer”,
“text”: “Use wired-edge ribbon and wire the bow to the frame rather than gluing it. Cheap unwired ribbon collapses within a day as the greenery settles. After making the bow, leave long wire tails on the back and thread them around the wreath frame at the bottom-center, then twist tightly. Wire it and it rides through wind, door-slams and daily misting without moving.”
}
},
{
“@type”: “Question”,
“name”: “Any tips to make a fresh wreath last even longer?”,
“acceptedAnswer”: {
“@type”: “Answer”,
“text”: “Daily misting and fresh-cut stem ends are what move the needle. Mist the wreath every morning, and re-cut about an inch off any stem ends that look sealed if refreshing mid-season. Keep it out of direct sunlight, away from heating vents and drafts, and away from fruit bowls, because ripening fruit releases ethylene that ages greenery quickly. Build from greens cut within a day of assembling.”
}
}
]
}
]
}