
If you want dahlias in your garden next summer — those big, outrageous blooms that look like they cost a fortune at the florist — the secret is entirely in the timing. When you plant the tubers and how you store them through winter decide whether you get a yard full of flowers or a pot full of rot. I learned that the hard way. The first year I ordered a dozen tubers, I was so eager that I planted them in cool, wet April soil, and eight of them rotted in the ground before a single sprout appeared. The second year I left them in the ground over a hard winter instead of digging them up, and lost the entire collection to freezing. Two expensive lessons, and both avoidable. In this article I’ll walk you through exactly when to plant dahlia tubers and how to dig, divide and store them so the same tubers flower for years.
Quick answer: plant dahlia tubers in spring only after the soil has warmed to at least 60°F (15°C) and all danger of frost has passed — usually two to four weeks after your last spring frost. Set them 4 to 6 inches deep, 12 to 18 inches apart, lying flat with the eye (the crown) facing up. In fall, after the first hard frost blackens the foliage, dig the tubers, cure them for a few days in a cool dry spot, then store them in a cool, dark, dry place around 40–50°F (4–10°C) in slightly damp peat or wood shavings. Everything below explains why that timing is the whole game.
- 1. Understanding Dahlia Tubers
- 2. When to Plant Dahlia Tubers
- 3. How to Plant Them for Strong Growth
- 4. Choosing Varieties for Beginners
- 5. Watering and Feeding Through the Season
- 6. Common Beginner Mistakes
- 7. Digging Up Tubers in Fall
- 8. Cleaning, Dividing and Storing for Winter
- 9. Ideas That Stretch Your Budget
- 10. Eco-Friendly Growing
- 11. Using the Same Skills for Other Tender Bulbs
- 12. Troubleshooting: Symptoms, Causes and Fixes
- 13. FAQs
- 14. Sources and Further Reading
Understanding Dahlia Tubers
What exactly is a dahlia tuber?
Before you plant anything, it helps to know what you’re holding. A dahlia tuber is a swollen underground storage root, not a bulb and not a seed. It’s the same idea as a potato — a starchy lump the plant uses to survive underground between growing seasons.
I keep a jar of old tubers on the potting bench so I can show first-timers the difference between a healthy one and a dead one. A living tuber feels firm, looks a little like a clustered bunch of fat fingers, and has a distinct neck that leads up to the crown where the plant sprouts. A rotten one is soft, smells sour, and may have black, mushy spots. The single thing that matters most is that each clump has at least one viable eye at the crown — without it, nothing grows no matter how perfect the soil is. Once you can tell a firm tuber from a mushy one, the rest of the process gets a lot less mysterious.
Eyes and the crown: where growth starts
The eye is the small bump on the crown where the new stem emerges, and frankly it’s easy to miss on a fresh tuber because it hasn’t swelled yet in early spring.
So how do you tell where to point it? The crown — the knobby top where last year’s stem was — faces up, and the fingers of the tuber trail below it. I’ve planted crowns upside down more than once and watched a weak sprout struggle sideways before giving up. A good trick is to let tubers sit in a warm, bright spot for a week or two before planting; the eyes plump up and turn pinkish, so you can see exactly which way is up. If you can’t find an eye at all, the tuber is likely a “dud” with no growing point — compost it rather than waste a season on it. Get the crown orientation right and you give every tuber its best shot.
When to Plant Dahlia Tubers
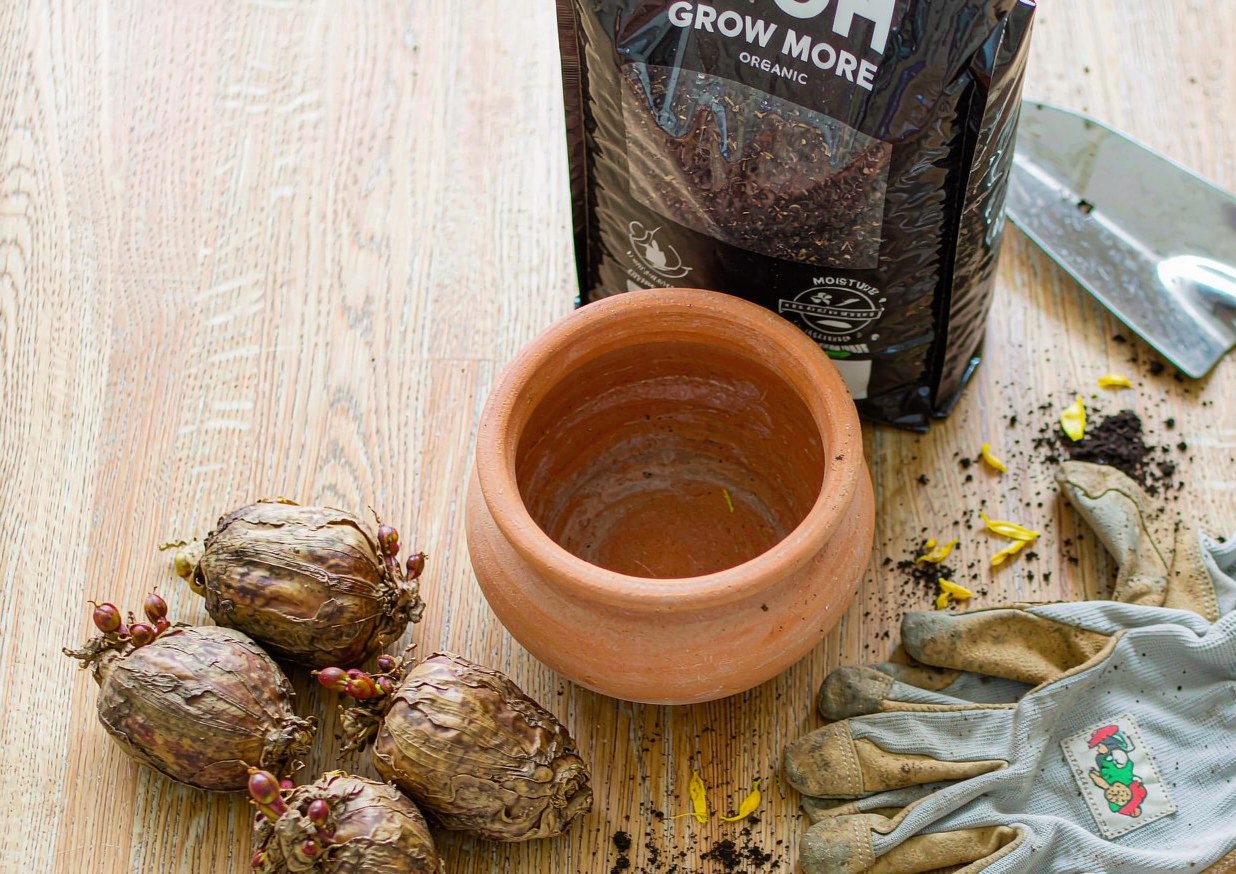 Dahlia planting supplies: tubers, pot, soil, trowel
Soil temperature and the last frost date
The decisive factor for dahlias is soil warmth, not the calendar date. Dahlia tubers rot in cold, wet soil, so planting before the ground reaches about 60°F (15°C) is the fastest way to lose them.
Most garden guides will tell you to plant “after the last frost,” but that’s only half the story — soil can still be in the 40s a week after your last frost date in a cool spring. I now wait until the soil feels warm to the back of my hand at planting depth and I’ve seen the local lilacs leaf out, which is my personal signal that the ground has thawed and warmed. In my zone that’s usually mid to late May; in warmer zones it can be early April. The NC State Extension Gardener Handbook has a clear rundown of planting windows by region if you want a more precise local number. Plant on warmth, not on a date, and your sprout rate jumps.
Why planting too early is the #1 killer
If there’s one mistake that ends more dahlia seasons than any other, it’s impatience. A tuber sitting in 50°F wet soil for three weeks is a tuber being slowly pickled.
My first year, I planted in early April because the garden center had a sale, and eight of twelve tubers never came up — they’d simply turned to mush underground. The fix is embarrassingly simple: wait. If you’re worried about losing the growing season, start a few tubers in pots indoors in late April, then transplant after the soil warms, while you hold the in-ground planting for late May. That one adjustment — waiting for warmth — is the difference between a half-empty bed and a full one. Hold off and you’ll save yourself the heartbreak of an empty row.
How to Plant Them for Strong Growth
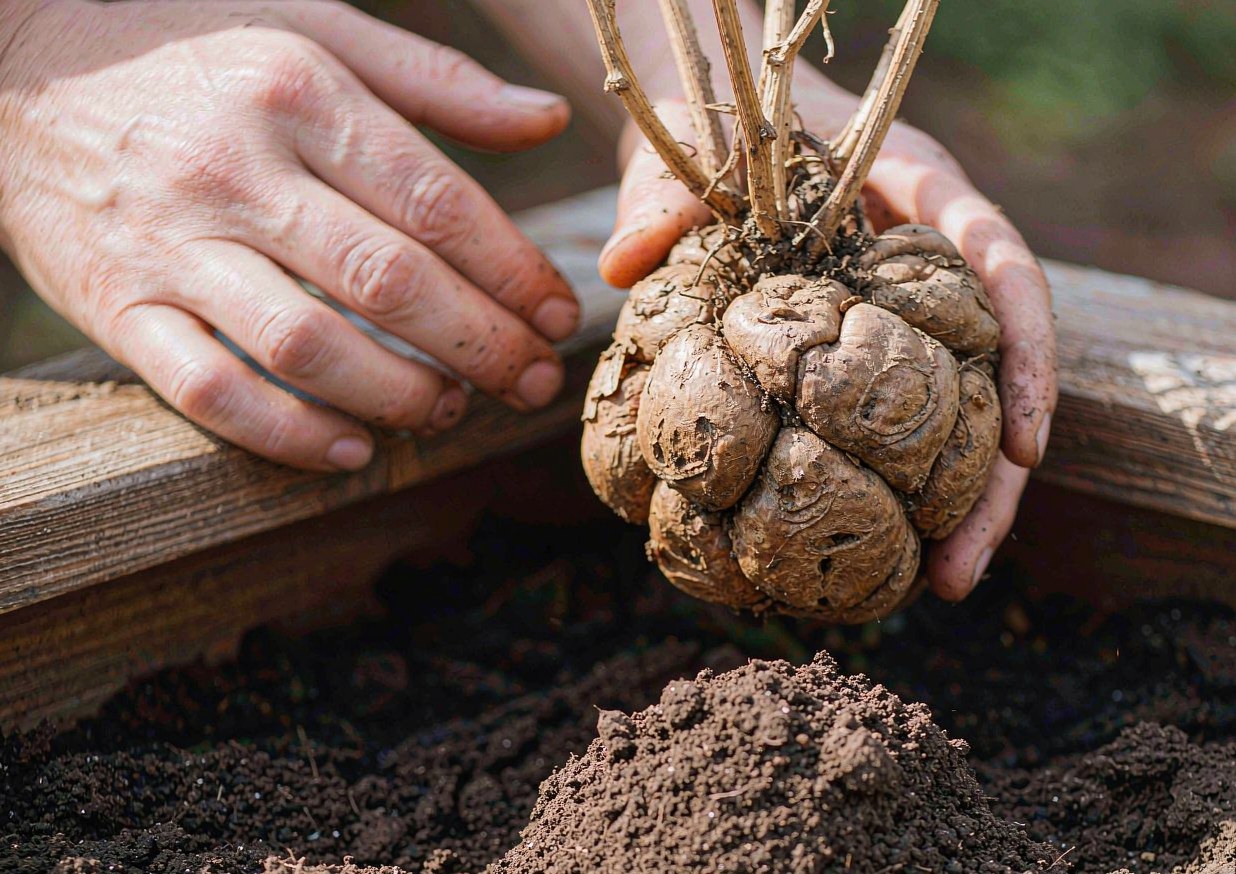 Planting a dahlia tuber in loose soil
Depth and spacing
When you actually put the tuber in the ground, depth and spacing decide whether the plant stays healthy and bloom-heavy or gets crowded and disease-prone.
The rule I use is 4 to 6 inches deep and 12 to 18 inches apart for most garden varieties, wider for the giant “dinnerplate” types. Plant too shallow and a hard rain can heave the tuber out; too deep and the sprout exhausts itself reaching the surface. I dig a hole, lay the tuber flat with the crown up, backfill gently, and do not water yet — the tuber has all the moisture it needs and extra water just invites rot before sprouts appear. One year I crowded them at 8 inches apart to fit “one more,” and the bed turned into a humid tangle with powdery mildew by August. Give them room and you get bigger blooms and fewer problems.
Pinching for more blooms
The single best trick for a bigger flower show is pinching — removing the top set of leaves when the plant is about 12 inches tall so it branches into three or four stems instead of one.
Here’s a question for you: would you rather have one tall stem with one flower, or three stems each with a flower? I pinch every dahlia at about a foot tall, and the result is a bushier plant with noticeably more blooms. The first time I skipped pinching, I got a single 4-foot spike with one lonely flower on top — pretty, but not the armload of cut flowers I wanted. After pinching, stake the plant early with a simple tomato cage or a few bamboo canes, because a loaded dahlia gets top-heavy and flops in wind. Pinch once and you multiply your harvest.
Choosing Varieties for Beginners
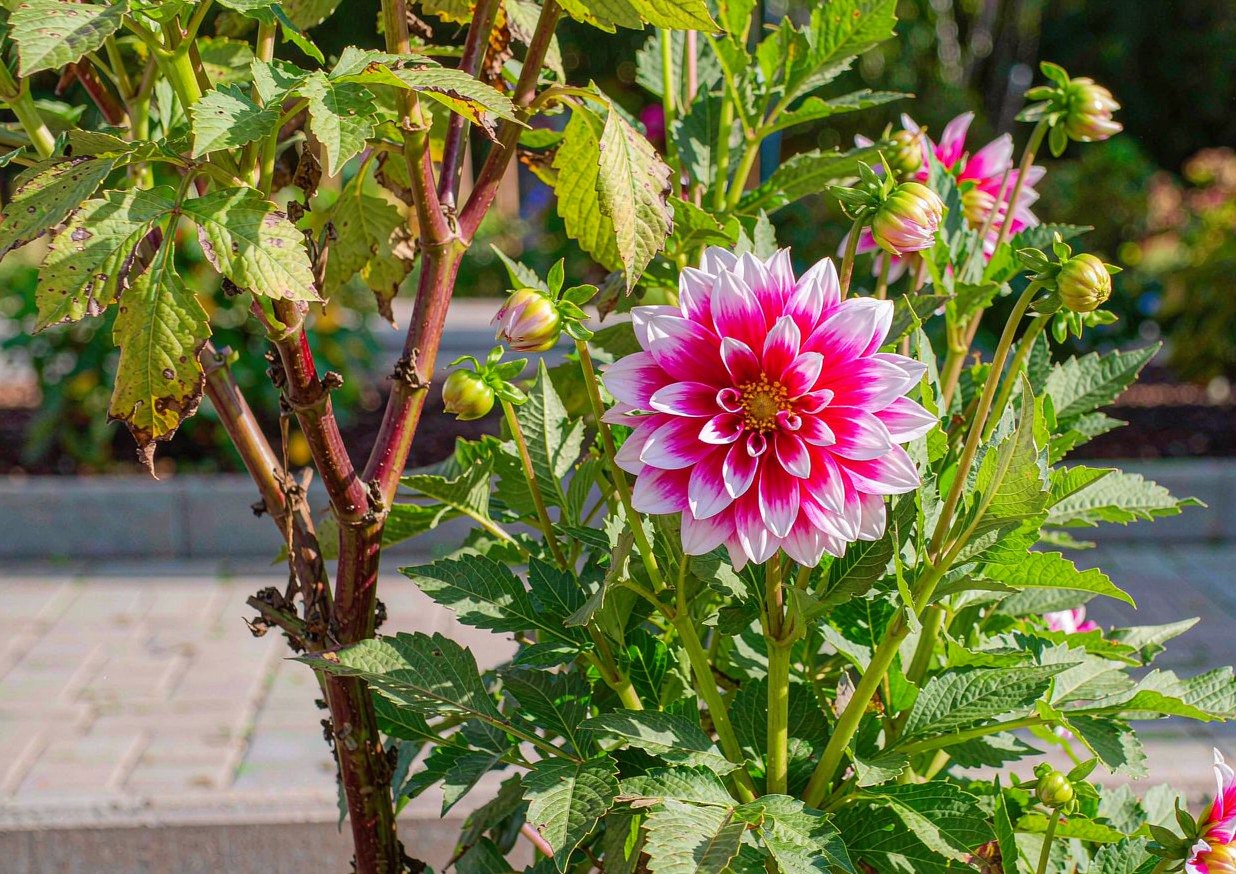 A blooming dahlia plant in the garden
Dinnerplate vs. border varieties
Once you’re ready to buy, the choice that matters most is size class. Dinnerplate dahlias produce enormous 8- to 12-inch blooms that are showstoppers but need staking and often look best as cut flowers, while border or bedding dahlias stay 2 to 3 feet tall with smaller, more numerous flowers that hold up in wind.
For a first-timer I steer people to the border types and the medium “decorative” or “ball” dahlias — they’re forgiving and still gorgeous. The RHS dahlia growing guide is a good place to compare forms before you buy. My own first successful year was all medium decoratives in pinks and corals; I saved the giant dinnerplates for year three once I’d learned the staking routine. Start with the manageable size and you’ll get confidence before you take on the divas.
Color and height for your space
The fun part is color and height, and dahlias come in almost every shade except true blue. Matching the plant to your bed keeps things from getting out of hand.
Most years I mix a few tall back-of-border varieties (4 to 5 feet) with shorter front-edge ones (2 feet) so the bed reads layered rather than flat. One lesson from a friend: she planted all 5-footers along a narrow path and they flopped into the walkway by July. For cut flowers, pick a mix of colors that look good together in a vase — I lean to pinks, corals and whites, which combine endlessly. You can also check the mature height of any named variety in the Missouri Botanical Garden Plant Finder before committing. Choose by your space and you’ll end up with a bed that fits.
Watering and Feeding Through the Season
First water only after sprouts appear
The most common over-watering mistake happens before the plant is even up. A freshly planted tuber doesn’t need irrigation.
I do not water dahlia tubers at planting time at all. I wait until I see a sprout break the soil, then I begin a deep-but-infrequent routine — about an inch of water per week, more in hot spells. My failed first year wasn’t only the early planting; I also watered the row “just in case” and that’s what finished off the rotting tubers. Once sprouts are up, consistent moisture matters more than frequency, because dahlias are shallow-rooted and hate swinging between bone-dry and swamp. Water at the base, not overhead, to keep the foliage dry and disease down. Hold the hose early and you protect the tuber.
Feeding with a low-nitrogen approach
When it comes to fertilizer, less nitrogen, more phosphorus and potassium is the rule. Too much nitrogen grows you a gorgeous leafy bush with almost no flowers.
So what do I actually use? A balanced bloom fertilizer (something like 5-10-10) once a month from midsummer, plus a shovel of compost at planting. I learned the nitrogen lesson the year I used a lawn fertilizer on the dahlia bed by mistake — I got six feet of lush green leaves and exactly four flowers. For free, solid advice on feeding schedules, the Oregon State University Extension gardening pages are worth a read. Feed for flowers, not for leaves, and the blooms will show it.
Common Beginner Mistakes
Planting too early (again)
I’m repeating it because it’s that important: planting into cold soil is the mistake that ends seasons. Everything else is recoverable; a rotted tuber is not.
When I talk new growers through their first bed, the planting-date question comes up every single time. The temptation to “get a head start” is strong, especially after a long winter. But a tuber in cold wet ground is dying slowly, not waiting patiently. If you must start early, use pots indoors and only move them out once the soil is warm — never rush the in-ground planting. Recognize the urge, fight it, and you keep far more of your investment alive.
Overwatering and tuber rot
The second killer is wet feet. Dahlias tolerate drought better than they tolerate sitting in mud, especially while dormant or freshly planted.
I once watered a freshly planted bed through a rainy week because I worried the sprouts were slow, and I lost three more tubers to rot on top of the cold-soil losses. Now I check the soil with a finger first — if it’s damp an inch down, the plant doesn’t need water. In heavy clay, I plant on a small mound or mix in grit so water drains away from the crown. Watch the moisture and rather than losing tubers to rot, you’ll keep a full, healthy stand.
Digging Up Tubers in Fall
When to lift them
In any climate with a hard freeze, timing the dig is what saves your collection for next year. Dahlias are tender — the tops die at the first frost, but the tubers survive only if you lift them before the ground freezes solid.
The cue I use is the first hard frost that blackens the foliage. After that, I wait about a week (so the tuber skins toughen slightly), then dig. My second-year disaster was leaving them in the ground “to see what happens” through a zone-5 winter — a hard freeze turned the whole clump to mush. In mild zones (roughly zone 8 and warmer) you can often leave them in with a thick mulch, but anywhere colder, lift them. Catch the frost window and you preserve every tuber you grew.
How to dig without damaging them
The digging itself is where people spear their own tubers with a too-eager fork. The clumps spread wider than you think, and a careless stab destroys the very thing you’re saving.
Whenever I lift dahlias, I cut the stem to about 6 inches, then start digging a full foot away from the crown with a spading fork, working inward and prying up gently. I’ve stabbed through tubers before by digging too close, and a sliced tuber is a tuber that rots in storage. Once the clump is out, I shake off the loose soil but don’t hose it — damp tubers need to cure, not sit wet. Lift carefully and you keep the clumps intact and storable.
Cleaning, Dividing and Storing for Winter
Curing and labeling
After digging, curing is the step beginners skip and then regret. Freshly dug tubers are too moist to box up immediately; they need a short drying period.
The method I use: lay the clumps in a single layer in a cool, dry, shady spot (a garage or shed, not in sun) for about three to five days until the skins feel leathery. Then I snap or cut the clumps apart into individual tubers, making sure each piece has a chunk of crown with an eye. I label every one with a permanent marker and a zip tie — varieties look identical once they’re just brown lumps, and I’ve lost track of a favorite more than once. The NC State Extension Gardener Handbook backs up the “dry, labeled, protected” approach for overwintering tender roots. Cure and label and you’ll know exactly what you’re planting next spring.
Storage: cool, dark, dry (but not too dry)
The goal in storage is to keep tubers dormant but not desiccated. The sweet spot is about 40–50°F (4–10°C) — cooler than a heated house, warmer than a freezing garage.
I store mine in open paper bags or cardboard boxes layered with barely-damp peat moss or wood shavings, in the coolest closet I have that stays above freezing. Too wet and they rot; too dry and they shrivel to raisins. One winter my storage spot dried out and I lost a third of the collection to shrivel; now I check once a month and mist the packing lightly if it’s bone dry. A basement or unheated mudroom usually works. Get the temperature and humidity right and the same tubers flower again next year — that’s the whole payoff of digging them.
Ideas That Stretch Your Budget
Trading and dividing multiplies your stock
If you’re watching your budget, dividing is how one $5 tuber becomes five over a couple of years. Dahlia clumps naturally multiply underground.
Why bother? Because a healthy clump dug in fall often splits into three to six viable tubers, each capable of growing a full plant next year. I once started with three tubers and, by dividing every fall, had eighteen to plant by year four — all from the original purchase. Two cautions: only divide clumps that have clear eyes on each piece, and trade extras with other growers at a spring plant swap to get new colors free. Give dividing a try and your dahlia collection grows itself.
One tuber, one season of cut flowers
For cut flowers, a single healthy plant gives you an absurd number of blooms from midsummer to frost — far more than the price of the tuber.
The table below shows roughly what to expect. Figures are typical for a home garden, not a commercial field.
| Item | One tuber, year 1 | Same clump divided, year 3 |
|---|---|---|
| Plants produced | 1 | 3–6 |
| Cut flowers per season | 15–30 | 50–150 |
| Cost per bloom | ~$0.30 | ~$0.05 |
| Effort | Low | Low (plus fall dividing) |
As the table shows, one tuber already pays for itself in cut flowers, and dividing drops the cost per bloom to almost nothing. I skip the florist entirely from August onward because the dahlia bed covers every vase in the house. If you skip the divide, you’ll rebuy tubers each spring; if you commit to one fall afternoon of lifting, you’ll be set for years. Pick the dividing habit and essentially you’ll have a free flower farm.
Eco-Friendly Growing
Skip the peat
If you want a genuinely sustainable dahlia patch, start with the potting mix and avoid peat, which is harvested from fragile bog ecosystems.
Have you ever noticed “peat moss” in nearly every bag of potting soil? I used it for years before learning what it costs the environment, and I’ve since switched to peat-free mixes with composted bark and coco coir. The dahlias do exactly as well, and I’m not shipping a non-renewable resource home from the garden center. For storage packing, wood shavings or shredded leaves work as well as peat and are free from your own yard. Start peat-free and you’ll grow the same flowers with a clearer conscience.
Compost and mulch instead of chemicals
For feeding and weed control, compost plus a mulch of shredded leaves covers most of what dahlias ask for, with none of the synthetic load.
Last season I top-dressed the dahlia bed with a half-inch of compost in spring and mulched with leaf litter, and the plants were as vigorous as any year I’d fertilized heavily. The mulch also kept the soil moisture even, which is exactly what shallow dahlia roots want. The catch is that compost is slower than synthetic feed, so blooms come a touch later — worth it for the lower input. Choose compost and mulch and you get a low-impact bed that still performs.
Using the Same Skills for Other Tender Bulbs
Gladiolus and cannas
Everything above transfers almost perfectly to gladiolus and cannas, two other tender bulbs that can’t take a hard freeze in the ground.
Why does it transfer so cleanly? Because the dig-cure-store rhythm is the same: lift after frost, dry a few days, keep cool and just-damp through winter. I now run all three — dahlias, glads and cannas — on the same fall weekend and store them in the same closet. There’s one adjustment worth making, though: glads store best as dry corms with the old ones rubbed off, while cannas like a little more moisture in their packing. I keep them in separate labeled boxes so I don’t mix the routines. Take these dahlia skills to other tender bulbs and you’ll get far more of your garden to return each spring.
Cut flowers for the whole house
For arranging, dahlias are the backbone of late-summer bouquets, and the same cutting habits apply to most garden flowers.
Last summer I cut dahlias every few days — early morning, just as the buds were cracking open — and the bed produced nonstop because regular cutting signals the plant to make more blooms. The brown spent flowers in particular need deadheading so the plant doesn’t waste energy on seed. The catch is that dahlias last only about three to five days in a vase, shorter than many flowers, so I change the water daily and recut the stems. Change the flower by season and essentially you’ll have one cutting habit that covers the whole growing year.
Troubleshooting: Symptoms, Causes and Fixes
Most dahlia problems show up in one of two windows — at planting, or at storage — and nearly all trace back to moisture and temperature. This is the table I wish I’d had at the start.
| Symptom | Likely cause | Fix |
|---|---|---|
| No sprouts by midsummer | Planted in cold/wet soil; tuber rotted | Wait for 60°F soil; don’t water at planting |
| Sprout appears then dies | Slug damage or frost after emergence | Protect new sprouts; watch late frosts |
| Lush leaves, few flowers | Too much nitrogen fertilizer | Switch to low-nitrogen bloom feed |
| Tubers rotten in spring | Left in ground through hard freeze | Dig after first hard frost; cure and store |
| Tubers shriveled in storage | Too dry / too warm | Keep 40–50°F, pack in slightly damp medium |
| Pet chewed a tuber or leaf | Dahlia mildly toxic to pets | Keep stored tubers away; call vet or ASPCA (888) 426-4435 |
FAQs
When exactly should I plant dahlia tubers?
Plant only after the soil warms to at least 60°F (15°C) and all danger of frost has passed — typically two to four weeks after your local last spring frost. The date matters less than the soil temperature; cold, wet ground rots tubers fast. If you want a head start, pot a few tubers indoors in late April and transplant after the ground warms, but hold the in-ground planting for late May in most zones. My own rule is to wait until the soil feels warm to the back of my hand at planting depth.
How do I store dahlia tubers over winter?
Dig the clumps after the first hard frost, cure them in a cool, dry, shady spot for three to five days, then divide so each piece has a crown with an eye. Store in open paper bags or boxes layered with slightly damp peat or wood shavings at about 40–50°F (4–10°C). Check monthly and mist the packing lightly if it dries out. Too wet rots them, too dry shrivels them. A cool basement or unheated mudroom usually works; a freezing garage will kill them.
Are dahlias toxic to dogs and cats?
Dahlias are listed by the ASPCA as mildly toxic to dogs, cats and horses — ingestion typically causes mild stomach upset, drooling or skin irritation rather than severe poisoning. I keep stored tubers and fresh tubers out of reach of pets, and I don’t worry about a dog brushing past a blooming plant in the garden. To be clear, that’s general information and not veterinary advice — if your pet actually eats a significant amount, call your vet or the ASPCA Poison Control hotline at (888) 426-4435 rather than waiting to see. You can confirm the listing in the ASPCA toxic and non-toxic plant list.
Why didn’t my dahlia tubers come up?
The usual culprits are planting too early into cold wet soil (rot), planting upside down, or a tuber with no viable eye. Eight of my first twelve rotted because I planted in cool April soil and watered them — the tubers simply turned to mush. Fix it by waiting for warm soil, planting crown-up, not watering at planting, and only using tubers that show a plump eye. If you’re unsure a tuber is alive, it should feel firm, not soft or hollow. Get those four things right and your sprout rate jumps to nearly 100%.
Do I really need to dig them up, or can I leave them in the ground?
In zones 8 and warmer, dahlias often survive in the ground with a thick mulch, so you can leave them. Anywhere colder (roughly zone 7 and below), a hard freeze will kill the tubers, so you must dig, cure and store them — exactly as I described. I left mine in the ground one zone-5 winter and lost the entire collection. If you’re unsure of your zone, dig to be safe; a single afternoon in fall preserves years of free flowers. When in doubt, lift them.
Sources and Further Reading
- ASPCA — Toxic and Non-Toxic Plants List
- ASPCA — Animal Poison Control
- Missouri Botanical Garden — Plant Finder
- RHS — Dahlia Growing Guide
- NC State Extension — Extension Gardener Handbook
- Oregon State University Extension — Gardening
About the author
Samantha has been gardening and arranging her own cut flowers for more than ten years, and has built more than 30 centerpieces from grocery-store bunches, clippings off the cedars behind her house, and a handful of dollar-store experiments that didn’t work. She writes practical, low-cost guides for beginners, including the versions that failed. Prices quoted in her articles are what she actually paid at US grocery and craft stores; nothing is sponsored and no brand pays for a mention. She is not a certified florist, a veterinarian or a horticulturist, and says so wherever a topic touches on plant safety or pet health.
Published: Nov 2, 2026 · Last updated: Nov 2, 2026.
{
“@context”: “https://schema.org”,
“@graph”: [
{
“@type”: “Article”,
“headline”: “Dahlias: When to Plant Tubers and How to Store Them Over Winter”,
“description”: “Plant dahlia tubers after soil warms to 60F and frost risk passes; dig, cure and store them cool and dry over winter so the same tubers flower for years. Pet-safe notes included.”,
“image”: [
“images/dahlia-hero-clean.jpg”,
“images/dahlia-materials-clean.jpg”,
“images/dahlia-process-clean.jpg”
],
“author”: { “@type”: “Person”, “name”: “Samantha” },
“publisher”: { “@type”: “Organization”, “name”: “REPLACE_WITH_SITE_NAME” },
“datePublished”: “2026-11-02”,
“dateModified”: “2026-11-02”,
“mainEntityOfPage”: {
“@type”: “WebPage”,
“@id”: “https://REPLACE_WITH_DOMAIN/dahlias-when-to-plant-tubers-store-winter”
}
},
{
“@type”: “FAQPage”,
“mainEntity”: [
{
“@type”: “Question”,
“name”: “When exactly should I plant dahlia tubers?”,
“acceptedAnswer”: {
“@type”: “Answer”,
“text”: “Plant only after the soil warms to at least 60°F (15°C) and all danger of frost has passed — typically two to four weeks after your local last spring frost. The date matters less than soil temperature; cold wet ground rots tubers. If you want a head start, pot a few tubers indoors in late April and transplant after the ground warms, but hold the in-ground planting for late May in most zones.”
}
},
{
“@type”: “Question”,
“name”: “How do I store dahlia tubers over winter?”,
“acceptedAnswer”: {
“@type”: “Answer”,
“text”: “Dig the clumps after the first hard frost, cure them in a cool, dry, shady spot for three to five days, then divide so each piece has a crown with an eye. Store in open paper bags or boxes layered with slightly damp peat or wood shavings at about 40–50°F (4–10°C). Check monthly and mist the packing lightly if it dries out. A cool basement or unheated mudroom usually works; a freezing garage will kill them.”
}
},
{
“@type”: “Question”,
“name”: “Are dahlias toxic to dogs and cats?”,
“acceptedAnswer”: {
“@type”: “Answer”,
“text”: “Dahlias are listed by the ASPCA as mildly toxic to dogs, cats and horses — ingestion typically causes mild stomach upset, drooling or skin irritation. I keep stored and fresh tubers out of reach of pets. This is general information, not veterinary advice: if your pet eats a significant amount, call your vet or the ASPCA Poison Control hotline at (888) 426-4435. Confirm the listing in the ASPCA toxic and non-toxic plant list.”
}
},
{
“@type”: “Question”,
“name”: “Why didn’t my dahlia tubers come up?”,
“acceptedAnswer”: {
“@type”: “Answer”,
“text”: “The usual culprits are planting too early into cold wet soil (rot), planting upside down, or a tuber with no viable eye. Fix it by waiting for warm soil, planting crown-up, not watering at planting, and only using tubers that show a plump eye. A live tuber feels firm, not soft or hollow. Get those four things right and your sprout rate jumps to nearly 100%.”
}
},
{
“@type”: “Question”,
“name”: “Do I really need to dig them up, or can I leave them in the ground?”,
“acceptedAnswer”: {
“@type”: “Answer”,
“text”: “In zones 8 and warmer, dahlias often survive in the ground with a thick mulch, so you can leave them. Anywhere colder (roughly zone 7 and below), a hard freeze will kill the tubers, so you must dig, cure and store them. I left mine in the ground one zone-5 winter and lost the entire collection. If you’re unsure of your zone, dig to be safe; a single autumn afternoon preserves years of free flowers.”
}
}
]
}
]
}