
If your garden tools are caked in dried mud and your pruners tear stems instead of slicing them, you’re not alone — for years mine lived in a heap by the back door, rusting quietly until they were nearly useless. The turning point was a $4 pair of secateurs I ruined by letting sap gum up the pivot; it jammed mid-cut on a rose and I had to saw it free. That’s when I started taking tool care seriously, and the payoff was bigger than I expected: clean, sharp tools not only last for decades, they make every job easier and actually keep your plants healthier. If you want to learn how to clean and sharpen garden tools so they last for years, here’s the exact routine I use now, including the cheap mistakes I made so you don’t have to repeat them.
Quick answer: to make garden tools last for years, clean off soil and sap after every use, disinfect blades to stop disease spread, then sharpen cutting edges a few times a season with a mill file or whetstone held at the tool’s existing bevel angle. Finish by drying thoroughly, oiling the metal to prevent rust, and sanding and oiling any wooden handles. Three things decide how long tools last: clean before storage, sharpen little and often, and never put wet tools away. Do those and a good spade or pair of pruners will outlive the garden fence.
- 1. Why Dirty, Dull Tools Cost More Than You Think
- 2. What You Need Before You Start
- 3. Cleaning Hand Tools
- 4. Sharpening Blades the Right Way
- 5. Caring for Long-Handled and Digging Tools
- 6. Wooden Handles: Don’t Forget Them
- 7. Mistakes That Ruin Good Tools
- 8. A Maintenance Routine That Takes 10 Minutes a Month
- 9. Troubleshooting: Symptoms, Causes and Fixes
- 10. FAQs
- 11. Sources and Further Reading
Why Dirty, Dull Tools Cost You More Than You Think
The hidden price of neglect
It’s tempting to drop a muddy trowel back in the shed and deal with it later, but neglect is quietly expensive. A dull spade makes you push harder, which strains your back and turns a ten-minute job into a thirty-minute struggle. A crust of damp soil on metal is a direct invitation to rust, and once rust pits the steel, the tool’s edge is gone for good. I’ve thrown away two perfectly good border forks that I simply let sit wet one too many winters — the replacement cost stung far more than the five minutes of wiping would have.
Then there’s the false economy of buying cheap and replacing often. A well-cared-for quality tool can last a lifetime; a neglected one becomes landfill in three seasons. The Oregon State Extension gardening pages and other university programs consistently frame tool maintenance as part of smart garden budgeting, and my own ledger agrees. Spend a little time now and you stop the slow leak of money and effort that neglect quietly causes.
How a clean cut keeps plants healthy
This is the part many people miss: sharp, clean tools are a plant-health issue, not just a convenience. A blunt blade crushes and tears plant tissue instead of slicing it, leaving ragged wounds that heal slowly and invite disease. Dirty blades carry pathogens from one plant to the next — I once spread a fungal spot across three tomato plants in an afternoon because I pruned without wiping the shears. Cleaning and disinfecting between plants is one of the cheapest forms of plant insurance there is.
The fix is simple and fast. A quick wipe with a disinfecting solution (I use a 70% isopropyl alcohol spray or a diluted bleach wipe) between cuts on susceptible plants takes seconds and stops problems before they start. The Michigan State home gardening team and the Cornell gardening program both stress sanitizing pruning tools as a routine disease-control step. Sharp plus clean equals happier plants — and fewer losses to explain at the end of the season.
What You Need Before You Start
The basic cleaning kit
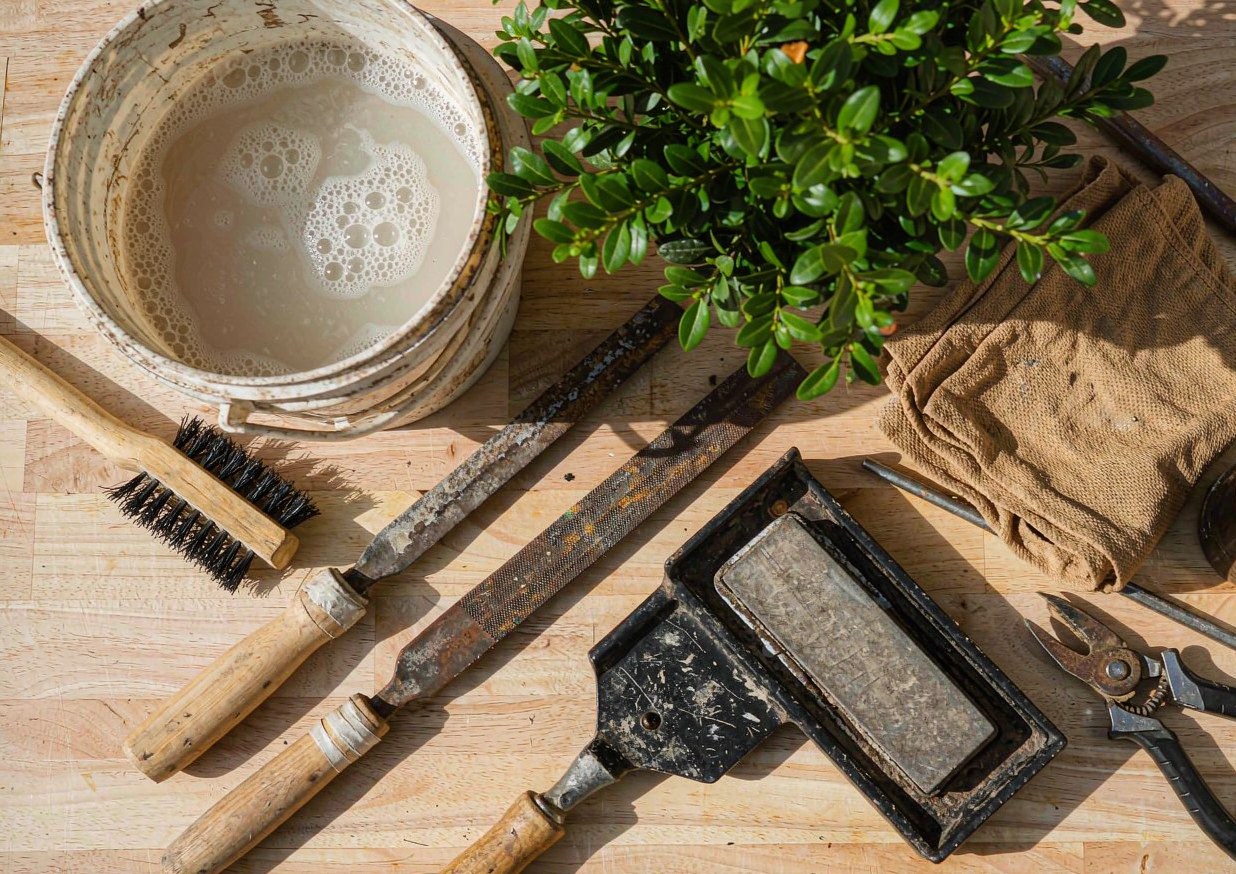
You don’t need a fancy setup. My whole kit fits in a small tote: a bucket of warm water with a splash of dish soap, a wire brush or stiff scrubbing brush, an old towel, a putty knife or scraper for caked mud, and a spray bottle of disinfectant. For really stuck-on sap, a little rubbing alcohol or a dedicated sap remover on a rag works wonders. That’s it — everything else is technique. I keep this kit by the hose so there’s no excuse not to use it.
The one item worth buying properly is a good wire brush; the cheap ones shed bristles and barely scrape. A small brass-bristle brush is gentle enough for tool surfaces and tough enough to lift rust spots. Pair it with the soapy bucket and you can clean a whole season’s worth of tools in an hour. I resisted buying “another garden gadget” for years, but this kit paid for itself the first time I revived a rusty old hoe instead of replacing it.
Sharpening gear worth buying
For sharpening, start with a mill file (a 10- or 12-inch single-cut bastard file) — it’s cheap, forgiving, and handles spades, hoes and mower blades as well as pruners. A whetstone or a diamond sharpening stone is lovely for the smaller, finer edges of pruners and shears. I also keep a small tool sharpener with a fixed angle guide for quick touch-ups, though I trust the file most for control. None of this is expensive, and a file lasts for years.
Skip the gimmicks that promise to sharpen anything in one pass; they tend to take off too much steel or set the wrong angle. The Iowa State horticulture team and the NC State Extension both describe straightforward hand-sharpening with a file, which is exactly the method I rely on. Buy a file, a stone, and a little patience, and you have everything required to keep every edge on the property keen.
Cleaning Hand Tools
The soak-and-scrub method
For pruners, shears, trowels and hand forks, the soak-and-scrub routine is my default. Knock off loose dirt, then drop the metal parts in the warm soapy bucket for a few minutes to loosen grime. Scrub with the wire brush, paying attention to pivots and any grooves where soil hides. Rinse, then dry immediately with the towel — never let clean-wet tools air-dry, because that’s how rust starts. I do this right after a big planting session, and it takes longer to read about than to do.
For sticky sap on pruners, soap alone won’t cut it; that’s where a rag dampened with rubbing alcohol earns its place. Wipe the blades and pivot until they move freely, then open and close the tool a few times to work the cleaner in. The goal is a bare, smooth metal surface you can oil without trapping grit underneath. A clean pivot is the difference between pruners that glide and pruners that fight you — and fighting pruners is how hands get tired and cuts get sloppy.
Disinfecting to stop disease spread
Cleaning removes dirt; disinfecting removes the invisible threat. After scrubbing, mist or wipe the blades with your disinfectant and let it sit for a minute before drying. I disinfect between plants whenever I’m pruning anything that’s shown disease, and at least at the start and end of every pruning session. It’s a small habit that has saved me more plant losses than any fungicide I’ve sprayed. Keep the spray bottle right next to the wire brush so it’s part of the same motion.
If you’ve been working on a plant you know is sick, disinfect before moving to the next one — don’t wait until the end. The University of Illinois Extension and the Cornell gardening program both list tool sanitation as a front-line defense against spreading pathogens in the garden. Think of disinfection as washing your hands between patients; the principle is identical and the payoff is the same.
Sharpening Blades the Right Way
A file vs. a whetstone vs. a sharpener
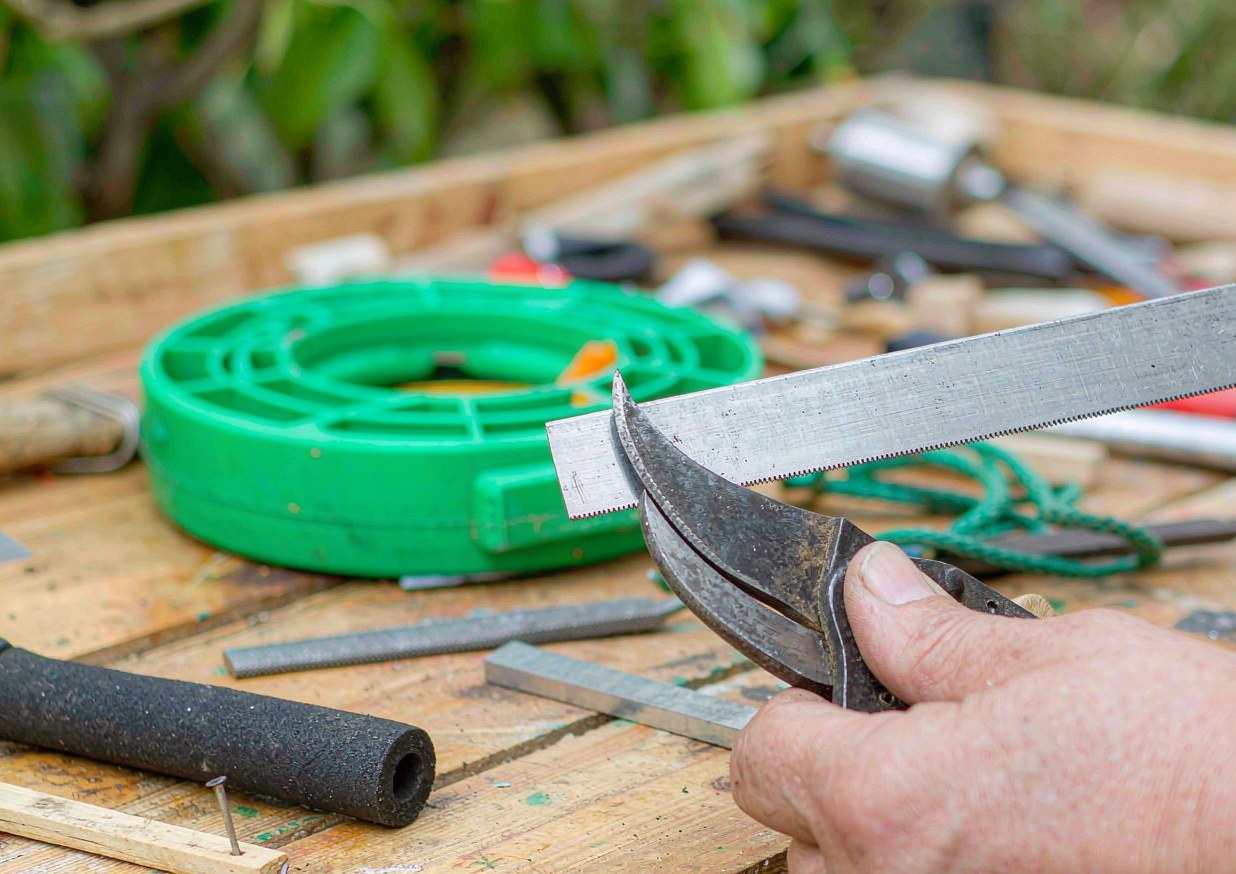
All three tools have their place. A mill file is my workhorse for big edges — spade, shovel, hoe, edger — because it removes steel quickly and you control the angle yourself. A whetstone or diamond stone is gentler and better for the short, curved blades of bypass pruners and floral snips, where finesse matters more than speed. A guided hand sharpener is the easiest for beginners doing quick touch-ups, though it can lock you into one angle. I keep all three but reach for the file most often because it’s the most honest about what it’s doing.
The trap with power sharpeners and grinders is heat: spinning a blade against a fast wheel can blue the steel and ruin its temper, leaving an edge that won’t hold. I stay away from bench grinders for garden tools for exactly that reason. Slow, cool hand-sharpening with a file or stone is safer, cheaper, and gives you a feel for the edge that a machine can’t. The MSU home gardening guidance lines up with this — patient hand work beats fast machines for keeping tool steel sound.
The angle that actually works
Here’s the secret that took me too long to learn: sharpen to the angle that’s already there. Most tools are beveled at roughly 20 to 25 degrees, and your job is to follow that existing bevel, not invent a new one. Lay the file flat against the bevel, push away from your body in smooth strokes (file only on the push, lift on the return), and keep the angle consistent. A few passes per side, then check the edge with your thumb (carefully) for a clean burr. I wasted a pruner once by re-beveling it to the wrong angle and never got a clean cut back.
For bypass pruners, sharpen only the back (the beveled cutting blade), not the flat anvil, and follow its curve. For spades and hoes, sharpen both bevels lightly so the edge is symmetric. The aim is “sharp enough to slice a piece of paper,” not razor-keen — too sharp an edge on a digging tool just folds over in soil. Match the angle, keep strokes even, and you’ll get a long-lasting edge without grinding the life out of the steel.
Caring for Long-Handled and Digging Tools
Spades, shovels and hoes
Long-handled digging tools take the most abuse, so they deserve the most care. After each use, scrape off soil (a dedicated mud scraper or the edge of a bucket rim works), then wipe the metal with an oily rag — I keep a can of used motor oil or a light machine oil specifically for this. A thin film of oil is all it takes to block rust between jobs. I run this quick wipe-down as I put the tool away, and it’s become as automatic as hanging it on its hook.
Sharpen the cutting edge of your spade and hoe a few times a season with the mill file, following the existing bevel as described above. A sharp spade slices through roots and compacted soil instead of bouncing off, and a sharp hoe slices weeds cleanly at the surface. The Oregon State and Iowa State guidance both treat edge maintenance as routine, not optional. These big tools are the backbone of the garden; keep their edges keen and every digging job gets easier.
Preventing rust on metal
Rust is the enemy of every steel tool, and it starts with moisture and neglect. The three rules I live by: dry tools before storage, keep a light oil film on the metal, and never leave tools lying on damp ground or leaning in a wet corner of the shed. If you garden in a humid climate, a silica packet or two in the tool box and a dehumidifier in the shed help enormously. I learned the hard way that a “quick” leave-it-by-the-door habit turned into a rusted-out trowel within a month.
For tools that do develop surface rust, attack it early with the wire brush and a little steel wool, then oil immediately so bare metal doesn’t re-rust. Once rust pits the steel, the edge is compromised and the tool is on its way out, so early action is everything. The NC State Extension and Illinois Extension both emphasize dry storage and light lubrication as the core of tool longevity. Rust prevention is mostly just not being lazy about drying and oiling.
Wooden Handles: Don’t Forget Them
Sanding and oiling
Metal isn’t the only thing that ages. A wooden handle left to dry out goes splintery, loose and eventually cracks — and a cracked handle is a safety hazard when you’re swinging a tool. Once or twice a year I sand the handle smooth with medium then fine paper, then rub it down with linseed oil (boiled linseed oil is easiest) and let it soak in. The wood darkens, feels great in the hand, and resists moisture and splintering. I did this to a 20-year-old shovel handle and it came back to life like new.
The oil step is what most people skip, and it’s the part that matters. Bare, dry wood drinks water and swells, then cracks as it dries; oil keeps that cycle from starting. A light coat, wiped in and left to dry, is enough — you’re not finishing furniture, just protecting the grip. The MSU home gardening team and the Cornell gardening program both note that handle care is a routine part of keeping long-handled tools safe and usable. Ten minutes of sanding and oiling can add a decade to a tool.
When a handle needs replacing
Sometimes a handle is past saving — badly split, loose at the head, or rotted at the base. The good news is that quality tool heads are worth more than the handle, and replacing a handle is far cheaper than buying a whole new tool. Most spades, forks and hoes use a standard socket or eye where a new haft slips in; garden centers and hardware stores sell replacement handles, and fitting one is a satisfying afternoon job with a mallet and a little wood glue.
If the head itself is sound but the handle is gone, don’t toss the tool — replace the handle and keep the steel. I’ve rescued three old forks this way and they’re now the best tools in my shed. The Iowa State horticulture resources and the Oregon State Extension both reflect the same practical ethic: repair before replace. A new handle costs a fraction of a new tool and keeps good steel out of the landfill.
Mistakes That Ruin Good Tools
Over-sharpening and wrong angles
The most common sharpening mistake is impatience: pressing too hard, using too coarse a file, or changing the bevel to the wrong angle and grinding away good steel. I’ve thinned a spade edge to a wobbly knife by over-filing, and it never cut right again. The rule is gentle, even strokes that follow the existing bevel, stopping as soon as the edge bites paper. Less is more — you can always take another pass, but you can’t put steel back.
The other angle error is sharpening the wrong face. On bypass pruners, only the cutting blade is beveled; filing the flat anvil just creates a gap and a poor cut. On anvil pruners, the single beveled blade meets a flat plate, so match that design. Misidentifying your tool type and filing the wrong side is how beginners ruin a good pair of pruners in five minutes. Look at how the blades meet before you touch a file to them.
Storing wet tools
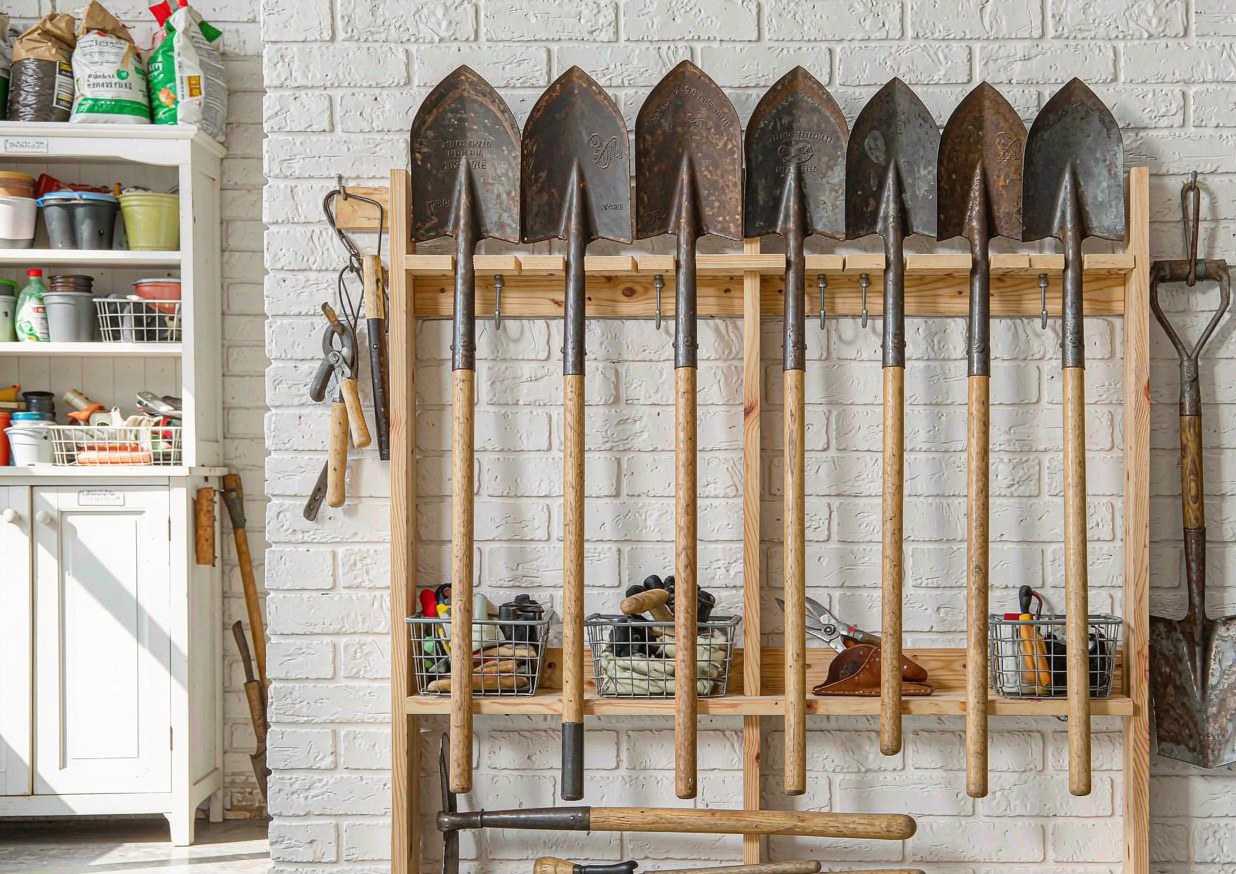
If I could ban one habit, it would be putting tools away wet. A damp trowel tossed in the shed is a rust time-bomb, and a wet wooden handle left leaning in a corner will rot at the base. The fix is almost comically simple: dry every tool before it goes away, and store long-handled tools hanging off the floor so air circulates. I keep a dedicated rag by the door specifically for the end-of-session wipe, and it has saved more tools than any product I’ve bought.
Storage location matters too. A damp, unventilated shed is the worst case; even a hook on a garage wall with some airflow is dramatically better. If your only option is a humid space, the light oil film plus a silica packet in the tool tote buys you real protection. The Illinois Extension and NC State Extension both point to dry, ventilated storage as the single biggest factor in tool life. Dry-first storage is the cheapest insurance you’ll ever buy.
A Maintenance Routine That Takes 10 Minutes a Month
End-of-season deep clean
Once a year, usually late fall, I do a proper deep clean of everything. That means full disassembly of pruners (most unscrew at the pivot), soaking and scrubbing every part, sharpening every edge, oiling metal, and sanding-and-oiling every wooden handle. It’s a couple of hours with a radio on, and it sets the whole kit up to survive winter and come out ready in spring. I used to skip this and wonder why tools felt “tired” by March; the deep clean changed that completely.
While everything is apart, it’s also the moment to spot worn parts — a loose pivot, a cracked handle, a bent tine — and order replacements before spring rush. The Cornell gardening program and the MSU home gardening team both treat an annual tool overhaul as standard good practice. Think of it like a car’s yearly service: a little attention at the right time prevents a breakdown at the worst moment.
Quick checks through the year
The deep clean carries you far, but a few quick in-season checks keep things smooth between them. After heavy use, wipe and oil edges; mid-season, give pruners a few file passes if they start crushing instead of cutting; and any time a handle feels rough, a quick sand-and-oil touch-up stops it cracking. None of these takes more than a few minutes, and together they mean you rarely face a tool that’s fallen into bad shape. I do a 10-minute “tool tidy” on the last weekend of each month through the growing season.
The habit that makes it stick is storing tools already clean, so the monthly check is just a glance and a light oil rather than a rescue mission. The Iowa State and Oregon State guidance both land on the same simple truth: a little regular attention beats a big annual repair. Build the monthly ten minutes and your tools will quietly outlast your expectations.
Troubleshooting: Symptoms, Causes and Fixes
Most tool troubles show up as one of six issues. This is the table I keep near the workbench.
| Symptom | Likely cause | Fix |
|---|---|---|
| Pruners won’t close smoothly | Sap and grit in the pivot | Disassemble, soak, scrub, oil the pivot; disinfect blades |
| Blade tears instead of slicing | Too dull or wrong bevel angle | Re-file following the existing bevel; test on paper |
| Rust spots appear on metal | Stored damp, no oil film | Wire-brush and steel-wool; oil immediately; dry before storage |
| Wooden handle splinters | Dry, untreated wood | Sand smooth, rub with boiled linseed oil; repeat yearly |
| Tools feel sticky after cleaning | Soap residue left on surface | Rinse, dry thoroughly, then apply a light oil film |
| Cuts look crushed on stems | Blunt bypass blade or wrong face filed | Sharpen only the beveled cutting blade; replace if edge gone |
FAQs
How often should I sharpen garden tools?
For most home gardeners, a few times per season is plenty: a proper edge at the start of the season, a mid-season touch-up if you’re cutting a lot, and a final sharpen during the fall deep clean. The real signal is performance — the moment a pruner starts crushing stems instead of slicing, or a spade starts bouncing off soil instead of biting in, it’s time to file. I sharpen little and often rather than waiting until an edge is badly gone, because a light pass is faster and removes less steel than a rescue job. A tool that still slices paper is sharp enough; you don’t need a razor edge.
Can I use a regular knife sharpener on pruners?
You can, but with caveats. A guided handheld sharpener designed for garden tools works well for quick touch-ups on bypass pruners if it holds the correct angle, but a generic knife sharpener may set the wrong bevel or only contact part of a curved blade. I prefer a mill file or a small whetstone because they let me follow the blade’s existing curve and angle precisely. Whatever you use, sharpen only the beveled cutting blade, not the flat anvil, and stop as soon as it cuts cleanly. Avoid bench grinders, which can overheat and ruin the steel’s temper.
What’s the best oil for garden tools?
For the metal, a light machine oil, 3-in-1 oil, or even a thin film of used motor oil all work to block rust — you’re not lubricating precision parts, just protecting steel from moisture. For wooden handles, boiled linseed oil is the classic choice because it soaks in and conditions the wood without going sticky. I keep one can of light oil for blades and one bottle of linseed oil for handles, and that’s the whole supply. The key is a thin, even film applied to dry metal; you’re not trying to pool oil, just deny water a place to sit.
How do I stop my tools from rusting?
Rust is almost entirely a moisture problem, so the defense is threefold: dry every tool before you store it, keep a light oil film on the metal, and store long-handled tools hanging in a dry, ventilated space rather than on a damp floor. In humid sheds, a silica packet in the tool tote and a dehumaidifier help. Catch surface rust early with a wire brush and steel wool, then oil at once so bare steel doesn’t re-rust. The single most effective habit is simply wiping tools dry at the end of each session — more than any product, that one step prevents most rust before it starts.
Is it worth sharpening cheap tools?
Often yes, at least the ones with decent steel. A cheap spade or hoe usually has a solid enough blade to take and hold an edge for a season, so a few file passes restore its usefulness for almost nothing. The exceptions are tools with pot-metal heads or handles that are already cracked, where the steel or structure is the limiting factor and sharpening won’t help. My rule: if the edge is sound steel and the tool is structurally sound, sharpen it; if the head is junk or the handle is split, replace the handle or the tool. Sharpening is the cheapest upgrade you can make to a working tool.
Sources and Further Reading
- Oregon State University Extension — Gardening
- Michigan State University — Home Gardening
- University of Illinois Extension — Lawn and Garden
- Cornell University — Gardening
- Iowa State University Horticulture — Lawn and Garden News
- NC State Extension — Gardener Resources
About the author
Samantha has been gardening and arranging her own cut flowers for more than ten years, and has built more than 30 centerpieces from grocery-store bunches, clippings off the cedars behind her house, and a handful of dollar-store experiments that didn’t work. She writes practical, low-cost guides for beginners, including the versions that failed. Prices quoted in her articles are what she actually paid at US grocery and craft stores; nothing is sponsored and no brand pays for a mention. She is not a certified florist, a veterinarian or a horticulturist, and says so wherever a topic touches on plant safety or pet health.
Published: Oct 26, 2026 · Last updated: Oct 26, 2026.
{
“@context”: “https://schema.org”,
“@graph”: [
{
“@type”: “Article”,
“headline”: “How to Clean and Sharpen Garden Tools So They Last for Years”,
“description”: “Clean, sharp garden tools cut cleaner, spread fewer diseases and last for decades. A soak, a scrub, a few passes with a mill file at the existing bevel, and a light oil is all it takes to keep pruners, spades and shears in top shape.”,
“image”: [
“images/garden-tools-hero-clean.jpg”,
“images/tool-cleaning-materials-clean.jpg”,
“images/tool-sharpening-process-clean.jpg”
],
“author”: { “@type”: “Person”, “name”: “Samantha” },
“publisher”: { “@type”: “Organization”, “name”: “gmmur” },
“datePublished”: “2026-10-26”,
“dateModified”: “2026-10-26”,
“mainEntityOfPage”: {
“@type”: “WebPage”,
“@id”: “https://gmmur.com/how-to-clean-and-sharpen-garden-tools”
}
},
{
“@type”: “FAQPage”,
“mainEntity”: [
{
“@type”: “Question”,
“name”: “How often should I sharpen garden tools?”,
“acceptedAnswer”: {
“@type”: “Answer”,
“text”: “For most home gardeners, a few times per season is enough: a proper edge at the start, a mid-season touch-up if cutting heavily, and a final sharpen during the fall deep clean. The real signal is performance — when a pruner starts crushing stems or a spade bounces off soil, it is time to file. Sharpen little and often, and stop once the edge slices paper.”
}
},
{
“@type”: “Question”,
“name”: “Can I use a regular knife sharpener on pruners?”,
“acceptedAnswer”: {
“@type”: “Answer”,
“text”: “A guided garden-tool sharpener works for quick touch-ups if it holds the correct angle, but a generic knife sharpener may set the wrong bevel or miss a curved blade. A mill file or small whetstone lets you follow the blade’s curve precisely. Sharpen only the beveled cutting blade, not the flat anvil, and avoid bench grinders that can overheat and ruin the steel’s temper.”
}
},
{
“@type”: “Question”,
“name”: “What’s the best oil for garden tools?”,
“acceptedAnswer”: {
“@type”: “Answer”,
“text”: “For metal, a light machine oil, 3-in-1 oil, or a thin film of used motor oil blocks rust — you are protecting steel from moisture, not lubricating precision parts. For wooden handles, boiled linseed oil conditions the wood without going sticky. Apply a thin, even film to dry metal; you are denying water a place to sit, not pooling oil.”
}
},
{
“@type”: “Question”,
“name”: “How do I stop my tools from rusting?”,
“acceptedAnswer”: {
“@type”: “Answer”,
“text”: “Rust is mostly a moisture problem. Dry every tool before storage, keep a light oil film on the metal, and hang long-handled tools in a dry, ventilated space rather than on a damp floor. In humid sheds, use a silica packet and dehumidifier. Catch surface rust early with a wire brush and steel wool, then oil at once. Wiping tools dry at the end of each session is the single most effective habit.”
}
},
{
“@type”: “Question”,
“name”: “Is it worth sharpening cheap tools?”,
“acceptedAnswer”: {
“@type”: “Answer”,
“text”: “Often yes, if the steel is sound. A cheap spade or hoe usually has a blade that takes and holds an edge for a season, so a few file passes restore it for almost nothing. Skip sharpening tools with pot-metal heads or already-cracked handles, where the structure is the limiting factor. If the edge is sound steel and the tool is structurally sound, sharpen it; if not, replace the handle or the tool.”
}
}
]
}
]
}