
If you’re standing in the garden aisle trying to pick the best garden pruners, the display is going to lie to you. Every pair looks capable, the bright colors suggest they’re all basically the same tool, and the cheapest one is right there at eye level. I learned this the slow way. The first pair I bought was a $9 anvil pruner from a big-box checkout line, and I used it to “prune” a young apple tree I’d just planted. It didn’t cut so much as crush the twigs, leaving ragged brown stubs that took a full season to recover. Three trees later I realized the tool, not my technique, was the problem. This guide is everything I wish someone had handed me that first spring: how bypass and anvil pruners actually differ, what blade and handle details decide whether a pair feels good after an hour, and the five checks I run before I ever hand over money.
Quick answer: for almost every home garden job, buy a bypass pruner with a forged high-carbon or stainless blade, a sap groove, and a comfortable grip sized to your hand. Bypass pruners slice cleanly like scissors and heal fastest on live wood; anvil pruners crush the stem against a flat plate and are only worth it for dead, dry branches. Look for a replaceable blade, a ratchet or geared version if you have weaker hands, and shock-absorbing bumpers. Spend $25–$45 for a pair that will outlast the tree. Everything below explains why each of those details matters and how to spot the ones that fail early.
- 1. Why the Right Pruners Matter More Than You Think
- 2. Bypass Pruners: When They’re the Right Call
- 3. Anvil Pruners, and When to Skip Them
- 4. Blade Material, Coating and What Stays Sharp
- 5. Handles, Grips and the Comfort You’ll Feel by Hour Two
- 6. Sizing, Reach and the Long-Handled Options
- 7. What to Look for Before You Hand Over Your Money
- 8. Care That Keeps a Good Pair Cutting for Years
- 9. Troubleshooting: Symptoms, Causes and Fixes
- 10. FAQs
- 11. Sources and Further Reading
Why the Right Pruners Matter More Than You Think
How I learned the difference the hard way
The reason most people buy the wrong pruner is that the damage is invisible at first. When I crushed those apple-tree twigs with my bargain anvil pruner, the cut looked “close enough” from two feet away. What I couldn’t see was the split running up the stem and the torn tissue that now had to scab over instead of healing. That tree pushed weak, lopsided growth the next year, and I blamed the variety, the weather, and the fertilizer before I ever blamed the tool. A clean cut on live wood closes in days; a crushed one can invite dieback that you’ll be pruning around for years. The tool is not a detail you sort out later — it sets the clock on every plant you touch.
Once I switched to a proper bypass pruner, the same trees responded within a single season. The cuts were clean, the regrowth was balanced, and I stopped losing branches to rot at the wound site. I’m not describing a luxury upgrade; I’m describing the difference between a plant recovering and a plant fighting itself. If you take one thing from this whole guide, let it be this: the pruner is the single most-used tool in a garden, so it’s worth more attention than the tiller you use once a year. Get this right and every other cutting job gets easier.
Bypass vs. anvil: the core decision
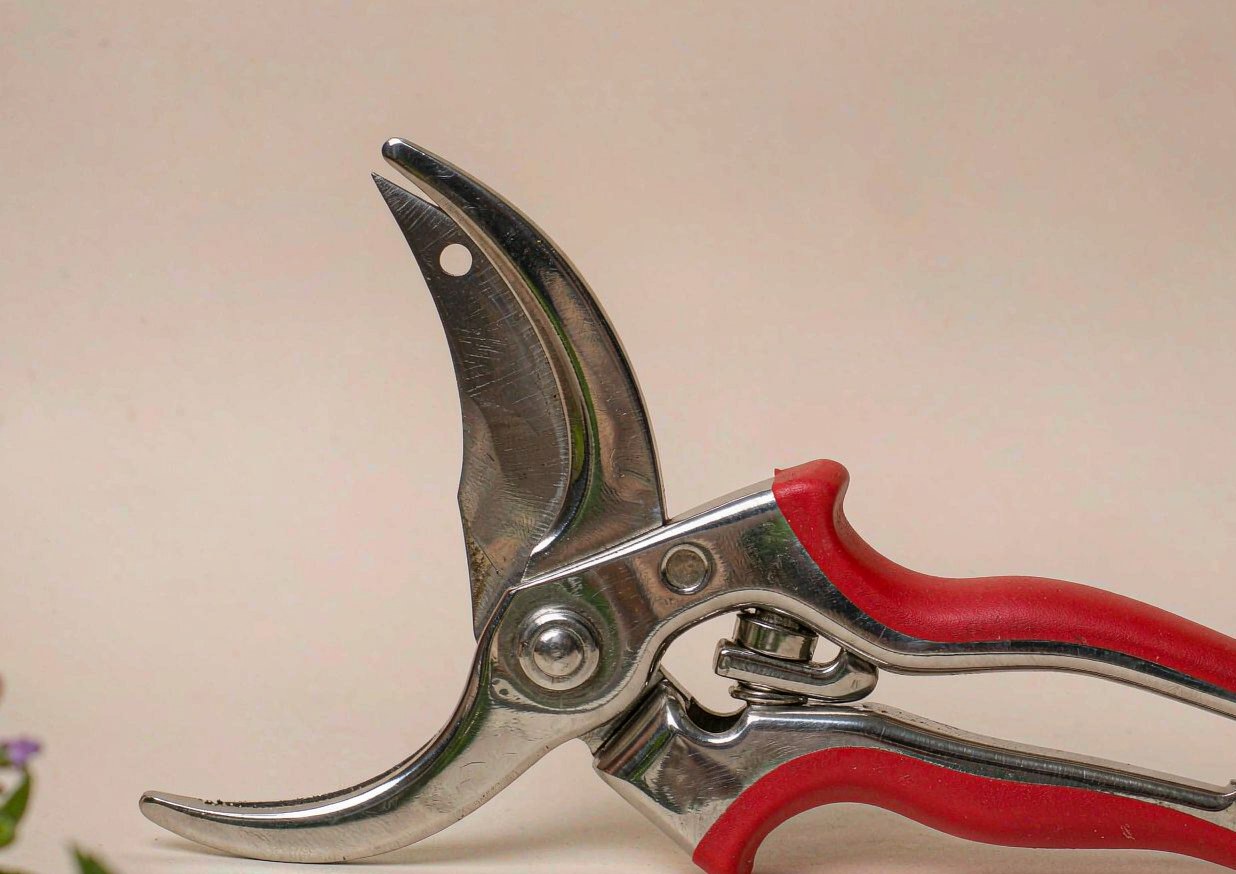
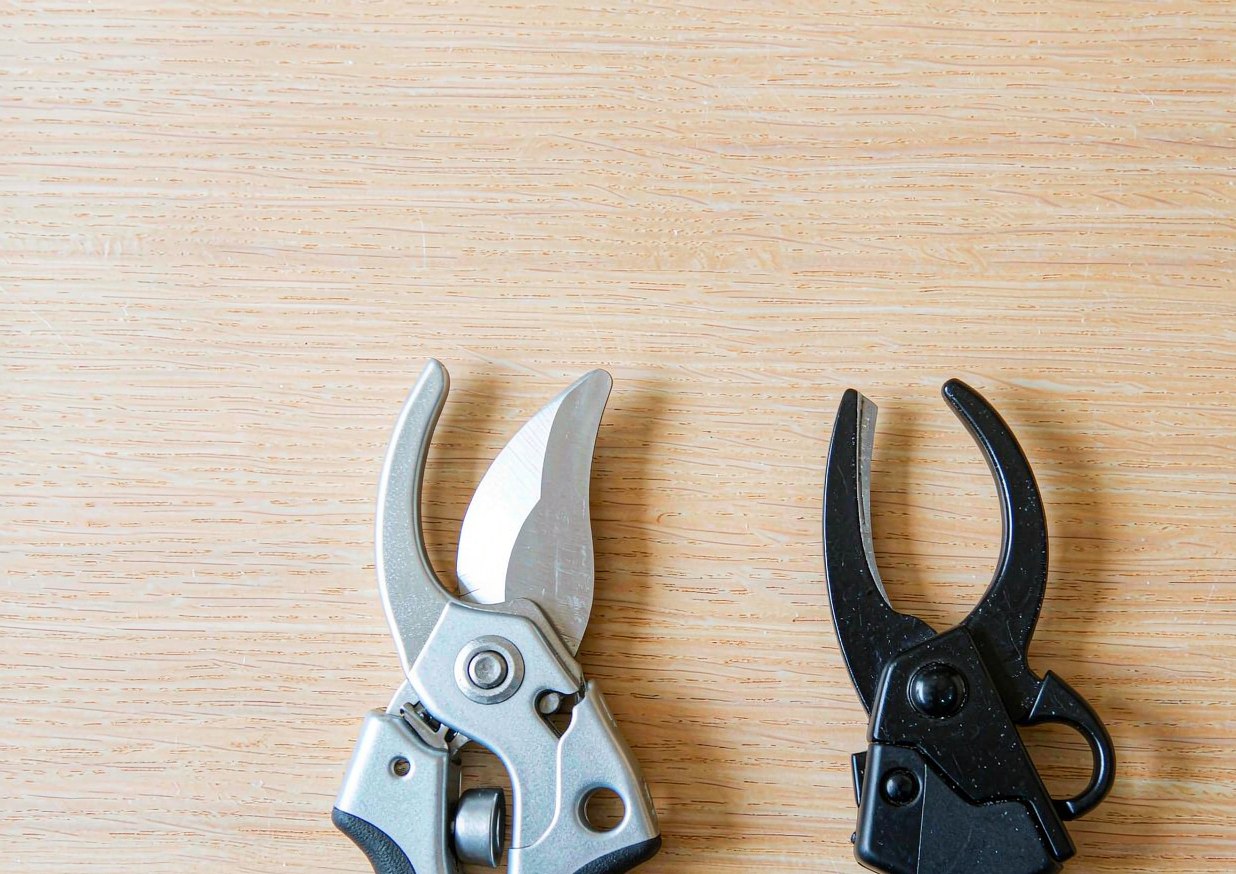
Almost every hand pruner you’ll see falls into one of two mechanisms, and the difference is the whole ballgame. A bypass pruner has two curved blades that pass each other like scissors, one sharp and one blunt, so the sharp blade slices through the stem. An anvil pruner has a single sharp blade that comes down onto a flat metal plate, pinching the stem against it. The names describe the motion: bypass slides past, anvil presses down. For live, green wood — the branches you prune most of the year — bypass wins every time because it leaves a surgical cut. Anvil’s pinching action is fine for brittle dead wood but disastrous on anything you want to survive.
The trap is that anvil pruners are often marketed as “heavy duty” and sit next to the bypass models at the same price. They feel substantial, which reads as better to a first-time buyer. But “heavy duty” for dead wood is “destructive” for live wood. My rule now is simple: if the branch is alive and you want it to heal, reach for bypass; if it’s brown, dry, and already dead, an anvil will happily chew through it. Most gardeners need one good bypass pruner far more than they need an anvil, which is why a bypass is the safe default for your first and primary pair.
Bypass Pruners: When They’re the Right Call
What bypass pruners actually do to the stem
The reason bypass pruners heal better comes down to the cut itself. Because the moving blade slides past a stationary hook, it severs plant tissue with a clean shearing action rather than compression. The wound is a narrow, even line that the plant can wall off quickly. On a living branch that matters enormously: a clean cut closes, a torn one stays open. You can see the difference immediately if you cut a soft green stem with each type side by side — the bypass leaves a smooth diagonal, the anvil leaves a crushed, splitting end. That smooth diagonal is what lets sap flow and bark roll over the wound naturally.
There’s a second benefit that only shows up over time. Clean cuts reduce the surface area exposed to fungi and bacteria, which means fewer infections moving into the branch. I had a rose that kept dying back from the tips until I stopped using the anvil on it; the bypass cuts closed fast and the dieback simply stopped. It’s not that the anvil was “dirty” — it was that it was tearing living tissue and leaving it vulnerable. For any plant you value, bypass is the kinder, faster-healing choice, and that’s the version I reach for on roses, shrubs, fruit trees, and perennials alike.
The jobs bypass pruners handle best
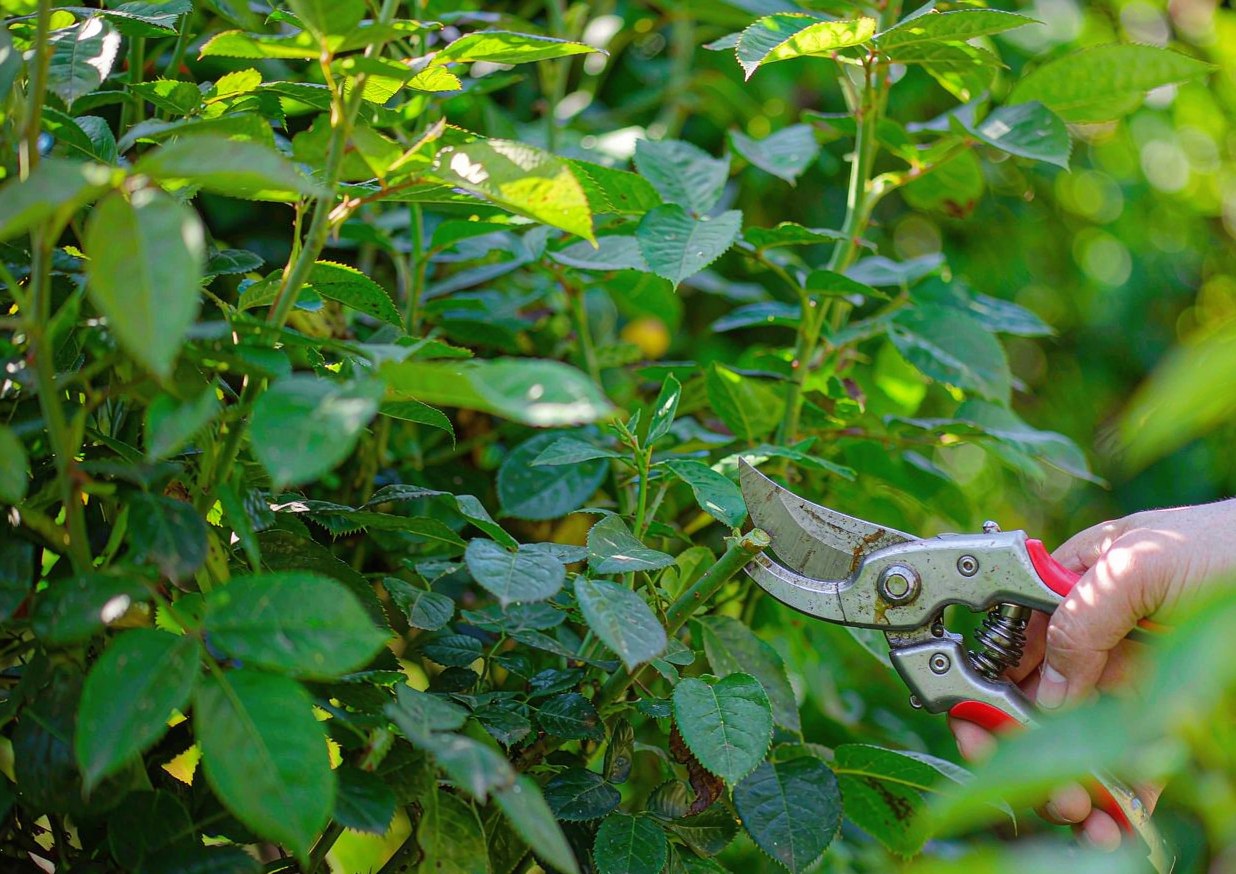
In a typical home garden, bypass pruners cover the overwhelming majority of cutting work. Deadheading spent flowers, shaping shrubs, trimming back perennials, harvesting herbs and soft vegetables, cutting back raspberry canes, and making the small corrective cuts on a young fruit tree are all bypass jobs. If the stem is green and flexible or green-and-woody up to roughly finger thickness, a bypass pruner is the tool. Most quality bypass models comfortably cut branches up to about 3/4 inch (roughly 20 mm) in diameter, which covers far more of the garden than people expect before they ever need a saw or lopper.
The only time I set the bypass aside is for genuinely dead wood, and even then I often still prefer it for precision. Where bypass struggles is thick, fully dead branches that are too hard and dry for the blade to slice cleanly — those can wedge the mechanism. For those, a small anvil or a folding pruning saw does the job. But notice the pattern: the living, valuable, everyday cuts are all bypass territory. If you buy one pruner this year, make it a bypass, and you’ll handle most of what your garden throws at you without a second tool.
Anvil Pruners, and When to Skip Them
Why anvils crush instead of slice
To be fair to the anvil design, its crushing action isn’t a flaw — it’s a feature for a specific job. Dead, brittle branches don’t need a clean heal; they need to be removed, and an anvil’s pressing blade will snap through dry wood that would wedge a bypass. The flat plate gives the sharp blade a backing to push against, so there’s no give. On dry material that’s efficient. The problem is purely that this same efficiency destroys living tissue, so the anvil is a specialist’s second tool, not a beginner’s first. Using one on a living branch is like using kitchen shears that crush instead of cut.
I keep one anvil pruner in the shed specifically for clearing dead wood in late winter, and even then I’m careful. The moment a branch shows green underneath, the anvil goes down. A common mistake is buying an anvil because it “cuts thicker branches” — and yes, the crushing action can defeat a drier, harder stem — but that thicker capacity comes at the cost of a ruined cut on anything alive. If a label emphasizes maximum cut diameter above all else, ask what kind of cut it’s making. For live plants, diameter bragging rights don’t matter if the wound never heals.
The one job anvils still win
There is a real niche where an anvil earns its place: thick, dead, and woody branches that are too hard for a bypass to slice but not worth dragging a saw out for. Think old rose canes that died to the base, spent raspberry primocanes, or dead suckers on a shrub. Because the wood is already dead, the crushing cut does no additional harm, and the anvil’s leverage gets through material a bypass would stall on. For a gardener who already owns a good bypass, a cheap anvil as a dedicated “dead wood only” tool is a reasonable add-on.
The key is discipline about when to use it. I label mine mentally as “brown wood only” and never let it touch a living stem. If you’re just starting out and can only justify one pruner, skip the anvil entirely and put the money into a better bypass. You’ll do 95 percent of your cutting with the bypass anyway, and you’ll avoid the heartbreak of discovering your favorite shrub was damaged by the wrong tool. Anvils are a complement, never a substitute, for a proper bypass pruner in a healthy garden.
Blade Material, Coating and What Stays Sharp
Forged steel vs. stamped blades
Once you’ve chosen bypass, the next decision is the blade itself, and the single most important word on the spec sheet is forged. A forged blade is shaped from a single piece of heated steel, which aligns the grain of the metal and makes it both tougher and able to hold an edge far longer than a stamped blade cut from sheet metal. Stamped blades are cheaper to make and show up in the bargain bins, but they dull quickly, can bend under load, and rarely take a satisfying sharpening. When I’m comparing two pruners, I look for “forged” or “hot-forged” in the description — it’s the quiet indicator of a tool that will still be sharp in year three.
The steel type matters too. High-carbon steel takes an exceptionally keen edge and is the traditional choice for pruning blades, though it needs a little oil to resist rust. Stainless steel resists rust better and is lower maintenance, at a small cost to how long the finest edge lasts. Either is fine in a quality tool; what you’re really avoiding is unknown mystery metal that bends on the first thick branch. A good forged blade should bite cleanly through a green stem without the handles flexing or the cut wandering — if the blade deflects, it’s not up to the job regardless of the brand name on the side.
Coatings that fight sap and rust
Even a great blade sticks if sap builds up, and that’s where a non-stick coating earns its keep. Many quality pruners coat the blade with a teflon or similar finish so wet, sappy cuts slide off instead of gumming the mechanism. I can’t overstate how much this improves the feel: a coated blade needs far less wiping mid-job, and the cut stays smooth instead of dragging. After a morning of pruning a sap-heavy tree like a cherry or a fig, an uncoated blade can seize entirely, while a coated one keeps gliding. Look for the coating as a quiet sign the maker thought about real-world use.
Rust is the other enemy, especially if you garden somewhere humid or leave tools in the shed through a wet season. A coated blade resists surface rust, and a drop of oil on the pivot after cleaning keeps everything moving. I learned the hard way that a pruner left wet overnight after a rainstorm develops a film that ruins the edge — now I wipe and oil every pair before it goes back on the hook. The coating helps, but it isn’t a substitute for a quick dry and a dab of oil. Treat the blade well and the coating will last for years instead of months.
Handles, Grips and the Comfort You’ll Feel by Hour Two
Ratchet and geared mechanisms for weaker hands
The part of a pruner you feel first is the handle, and the part you feel later — sometimes painfully — is the effort. Standard bypass pruners require one clean squeeze to cut, which is fine for most green stems but tiring on anything thicker. That’s where ratchet and geared pruners come in. A ratchet pruner bites the branch in stages: you squeeze, it advances a notch, you release, you squeeze again, and the cut completes over three or four bites. The total force is the same, but it’s spread across several easy squeezes instead of one hard one. For anyone with arthritis, smaller hands, or simply a long day ahead, that difference is the difference between finishing and quitting.
I didn’t appreciate this until I loaned my standard pruner to a friend with a wrist injury and watched her struggle on branches I cut without thinking. I bought her a ratchet model and the change was immediate — she pruned her whole butterfly bush in one go. Geared pruners achieve a similar reduction in effort through a compound linkage rather than steps, and some people prefer the continuous motion. If you’ve ever stopped pruning because your hand cramped, this is the feature that fixes it. Don’t buy on maximum cut diameter alone; buy on how the effort feels after an hour.
Grip size, weight and wrist strain
Comfort is also about fit. A pruner sized for a large hand will cramp small hands and force awkward angles; one sized for small hands may not generate enough leverage for bigger cuts. The grip should sit naturally in your palm with your fingers able to reach the lock and the trigger without stretching. I always test the open-and-close motion in the store a few times, because a grip that looks fine on the peg can twist your wrist into a bad position after fifty cuts. Rotating handles, which pivot as you squeeze, further reduce wrist strain and are worth a look if you prune a lot.
Weight matters more than you’d guess. A heavy pruner is fine for a few cuts but becomes a burden by the dozen, while an overly light one can feel flimsy and transmit more shock to your hand. Most quality pruners land in a sweet spot around 8 to 10 ounces (225–285 g), heavy enough to feel solid, light enough to forget you’re holding it. Rubberized, shock-absorbing bumpers where the handles meet also cut the jolt on each cut, which your wrist notices by mid-morning. Try before you buy if you can, and trust the hand that will actually be doing the work.
Sizing, Reach and the Long-Handled Options
Matching pruner size to your hand
Hand pruners come in roughly two sizes — often called small/medium and large — and matching them to your hand prevents both cramping and a lack of leverage. If your hand is small, a large pruner forces you to overextend your grip, which tires the muscles and reduces control; if your hand is large, a small pruner limits how much branch you can close on and makes thick cuts harder. The right size lets you close the handles fully with a comfortable, powerful squeeze. I keep one medium pair as my daily driver and a larger pair for the occasional thick rose cane, which saves my hands on the bigger jobs.
Sizing also interacts with the cut capacity. A properly sized pruner closes completely on the branch it’s rated for; an undersized one leaves you forcing the handles past their stop, which bends the blade and strains the spring. When you’re comparing models, check the listed maximum cut diameter and make sure your hand can actually close on a branch near that limit. If you have to white-knuckle it, the tool is too big or too small. Fit is not a luxury — it’s what lets you use the full rated capacity without damage to the pruner or your hand.
Loppers and pole pruners for the bigger cuts
No hand pruner, however good, should be forced past its rating, and that’s where loppers and pole pruners take over. Loppers are essentially long-handled bypass pruners that trade some finesse for leverage, comfortably handling branches from about 1 to 2 inches (25–50 mm) thanks to the longer handles acting like a lever. For high or awkward branches, a pole pruner extends your reach from the ground, sparing you a ladder for a lot of routine work. I keep a pair of bypass loppers next to my pruners and reach for them the moment a branch is clearly too thick for the hand tool.
The mistake is using the hand pruner on a branch it can’t cleanly cut, which both damages the plant and wrecks the tool. Knowing the boundary — roughly finger-thickness for pruners, forearm-thickness for loppers, and above that a pruning saw — keeps every tool in its lane and lasting longer. A small investment in loppers pays for itself the first time you avoid straining a $40 pruner on a job it was never meant for. Think of the three tools as a ladder of capacity rather than competing replacements, and your pruning kit covers the whole garden.
What to Look for Before You Hand Over Your Money
The five checks I run in the store
When I’m deciding whether a pruner is worth the price, I run five quick checks before I ever reach the register. First, confirm it’s a bypass unless I specifically need an anvil for dead wood. Second, look for forged in the blade description rather than stamped. Third, open and close it a few times to feel whether the action is smooth and the spring returns the handle without sticking. Fourth, check that the blade is replaceable — a pruner you can’t re-blade is disposable. Fifth, make sure there’s a sap groove and a non-stick coating. Any pair that fails two or more of those gets put back on the shelf, no matter how good the color looks.
There’s a sixth, quieter check I’ve added over the years: read the warranty. A maker that sells a “lifetime” or multi-year warranty on a forged pruning tool is telling you they expect it to last, and they usually back replacement blades and springs. A no-name pruner with no warranty and no replacement parts is, practically speaking, a single-season tool no matter how sharp it feels in the store. Price correlates with these details but isn’t identical to them — I’ve found excellent $30 forged bypass pruners and disappointing $50 stamped ones. Run the five checks and the price takes care of itself.
Replacement parts and a warranty that matters
A pruner is a tool with wear parts: the blade, the spring, the pivot bolt, and sometimes the bumpers. The difference between a tool that lasts a decade and one that lands in the trash after two seasons is almost always whether those parts can be replaced. Quality brands sell individual blades, springs, and even complete repair kits, and the best ones publish the part numbers so you’re not hunting. I’ve kept a $38 pair alive for six years on one new blade and two springs — total spent on parts, about $12. The original price looked high next to a $9 throwaway, but the math flipped within two seasons.
The warranty is the maker’s bet against your experience. A brand that offers a genuine warranty on a forged tool is signaling confidence, and more importantly it gives you a free path to a replacement if the spring breaks or the blade chips early. I read the fine print: some “lifetime” warranties cover only manufacturing defects and not normal wear, which is fair, while others are effectively unconditional. Either way, a documented warranty plus available spare parts means the pruner is a maintainable tool rather than a consumable, and that’s the version worth buying for a garden you plan to keep.
Care That Keeps a Good Pair Cutting for Years
Cleaning and oiling after every use
The cheapest insurance on a good pruner is thirty seconds of care after each use. Sap and plant residue are mildly acidic and gritty, and left on the blade they both dull the edge and invite rust. My routine is simple: wipe the blade with a rag, and if sap has set, a dab of rubbing alcohol or a dedicated tool cleaner dissolves it fast. Then I put one drop of light oil on the pivot and work the handles a few times so it spreads. That single habit has kept my primary pair cutting like new for years, and it takes less time than finding the pruner again next weekend.
Don’t underestimate the power of drying. The fastest way I’ve ruined a blade was leaving a pruner wet in the shed after a drizzle, and by spring it had a rust film that took real work to remove. Now, wet or dry, it gets wiped and oiled before it goes back on its hook. If you garden in a humid climate, a light coat of oil on the blade before long storage — say over winter — prevents the seasonal rust that silently eats an edge. Care isn’t glamorous, but it’s the gap between a tool that’s an heirloom and one that’s landfill by next summer.
Sharpening without ruining the edge
A pruner doesn’t need sharpening often, but when it starts tearing instead of slicing, a quick touch-up restores it. The rule I follow is to match the blade’s existing bevel and use a fine diamond file or a ceramic sharpening stone, working in a few light strokes from the base of the bevel toward the tip — never across the edge, which rounds it off. I learned the wrong way first, dragging a steel file sideways and turning a crisp bevel into a dull mush that took a professional stone to fix. Light and consistent beats hard and random every time, and you only need to raise a faint burr, then wipe it off.
After sharpening, I always re-oil the blade and check the cut on a soft green stem before trusting it on a valued plant. A properly touched-up bypass pruner should sever a herb stem in one clean squeeze with no crushing. If it still tears, the bevel is off and I stop rather than make it worse. The joy of a forged, replaceable-blade pruner is that even if I overdo a sharpening, a fresh blade is a small purchase away — but with a light hand, the original edge comes back repeatedly and the tool just keeps working. Sharpen gently, test often, and the pruner stays sharp for a very long time.
Troubleshooting: Symptoms, Causes and Fixes
Most pruner problems show up as a cut that goes wrong or a handle that won’t cooperate, and nearly all of them trace back to one of six causes. This is the table I keep in my head when a tool starts misbehaving.
| Symptom | Likely cause | Fix |
|---|---|---|
| Branch crushes and splits instead of cutting | Using an anvil on live wood, or bypass blade is dull | Switch to a sharp bypass pruner; sharpen or replace the blade |
| Handles won’t spring back open | Dry, gummed pivot or broken spring | Clean pivot, oil it, or fit a replacement spring |
| Blade sticks halfway through the cut | Branch exceeds rated diameter; forcing the tool | Use loppers or a pruning saw for the thicker branch |
| Rust film on the blade | Stored wet or humid without oil | Remove rust with fine steel wool, oil, and dry-store |
| Sap gums the mechanism mid-job | Uncoated blade, no wipe between cuts | Wipe with alcohol; choose a non-stick coated blade next time |
| Hand cramps after a few cuts | Wrong size, or too much force on thick stems | Size the pruner to your hand; try a ratchet or geared model |
FAQs
What type of pruner is best for general garden use?
For nearly every home garden task, a forge-bypass pruner is the best all-round choice. Bypass pruners slice live wood cleanly so cuts heal fast, which matters for roses, shrubs, fruit trees, and perennials — the plants you prune most. Anvil pruners crush the stem and are only suitable for dead, dry wood, so they belong as a secondary tool rather than your first. If you can only buy one pruner, make it a quality bypass with a replaceable forged blade and a comfortable grip. Reserve loppers and a pruning saw for the thicker branches a hand pruner shouldn’t be forced to cut.
How much should I spend on a good pair of pruners?
A reliable, long-lasting pair of hand pruners typically costs $25 to $45, and that range gets you a forged blade, a non-stick coating, a comfortable grip, and available replacement parts. Spending less usually means stamped metal and no spare blades, which turns the tool into a disposable item within a season or two. Spending more can buy premium ergonomics or brand prestige, but the core features that matter are present in the mid-range. The real saving comes from maintainability: a $38 pair with $12 of replacement blades over six years beats a $9 pair you throw away annually.
How do I know when to sharpen my pruners?
Sharpen when the pruner starts tearing or crushing stems instead of slicing them in one clean squeeze, or when you feel it dragging through green wood it used to cut easily. A light touch-up with a fine diamond file, matching the blade’s existing bevel and working from base to tip, is usually enough — you don’t need to remove much metal. Always test the cut on a soft stem afterward; if it still tears, the angle is wrong and you should stop rather than make it worse. Clean and oil the blade after sharpening, and you’ll keep the edge for a long time between sessions.
Are ratchet pruners worth it?
Yes, especially if you have smaller hands, arthritis, or a lot of pruning to do in one session. A ratchet pruner completes a cut in several small bites, spreading the effort across easy squeezes instead of one hard one, so your hand tires far more slowly. The trade-off is a slightly slower, step-by-step motion rather than a single snip, which some people dislike for fine work. For thick or numerous cuts, the reduced strain is a genuine quality-of-life upgrade. If you’ve ever quit pruning because your hand cramped, a ratchet or geared model is the feature that fixes it — buy on how the effort feels after an hour, not on raw cut capacity.
Can I use one pruner for everything in the garden?
You can handle the large majority of cuts with one good bypass pruner, but you shouldn’t force it past its rating. Hand pruners comfortably cut live branches up to about 3/4 inch (20 mm); beyond that, forcing the tool damages both the plant and the pruner. Keep loppers for branches roughly 1 to 2 inches and a pruning saw for anything larger, and use an anvil pruner only for dead wood. Matching the tool to the branch size is what keeps every tool working and every cut clean, so a small kit of three tools covers the whole garden better than one overworked pruner.
Sources and Further Reading
- Oregon State University Extension — Gardening
- NC State Extension — Extension Gardener Handbook
- Michigan State University Extension — Home Gardening
- Missouri Botanical Garden — Plant Finder
- University of Wisconsin Horticulture — Extension
About the author
Samantha has been gardening and arranging her own cut flowers for more than ten years, and has built more than 30 centerpieces from grocery-store bunches, clippings off the cedars behind her house, and a handful of dollar-store experiments that didn’t work. She writes practical, low-cost guides for beginners, including the versions that failed. Prices quoted in her articles are what she actually paid at US grocery and craft stores; nothing is sponsored and no brand pays for a mention. She is not a certified florist, a veterinarian or a horticulturist, and says so wherever a topic touches on plant safety or pet health.
Published: Oct 21, 2026 · Last updated: Oct 21, 2026.
{
“@context”: “https://schema.org”,
“@graph”: [
{
“@type”: “Article”,
“headline”: “Best Garden Pruners: What to Look for Before You Buy”,
“description”: “A practical buyer’s guide to garden pruners: why bypass beats anvil for live wood, what forged blades and coatings mean, how handles and ratchet mechanisms affect comfort, and the five checks to run before you buy.”,
“image”: [
“images/pruners-hero-clean.jpg”,
“images/pruners-types-clean.jpg”,
“images/pruners-use-clean.jpg”
],
“author”: { “@type”: “Person”, “name”: “Samantha” },
“publisher”: { “@type”: “Organization”, “name”: “Gmmur” },
“datePublished”: “2026-10-21”,
“dateModified”: “2026-10-21”,
“mainEntityOfPage”: {
“@type”: “WebPage”,
“@id”: “https://gmmur.com/best-garden-pruners-what-to-look-for”
}
},
{
“@type”: “FAQPage”,
“mainEntity”: [
{
“@type”: “Question”,
“name”: “What type of pruner is best for general garden use?”,
“acceptedAnswer”: {
“@type”: “Answer”,
“text”: “For nearly every home garden task, a forged bypass pruner is the best all-round choice because it slices live wood cleanly so cuts heal fast. Anvil pruners crush the stem and are only suitable for dead, dry wood, so they belong as a secondary tool. If you can only buy one pruner, make it a quality bypass with a replaceable forged blade and a comfortable grip.”
}
},
{
“@type”: “Question”,
“name”: “How much should I spend on a good pair of pruners?”,
“acceptedAnswer”: {
“@type”: “Answer”,
“text”: “A reliable pair of hand pruners typically costs $25 to $45 and gets you a forged blade, a non-stick coating, a comfortable grip, and available replacement parts. Spending less usually means stamped metal and no spare blades, turning the tool into a disposable item. The real saving comes from maintainability: a mid-range pair with replacement blades beats a cheap pair you throw away every year.”
}
},
{
“@type”: “Question”,
“name”: “How do I know when to sharpen my pruners?”,
“acceptedAnswer”: {
“@type”: “Answer”,
“text”: “Sharpen when the pruner starts tearing or crushing stems instead of slicing them in one clean squeeze. A light touch-up with a fine diamond file, matching the blade’s existing bevel and working from base to tip, is usually enough. Test the cut on a soft stem afterward; if it still tears, the angle is wrong and you should stop. Clean and oil the blade after sharpening to keep the edge.”
}
},
{
“@type”: “Question”,
“name”: “Are ratchet pruners worth it?”,
“acceptedAnswer”: {
“@type”: “Answer”,
“text”: “Yes, especially if you have smaller hands, arthritis, or a lot of pruning in one session. A ratchet pruner completes a cut in several small bites, spreading the effort across easy squeezes instead of one hard one, so your hand tires far more slowly. The trade-off is a step-by-step motion rather than a single snip. If you have ever quit pruning because your hand cramped, a ratchet or geared model is the feature that fixes it.”
}
},
{
“@type”: “Question”,
“name”: “Can I use one pruner for everything in the garden?”,
“acceptedAnswer”: {
“@type”: “Answer”,
“text”: “You can handle most cuts with one good bypass pruner, but you should not force it past its rating of about 3/4 inch (20 mm). Keep loppers for branches roughly 1 to 2 inches and a pruning saw for anything larger, and use an anvil pruner only for dead wood. Matching the tool to the branch size keeps every tool working and every cut clean.”
}
}
]
}
]
}