
The first raised bed I ever built looked perfect. I’d screwed the cedar boards together square, lined it with weed fabric, and then — because I was impatient and on a budget — I filled it with the cheapest “topsoil” the garden center had, plus a few scoops of whatever was in my compost tumbler that wasn’t quite finished. That first summer was a disaster: the soil sank three inches by July, the tomatoes were stunted and yellow, and a volunteer weed I didn’t recognize climbed the trellis faster than anything I’d planted on purpose. I’d built the pretty part and skipped the part that actually grows food. What I learned the slow way is that the soil inside the bed is the entire project, and the difference between a bed that feeds you and one that frustrates you is almost entirely about what you put in it and what you keep out. In this article I’ll show you the fill recipe I use now, the amendments that actually earn their place, the things I’d never put in a bed again, and how to keep the mix productive for years — including the mistakes that cost me a season.
Quick answer: fill a raised bed with a simple mix of roughly one-third screened topsoil, one-third compost, and one-third aeration material (coarse sand, perlite, or fine pine bark), rather than bagged “garden soil” alone or your native clay. That blend holds moisture and nutrients while still draining, so roots don’t drown or starve. Avoid fresh manure, uncomposted yard waste, and anything “soil-free” that’s really just peat; also skip cocoa bean hulls if you have dogs, because they’re toxic to them. Fill beds at least 10 to 12 inches deep for most vegetables (deeper for carrots and potatoes), and each spring top-dress with an inch or two of compost instead of tilling the whole thing up. Do that and you’ll spend your effort gardening, not fighting the dirt. The details below explain exactly how to mix, buy, and maintain it.
Why What’s Inside the Bed Matters More Than the Frame
The frame is the easy part
When you’re starting out, it’s natural to obsess over the frame — the wood, the corners, the height, whether to paint it. I did. But the box is just a container; it does nothing for your plants by itself. The moment I stopped treating the build as the project and started treating the fill as the project, my results changed completely. A beautiful cedar bed filled with dead, compacted subsoil will grow almost nothing, while a humble frame made of stacked untreated boards filled with a loose, living mix will grow more than you can eat. The plants don’t care what the sides look like; they care what their roots are sitting in. So before you over-invest in hardware, decide on your soil strategy, because that’s where the yield actually comes from. Every hour I now spend getting the mix right pays back tenfold at harvest, and every shortcut I take in the fill shows up as a problem by midsummer.
What “good soil” actually means
“Good soil” sounds vague, but it’s really four things at once: it drains so roots aren’t waterlogged, it holds enough water that you’re not watering twice a day, it’s rich in organic matter for slow nutrients, and it’s loose enough for roots to push through. Native ground soil often fails one of these — clay holds too much water and is too tight; pure sand drains too fast and holds nothing; bare topsoil has little life left after construction. A raised bed is your chance to engineer a mix that hits all four instead of fighting your yard’s defaults. The blend I describe below is built to balance those demands. When my first bed failed, it was because the “topsoil” I bought was mostly clay with no compost and no structure — it held water like a bowl and starved the plants of air. Understanding those four functions is what lets you judge any bag or bulk load before it goes in the bed.
The Fill Formula I Use (The Thirds Rule)
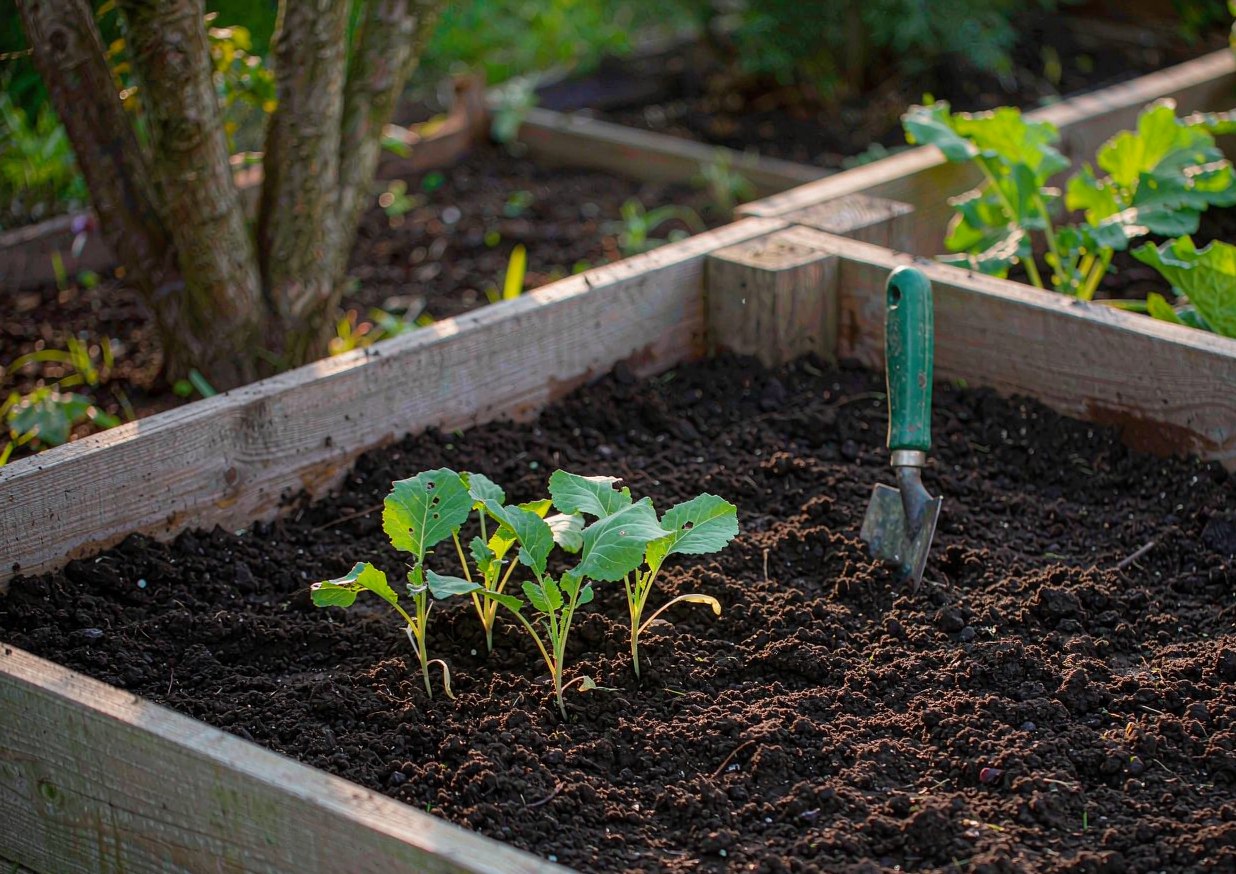 Photo provided by the author’s garden
Topsoil, compost, and aeration in thirds
The recipe I’ve landed on after a lot of expensive trial is dead simple: roughly one-third screened topsoil, one-third compost, and one-third aeration material. The topsoil gives bulk and mineral content; the compost gives nutrients and the microbial life that makes soil work; the aeration material — coarse sand, perlite, or fine pine bark fines — keeps the whole thing from packing into a brick. I mix it in a wheelbarrow or right on a tarp before filling, then water it in so it settles, because any mix compacts a little once wet. This “thirds” approach is forgiving: if your topsoil is heavy, add a bit more aeration; if it’s sandy, add a bit more compost. The point isn’t the exact ratio, it’s that all three roles are present. When I switched from “whatever was cheap” to this blend, my beds stopped sinking, stopped crusting over, and the same seeds I’d struggled with suddenly took off. It’s the single change that mattered most.
Why I avoid bagged “garden soil” alone
Here’s a trap I fell into early: I bought bags labeled “garden soil” thinking that was the answer, and they were terrible on their own. Many bagged “garden soil” products are mostly screened dirt with a little peat, and used by themselves they either crust on top or turn to concrete when dry. Worse, some are so dense they barely drain in a contained bed. The label “garden soil” is not regulated the way you’d hope, so it can mean almost anything. What I use bagged products for now is the compost and amendment portion, not as the whole fill. If you must use bags, look for ones that list compost and aerate well, and still cut them with topsoil and perlite. For a full bed, bulk screened topsoil and bulk compost from a landscape supplier is cheaper per cubic foot and usually better quality than retail bags. The lesson: read the ingredient list, and never let one product be the entire bed.
Topsoil: What to Buy and What to Skip
Screened vs unscreened
If you buy bulk topsoil — and for a real bed you should — ask specifically for screened topsoil. Screening means it’s been passed through a mesh to remove rocks, roots, and clumps, so it mixes smoothly and doesn’t leave air pockets that later collapse. Unscreened “fill dirt” is cheaper but it’s exactly that: fill, often subsoil scraped from a construction site, low in organic matter and full of debris. I once took a “free dirt” offer from a neighbor and spent a weekend picking out bricks and bits of plastic. Screened topsoil costs more per yard but saves you from mixing garbage into a bed you’ll live with for years. A good supplier will let you feel a sample; it should be dark, crumbly, and smell earthy, not sour or chemical. That small upgrade from unscreened to screened is the difference between a bed you fill once and forget, and one you’re constantly fishing rocks out of.
Don’t use your native clay straight
It’s tempting to just shovel the clay or sandy soil already in your yard into the bed to save money. I tried this the first time and regretted it: native clay, dumped into a raised bed, behaves exactly as badly as it did on the ground — it holds too much water, sheds the rest, and forms a hardpan that roots can’t penetrate. You’d be building a box around your problem instead of solving it. If you want to reuse some native soil, blend it with generous compost and aeration so it’s maybe a quarter of the mix, not the whole thing. The whole point of a raised bed is to escape your site’s worst soil trait, so don’t import it back in. A bed filled mostly with amended, purchased components gives you a clean slate and predictable results, which is the entire reason raised beds are worth the effort in the first place.
Compost: The Engine of the Bed
Homemade vs bought
Compost is the ingredient that turns dead dirt into living soil, and it’s worth getting right. Homemade compost is free and full of the biology your bed wants, but only if it’s truly finished — dark, crumbly, and earthy, with no recognizable food scraps. My early mistake was using half-finished compost that still had apple cores in it; it tied up nitrogen as it broke down in the bed and stalled my seedlings. Bought compost — from a municipality, a landscape yard, or bagged — is reliable if you buy “finished” compost and avoid products that are mostly wood waste, which can also rob nitrogen. I now use a mix: a base of bought finished compost for consistency, topped up each year with my own. Buy compost by the cubic yard from a trusted supplier and smell it before you load it; a sour or ammonia smell means it isn’t ready. Good compost is the single biggest lever on how much your bed produces.
How much is too much
More compost seems like it should be better, but there’s a ceiling. A bed that’s all compost holds water like a sponge, settles fast, and can overload young plants with soluble salts, especially with manure-based compost. I keep compost to about a third of the mix for the initial fill, then add only a top-dressing of an inch or two each spring rather than re-dumping half a bed. That steady, light replenishment feeds the soil without waterlogging it. If your compost is manure-heavy, go even lighter and let it age longer, because fresh or “hot” compost will burn tender roots — a lesson I learned when a spring top-dressing of fresh horse manure scorched a row of lettuce to the ground. The takeaway: compost is the engine, but like any engine, it runs best with the right fuel amount, not the whole tank dumped in at once.
Amendments That Earn Their Place
Perlite, coarse sand, and pine bark
Of all the bags at the garden center, only a few earn a spot in my beds. Perlite — those white puffed bits — is my go-to aeration for smaller beds and containers because it’s lightweight and never breaks down. Coarse builder’s sand (not play sand, which is too fine) is cheaper by the bag for large beds and improves drainage in heavy mixes, though you need a fair amount of it. Fine pine bark (sometimes called pine bark fines) is excellent in湿润 climates because it holds structure for years and resists compaction. I avoid vermiculite for outdoor beds — it’s fine for seed starting but collapses in a wet bed. The job of any of these is to keep the mix from turning to paste; pick the one that’s cheapest per cubic foot for your bed size and use it as your “third.” A bed with proper aeration stays loose for seasons instead of setting up like concrete after the first rain.
Lime and fertilizer — when and how little
The instinct to “feed” a new bed with a handful of this and that usually does more harm than good. Most quality compost-based mixes already contain what young plants need for the first several weeks, so I don’t dump synthetic fertilizer into a fresh bed. What I do check is pH: vegetables generally want a slightly acidic to neutral range around 6.0 to 7.0, and if a soil test says your mix is too acidic, a little agricultural lime per the test’s recommendation helps. I never guess at lime — too much swings the pH the wrong way and locks up nutrients. For ongoing feeding, I side-dress with compost or a diluted balanced liquid feed once plants are established and growing, rather than loading the whole bed up front. The restraint here matters: a bed built on good compost rarely needs much, and over-fertilizing just grows weak, pest-prone foliage. Test, then add the minimum.
What to Avoid Putting in a Raised Bed
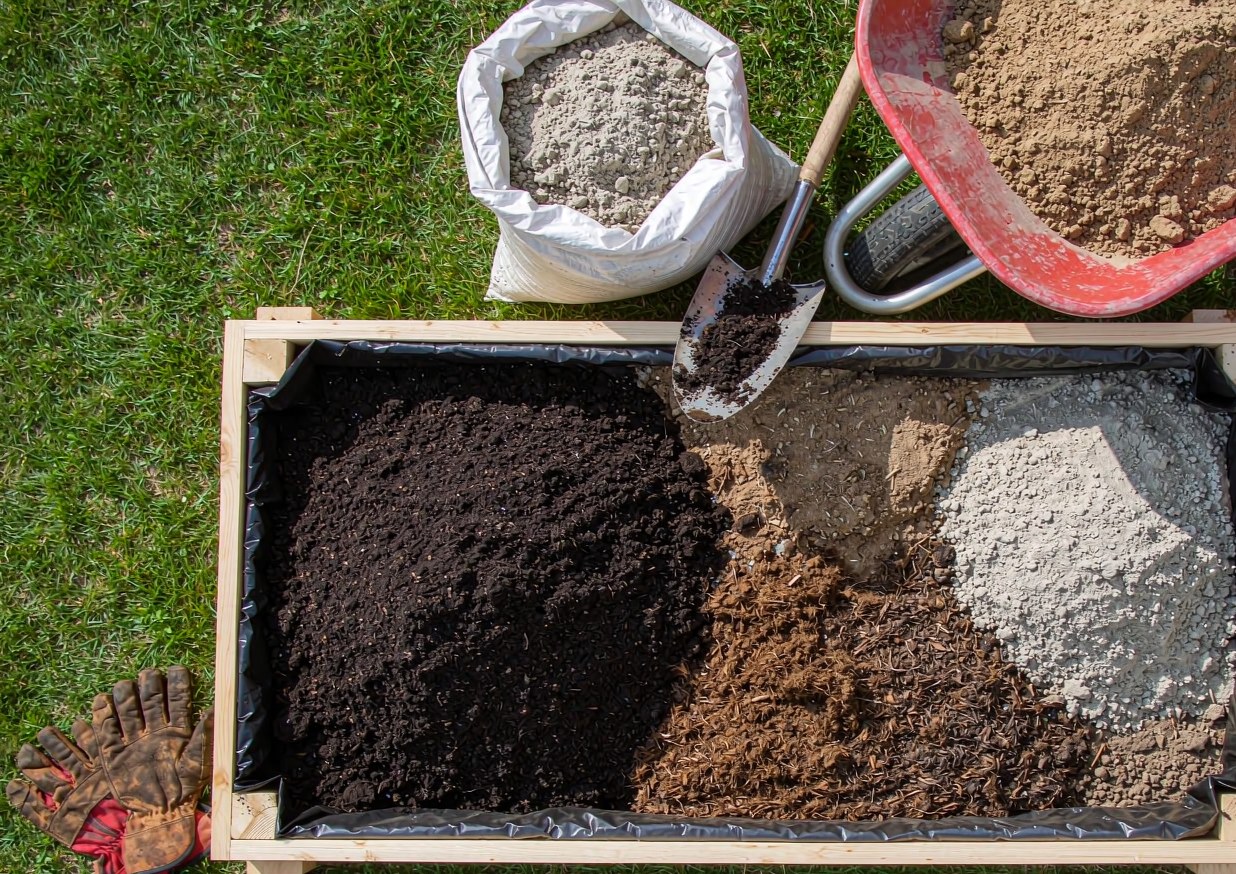 Photo provided by the author’s garden
Fresh manure and uncomposted material
The list of things I’ll never put in a bed again starts with fresh manure. It’s tempting — free, and “natural” — but uncomposted manure is “hot,” meaning it releases ammonia that burns roots and can carry pathogens and weed seeds by the thousand. I once mixed a neighbor’s fresh chicken manure into a bed in spring and watched my transplants wilt and die within days; the salt and ammonia load was too high. Manure is only safe after it has composted for many months at hot temperatures that kill weeds and pathogens. Likewise, uncomposted leaves, grass clippings, or kitchen scraps belong in the compost pile, not directly in the bed, because as they break down they pull nitrogen away from your plants and can sour the soil. The rule I follow: if it isn’t fully decomposed and earthy-smelling, it goes in the compost first. A raised bed is too contained and too valuable to use as a compost reactor.
Cocoa hulls around pets, and other traps
A few “natural” soil additions are quietly dangerous. Cocoa bean hulls — sold as a pretty, chocolate-smelling mulch — are toxic to dogs; they contain theobromine, the same compound that makes chocolate poisonous to them, and dogs that eat the hulls can become seriously ill. I’d never use them in a yard with a dog, and I mention it because it’s an easy trap to fall into at the garden center. Other traps: cat litter or “soil” made from industrial byproducts you can’t identify, and any “topsoil” that smells of chemicals or petroleum. Treated wood for the frame is a separate issue, but for the fill itself, stick to named, natural components you can trace. If you have pets, it’s worth checking any new soil product against a reliable list — I keep the ASPCA toxic and non-toxic plant list handy. To be clear, this is general information and not veterinary advice; if a pet eats something questionable, call your veterinarian or the ASPCA Animal Poison Control Center at (888) 426-4435 rather than waiting.
Filling Depth and the “Lasagna” Bottom
How deep is deep enough
Depth decides what you can grow, and it’s where a lot of first beds fall short. For most vegetables — lettuce, tomatoes, peppers, beans — a bed 10 to 12 inches deep of good mix is the practical minimum. Shallow-rooted greens tolerate less, but root crops like carrots and parsnips want 12 to 18 inches of loose soil or they fork and stall, and potatoes want even more. My first bed was only 6 inches deep and my carrots were stubby and useless. If you’re building new, go deeper rather than taller on the frame; extra depth is cheap compared to the lost harvest. Where the bed sits on poor ground, the depth of your mix matters even more because roots can’t escape into bad soil below. A deeper bed also holds water more evenly, meaning fewer midday wilting emergencies. When in doubt, build for the deepest-rooted crop you actually want to grow, not the average one.
Filling the bottom without wasting mix
Deep beds are expensive to fill entirely with premium mix, so a common trick is the “lasagna” or hugelkultur bottom: lay branches, twigs, leaves, and shredded cardboard in the bottom third, then top with your good mix. As that coarse organic material breaks down over a year or two, it holds water and slowly feeds the bed — and you save a lot of bought soil. I’ve done this in beds 18 inches and deeper and it works well, with one caveat: the bottom layer settles as it decomposes, so I fill to the brim initially and top up the next season. What I avoid is putting fresh, uncomposted wood right under shallow-rooted crops, because it ties up nitrogen as it breaks down; aged or partly rotted wood is safer. For a bed under about 12 inches, I skip the bottom layer and just use good mix, because there isn’t room to waste. The bottom-fill trick is a money-saver, not a required step, and it’s best reserved for genuinely deep beds.
Keeping the Bed Productive Year After Year
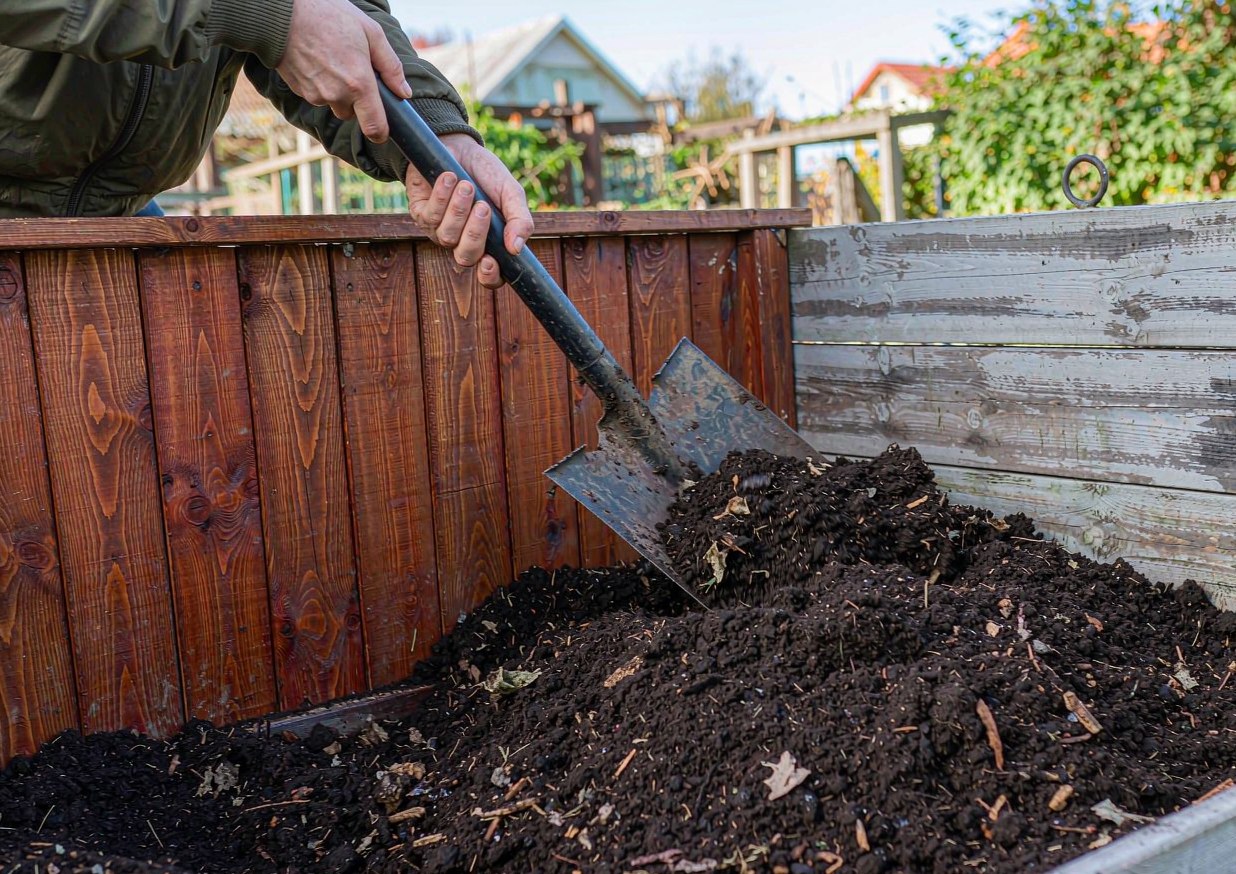 Photo provided by the author’s garden
Top-dressing each spring
A raised bed isn’t a one-time fill and forget; the mix slowly loses organic matter as it’s used by plants and broken down by soil life. My maintenance habit is to top-dress each spring with an inch or two of finished compost, spread on the surface and lightly forked in just the top few inches. I do not till the whole bed up every year — deep tilling destroys soil structure and the fungal networks that help plants, and it brings buried weed seed to the surface. A light surface feeding keeps the biology fed and the texture loose. Over a few years I might also add a little more aeration if the bed has settled and compacted. This small annual ritual is why my oldest beds now grow better than they did when new: the soil has matured into something alive. Skipping it is how beds quietly decline until you wonder why nothing thrives anymore.
When to replace versus refresh
Eventually a bed’s mix gets tired — depleted, compacted, or taken over by weeds from neglected top-dressing — and you face the choice of refresh or replace. I almost never replace the whole thing; instead I refresh by adding compost and aeration on top and working it into the top layer, which restores most of what’s lost. A full replacement only makes sense if the bed was filled with bad material to begin with (my first clay-filled disaster qualified) or if a soil-borne disease took hold. Even then, I often just rebuild the mix in place rather than hauling everything out. The economics favor refresh: a bag or two of compost and perlite each year costs a fraction of a full re-fill and keeps the bed in a permanent state of improvement. Knowing the difference between “tired and fixable” and “failed and worth rebuilding” saves both money and a weekend of heavy lifting.
Two habits keep that refresh from ever becoming an emergency. First, I rotate what goes where: tomatoes and other heavy feeders move to a different bed or a different corner each year, while legumes like bush beans go where the tomatoes were to quietly rebuild nitrogen. Second, I let the bed rest in the off-season with a living cover — a quick sowing of annual rye or crimson clover in fall — instead of leaving bare soil to crust over and shed winter rain. The cover holds the structure the earthworms and mycorrhizae spent the season building, and it gives me something green to look at in February. By spring the roots have done the loosening I would otherwise pay for in fork-work, and a single chop-and-drop turnunder adds a free layer of organic matter right where the next crop needs it.
Troubleshooting: Symptoms, Causes and Fixes
Most raised-bed soil problems announce themselves within the first season. This is the table I wish I’d had before my first bed failed.
| Symptom | Likely cause | Fix |
|---|---|---|
| Soil sank several inches by midsummer | Unfinished compost or loose uncompacted fill | Top up with compost mix; water in and re-level each season |
| Plants stunted and yellow despite watering | Clay-heavy or nutrient-poor fill | Top-dress with compost; consider a soil test for pH |
| Water pools on top and won’t soak in | Lack of aeration; compacted mix | Mix in perlite or coarse sand; fork the top layer |
| Seedlings wilt after adding manure | Fresh “hot” manure burned roots | Flush with water; use only finished compost next time |
| Dog sick after being in the yard | Cocoa hull mulch or toxic plant material | Remove cocoa hulls; call vet / ASPCA (888) 426-4435 |
| Carrots forked and stubby | Bed too shallow or stony | Deepen bed to 12-18 in of loose mix for roots |
FAQs
What is the best mix to fill a raised garden bed?
The mix I recommend is roughly one-third screened topsoil, one-third finished compost, and one-third aeration material such as coarse sand, perlite, or fine pine bark. That balance drains well while still holding moisture and nutrients, which is what most vegetables want. Avoid filling the bed entirely with bagged “garden soil” or your native clay, because both tend to compact and either waterlog or starve roots. For a deep bed, you can fill the bottom third with branches and leaves to save on bought mix, then cap with the good blend. Mix the components before filling and water in so it settles, then top up if it drops.
Can I use my own backyard soil in a raised bed?
You can reuse some native soil, but not as the whole fill. Native clay or sand, dumped into a bed, keeps the same problems it had on the ground — poor drainage or poor water retention — so you’d just be building a box around your problem. If you blend in a modest amount, keep it to about a quarter of the mix and compensate heavily with compost and aeration. The entire reason raised beds are worth the effort is that they let you escape your site’s worst soil trait, so importing that trait back in defeats the purpose. For predictable results, base the fill on purchased screened topsoil and finished compost.
What should I never put in a raised bed?
Three things top my never-again list: fresh manure, because it’s “hot” and burns roots while carrying weeds and pathogens; uncomposted leaves, grass, or kitchen scraps, because they tie up nitrogen as they break down; and mystery “topsoil” or industrial byproducts you can’t identify. Also skip cocoa bean hull mulch if you have a dog — it contains theobromine and is toxic to them. Stick to named, natural components you can trace: screened topsoil, finished compost, and a known aeration material. If you’re unsure whether a product is safe around pets, check a reliable plant-toxicity list before using it.
How deep should a raised bed be?
For most vegetables like lettuce, tomatoes, peppers, and beans, aim for 10 to 12 inches of good mix as a practical minimum. Leafy greens tolerate slightly less, but root crops such as carrots and parsnips want 12 to 18 inches of loose soil or they fork and stall, and potatoes want even more. My first bed was only 6 inches deep and produced useless stubby carrots, so I’d rather you build deeper than you think you need. Depth also helps the bed hold water evenly and reduces midday wilting. Build for the deepest-rooted crop you actually intend to grow.
How do I keep a raised bed productive year after year?
Each spring, top-dress the bed with one to two inches of finished compost, forked lightly into just the top few inches — do not deep-till, which destroys soil structure. Add a little aeration if the bed has settled and compacted. Refresh this way rather than replacing the whole fill; a full rebuild is rarely necessary unless the bed was originally filled with bad material or a soil disease took hold. A small annual compost top-dressing is far cheaper than a complete re-fill and keeps the soil improving over time. Consistent light feeding is what makes older beds outperform new ones.
Sources and Further Reading
- NC State Extension — Extension Gardener Handbook
- Michigan State University Extension — Home Gardening
- University of Illinois Extension — Home Gardening
- ASPCA — Toxic and Non-Toxic Plants List
- Royal Horticultural Society — Gardening Advice
About the author
Samantha has been gardening and arranging her own cut flowers for more than ten years, and has built more than 30 centerpieces from grocery-store bunches, clippings off the cedars behind her house, and a handful of dollar-store experiments that didn’t work. She writes practical, low-cost guides for beginners, including the versions that failed. Prices quoted in her articles are what she actually paid at US grocery and craft stores; nothing is sponsored and no brand pays for a mention. She is not a certified florist, a veterinarian or a horticulturist, and says so wherever a topic touches on plant safety or pet health.
Published: Oct 30, 2026 · Last updated: Oct 30, 2026.
{
“@context”: “https://schema.org”,
“@graph”: [
{
“@type”: “Article”,
“headline”: “Raised Bed Soil: What to Fill It With and What to Avoid”,
“description”: “Fill a raised bed with about one-third screened topsoil, one-third finished compost, and one-third aeration. Avoid fresh manure, uncomposted material, and cocoa hulls around pets.”,
“image”: [
“images/raised-bed-hero-clean.jpg”,
“images/raised-bed-materials-clean.jpg”,
“images/raised-bed-process-clean.jpg”
],
“author”: { “@type”: “Person”, “name”: “Samantha” },
“publisher”: { “@type”: “Organization”, “name”: “gmmur.com” },
“datePublished”: “2026-10-30”,
“dateModified”: “2026-10-30”,
“mainEntityOfPage”: {
“@type”: “WebPage”,
“@id”: “https://gmmur.com/2026/10/30/raised-bed-soil-what-to-fill-avoid”
}
},
{
“@type”: “FAQPage”,
“mainEntity”: [
{
“@type”: “Question”,
“name”: “What is the best mix to fill a raised garden bed?”,
“acceptedAnswer”: {
“@type”: “Answer”,
“text”: “Use roughly one-third screened topsoil, one-third finished compost, and one-third aeration material such as coarse sand, perlite, or fine pine bark. That balance drains while holding moisture and nutrients. Avoid filling entirely with bagged garden soil or native clay, which compact. For deep beds, fill the bottom third with branches and leaves to save on bought mix, then cap with the good blend.”
}
},
{
“@type”: “Question”,
“name”: “Can I use my own backyard soil in a raised bed?”,
“acceptedAnswer”: {
“@type”: “Answer”,
“text”: “You can reuse some native soil, but not as the whole fill. Native clay or sand keeps the same problems it had on the ground, so keep it to about a quarter of the mix and compensate heavily with compost and aeration. The point of a raised bed is to escape your site’s worst soil trait, so importing it back in defeats the purpose. Base the fill on purchased screened topsoil and finished compost.”
}
},
{
“@type”: “Question”,
“name”: “What should I never put in a raised bed?”,
“acceptedAnswer”: {
“@type”: “Answer”,
“text”: “Never put fresh manure (it burns roots and carries weeds and pathogens), uncomposted leaves, grass, or kitchen scraps (they tie up nitrogen), or unidentified topsoil and industrial byproducts. Skip cocoa bean hull mulch if you have a dog, because it contains theobromine and is toxic to them. Stick to named, traceable components: screened topsoil, finished compost, and a known aeration material.”
}
},
{
“@type”: “Question”,
“name”: “How deep should a raised bed be?”,
“acceptedAnswer”: {
“@type”: “Answer”,
“text”: “For most vegetables aim for 10 to 12 inches of good mix. Leafy greens tolerate slightly less, but root crops like carrots and parsnips want 12 to 18 inches of loose soil, and potatoes want more. A too-shallow bed produced stubby carrots in my first attempt, so build deeper than you think you need. Depth also helps the bed hold water evenly and reduces wilting.”
}
},
{
“@type”: “Question”,
“name”: “How do I keep a raised bed productive year after year?”,
“acceptedAnswer”: {
“@type”: “Answer”,
“text”: “Each spring top-dress with one to two inches of finished compost, forked lightly into the top few inches; do not deep-till, which destroys soil structure. Add a little aeration if the bed has settled. Refresh this way rather than replacing the whole fill, which is rarely necessary. A small annual compost top-dressing is cheaper than a full re-fill and keeps the soil improving over time.”
}
}
]
}
]
}