
If you’re thinking about starting a compost pile but you’re worried it’s going to stink up the yard, I get it — that was exactly what stopped me for two years. The first pile I built behind the garage smelled like a dumpster by week three, and my neighbor (kindly, but firmly) asked me to do something about it. The good news: a smelly compost pile is almost never unavoidable. In my experience it’s a sign of two specific mistakes, and both are easy to fix. Once I learned the brown-to-green ratio and gave the pile some air, my compost stopped smelling at all — to the point where I can stand right over it and only smell damp earth. In this article I’ll walk you through exactly how I set up an odor-free compost pile from scratch, including the things I got wrong, so you can skip the embarrassing conversation with the neighbor.
Quick answer: a compost pile smells because it has too many greens (nitrogen) and not enough air. Fix it with three habits. First, aim for roughly 3 parts brown material to 1 part green by volume — browns are dead leaves, cardboard and shredded paper; greens are kitchen scraps and fresh grass. Second, keep the pile as damp as a wrung-out sponge, never soggy, because wet + packed = anaerobic = stink. Third, turn it once a week to push air back through. Do those three and a backyard pile stays quiet and earthy instead of foul. Everything below explains why each step works and how to recover a pile that already smells.
- 1. Why a Smelly Compost Pile Is a Sign Something Is Off
- 2. The Brown-to-Green Ratio You Actually Need
- 3. Picking a Spot and a Bin That Breathe
- 4. Building the Pile Layer by Layer
- 5. Water and Air: The Two Controls That Prevent Smell
- 6. What to Toss In — and What to Keep Out
- 7. Keeping Pets and Kids Safe Around the Bin
- 8. A Simple Weekly Routine That Stays Quiet
- 9. Troubleshooting: Symptoms, Causes and Fixes
- 10. FAQs
- 11. Sources and Further Reading
Why a Smelly Compost Pile Is a Sign Something Is Off
The two things that actually cause the stink
When a compost pile smells bad, people assume composting is just naturally stinky. It isn’t. A healthy, active pile smells like forest floor after rain — earthy and a little sweet. The bad smell, the kind that drifts to the fence line, comes from anaerobic decomposition: microbes that live without oxygen breaking material down and releasing compounds like ammonia, hydrogen sulfide and putrescine. Those are the “rotten egg” and “sewer” notes you’re smelling.
Two conditions let those microbes take over. The first is too much nitrogen-rich “green” material in one spot — a pile of grass clippings or a week of food scraps with no browns to balance them. The second is compaction and poor airflow, usually from the pile being too wet or too tightly packed. My first pile failed on both counts: I’d dump the kitchen bucket on top every evening and never turn it, so the center went slimy and anaerobic. Fix either condition and the smell usually disappears within a few days. The rest of this article is really just techniques for keeping those two things in check.
Why my first pile reeked for a month
I want to be honest about how I learned this, because the mistake is common. When I started, I treated the compost bin like a garbage can — anything organic went in, and I assumed “nature” would handle it. What I didn’t realize was that a closed plastic bin with a tight lid and a pile of watermelon rinds at the bottom is a perfect sealed, wet, nitrogen-heavy chamber. It brewed anaerobic goo for about a month before I dealt with it.
The fix turned out to be simple once I knew what to look for. I opened the lid, mixed in two big lawn-and-leaf bags of dry leaves, poked a garden fork through it a dozen times to punch air channels, and left the lid cracked open afterward. Within four days the sewer smell was gone and it smelled like plain dirt. That single experience taught me more than any article: smell is feedback. It’s the pile telling you it’s out of balance, not that composting is broken. Keep that mindset and the rest of the setup is straightforward.
The Brown-to-Green Ratio You Actually Need
What counts as a “brown” and what counts as a “green”
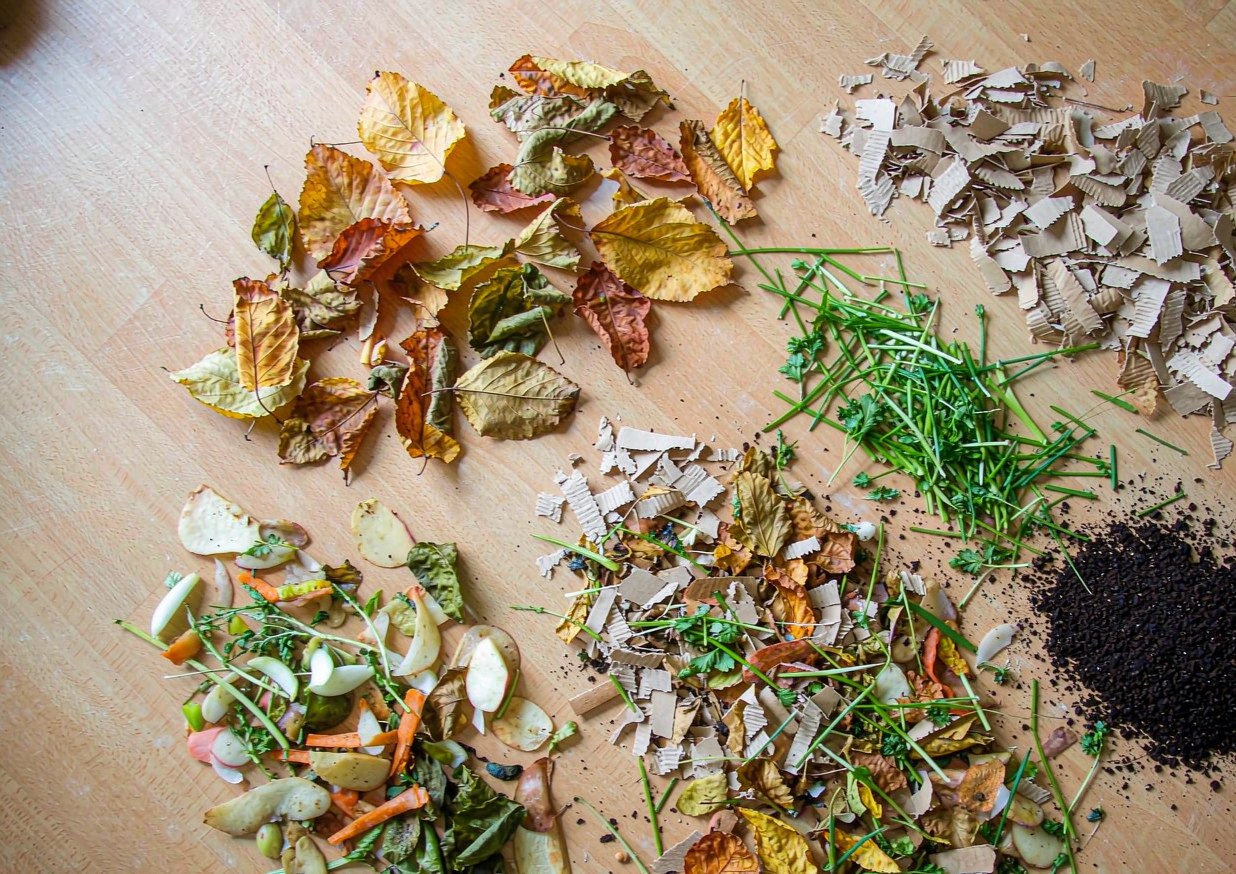
The single most useful idea in composting is the brown-to-green ratio. “Greens” are materials high in nitrogen: fruit and vegetable scraps, coffee grounds, fresh grass clippings, plant trimmings, eggshells. They’re the moist, soft, fast-rotting stuff. “Browns” are high in carbon: dry leaves, shredded cardboard, newspaper, paper towel rolls, straw, sawdust, and dead plant material. The browns are the dry, structural stuff that gives microbes something to chew on slowly and that creates air pockets.
Here’s the part beginners miss: it’s the ratio of browns to greens that controls smell, not the total amount of food scraps. A pile made only of greens collapses into a wet, airless mat. A pile made mostly of browns just sits there, dry and slow, but it never smells. So the goal is a balance. I keep a covered tote of shredded cardboard and a bag of dry leaves next to my bin all year so I always have browns ready the moment I add greens. If you only remember one thing from this article, make it this: always cover fresh food scraps with a layer of browns.
How I balance a bucket of kitchen scraps
So what ratio should you actually shoot for? Most Extension services recommend roughly 2 to 3 parts brown to 1 part green by volume. I aim for about 3:1 because I’d rather err on the side of “too many browns” — that’s the safe, odor-free direction. To make it concrete: when I empty a typical kitchen scrap bucket (maybe two quarts of peels, coffee, and trimmings), I cover it with about six quarts of shredded leaves or cardboard. Visually, the greens should disappear under the browns.
A practical trick I use: pre-shred your cardboard. A whole cereal box takes months to break down and can mat together; torn into postage-stamp pieces it disappears in weeks and creates far better airflow. I keep a paper shredder in the garage for junk mail and toilet-paper rolls. The University of Illinois Extension composting guide makes the same point — particle size and mixing matter as much as the ratio itself. Get the ratio and the shredding right and you’ve solved 80% of compost smell problems before they start.
Picking a Spot and a Bin That Breathe
Sun, shade, and drainage matter more than you think
Where you put the compost pile affects both how fast it breaks down and whether it smells. I keep mine in a spot that gets morning sun and afternoon shade. Some sun warms the pile so microbes work faster, but all-day baking dries it out and forces you to add water constantly. Drainage is the bigger deal for smell: never build a pile in a low, soggy corner where rainwater pools, because a waterlogged pile is an anaerobic pile by definition. If your only option is damp ground, lift the pile onto a pallet or a wire base so air reaches the bottom.
I also keep the bin a few feet from the house and the property line, partly for courtesy and partly because you want to be able to turn it without annoying anyone. One thing I learned the hard way: a pile sitting directly on compacted clay stayed wet and smelly at the base all summer. Lifting it onto a wooden pallet with gaps for airflow fixed the bottom layer completely. The EPA’s home composting page stresses the same basics — aeration and moisture control — as the foundation of an odor-free system. Location is your first lever.
Open pile, tumbler, or enclosed bin — what I use
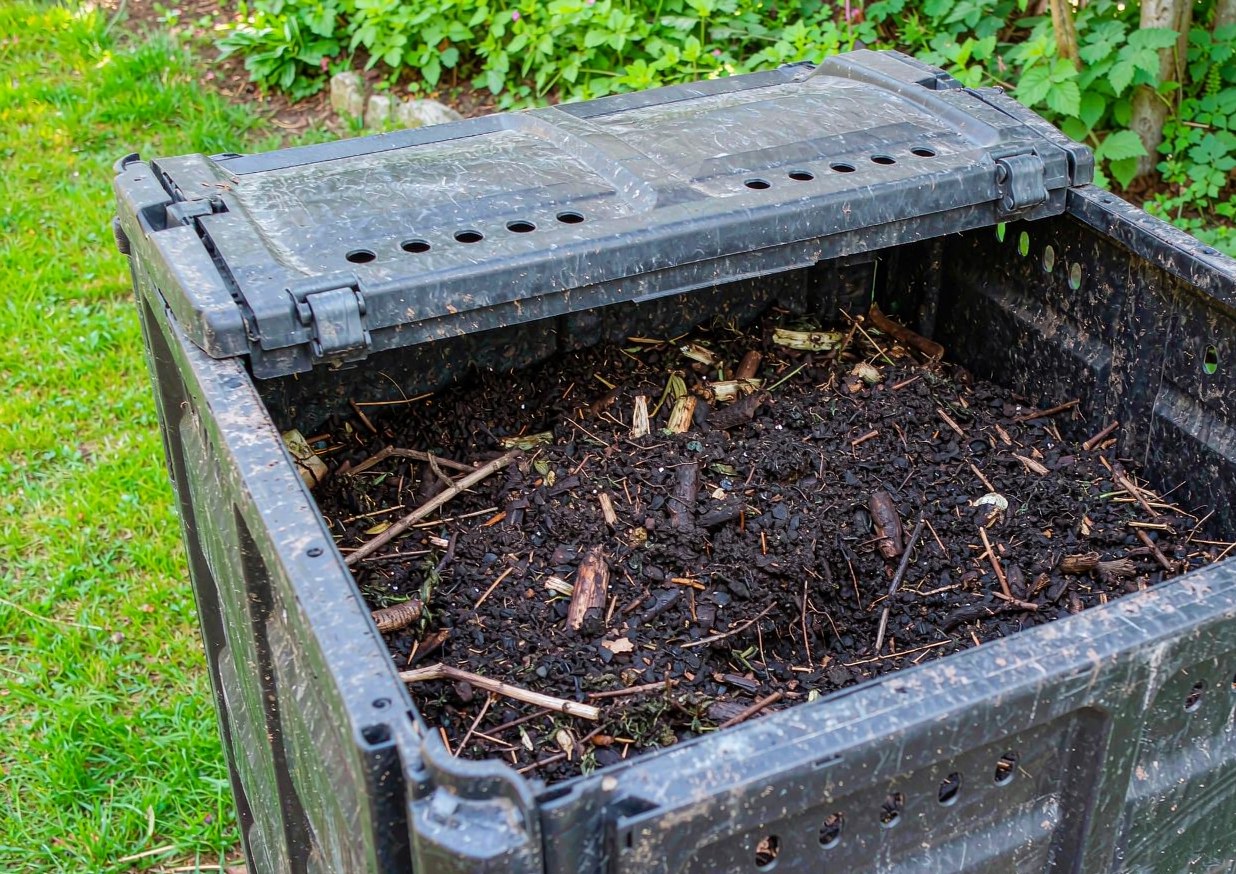
You don’t need fancy equipment, but the container shapes the airflow. An open pile on the ground is cheapest and breathes best, but it’s exposed to pests and looks messy. A tumbler (a sealed rotating drum on a stand) is tidy and turns in seconds, which is great for airflow, but it’s small and can go anaerobic if you overfill it with greens. An enclosed bin with side vents, like a plastic compost bin with a lid, keeps animals out but needs you to actively manage air since it’s more closed.
For an odor-free start I recommend a simple enclosed bin with ventilation or a three-sided pallet structure you can fork through. I run a basic vented bin plus a pitchfork, and it’s been enough for a household of two. If you go with a tumbler, the rule is to fill it only about two-thirds and turn it every few days — full and stagnant is exactly how tumblers start to smell. Whatever you choose, make sure you can easily get air and a fork into the middle, because the middle is where smell problems begin.
Building the Pile Layer by Layer
The lasagna method that kept mine odor-free
The easiest way to keep the ratio right while you build is the lasagna method: you alternate thin layers of greens and browns instead of dumping them in lumps. I start with a 4-inch layer of coarse browns (twigs, straw, shredded leaves) on the bottom for drainage, then a 2-inch layer of greens, then a 2- to 3-inch layer of browns to cover, repeating as I go. Each green layer gets tucked under browns, which traps odors and keeps fruit flies down.
This layering is what finally made my pile quiet. When I used to dump scraps in a heap, the green layer sat on top, fermented, and smelled. With lasagna layering the greens are buried, the browns wick moisture, and air moves through the coarse bottom layer. The Michigan State University composting basics describes a very similar approach and notes that covering fresh material is the single most reliable way to prevent odor and pests. If you build in layers from day one, you rarely have to rescue a stinky pile later.
How big the first layer should be
Size matters for a different reason: a pile needs enough mass to hold heat, but not so much that the center suffocates. I aim for a bin or pile roughly 3 feet by 3 feet by 3 feet — about a cubic yard. Smaller than that and it won’t heat up or break material down efficiently; much bigger and the center gets so dense that air can’t penetrate, which is another path to anaerobic smell. For a first-time backyard composter, one standard bin that size is plenty.
If you’re using a tumbler or a small bin, don’t try to force the cubic-yard rule — just keep the green-to-brown balance and turn often. The first bottom layer should always be coarse and about 4 to 6 inches deep so water drains and air enters from below. I learned to resist the urge to pack it down; a loose, fluffy pile with visible gaps between materials smells better than a tamped one every time. Think “lightly stacked,” not “stomped flat,” and you’ll keep the air where the microbes need it.
Water and Air: The Two Controls That Prevent Smell
The wrung-out-sponge test for moisture
If the brown-to-green ratio is the recipe, then moisture and air are the cooking conditions. The target is a pile as damp as a wrung-out sponge — wet to the touch but you can’t squeeze a drop out. Too dry and microbes go dormant; too wet and you get the anaerobic stink. I check by grabbing a handful from the middle: if water drips, it’s too wet (add browns and turn); if it crumbles dry, it’s too dry (add a little water or more greens).
Most smell problems I see are on the too wet side, because people add food scraps (which are mostly water) and rainy weather without compensating with browns. If your pile is soggy, spread it out, mix in dry leaves or shredded cardboard, and leave the lid off for a day or two so it can breathe and dry slightly. The Missouri Botanical Garden composting guide also points out that a covered pile in rainy climates needs periodic “fluffing” to avoid waterlogging. Moisture control is half the battle against odor.
Why turning once a week beats turning every day
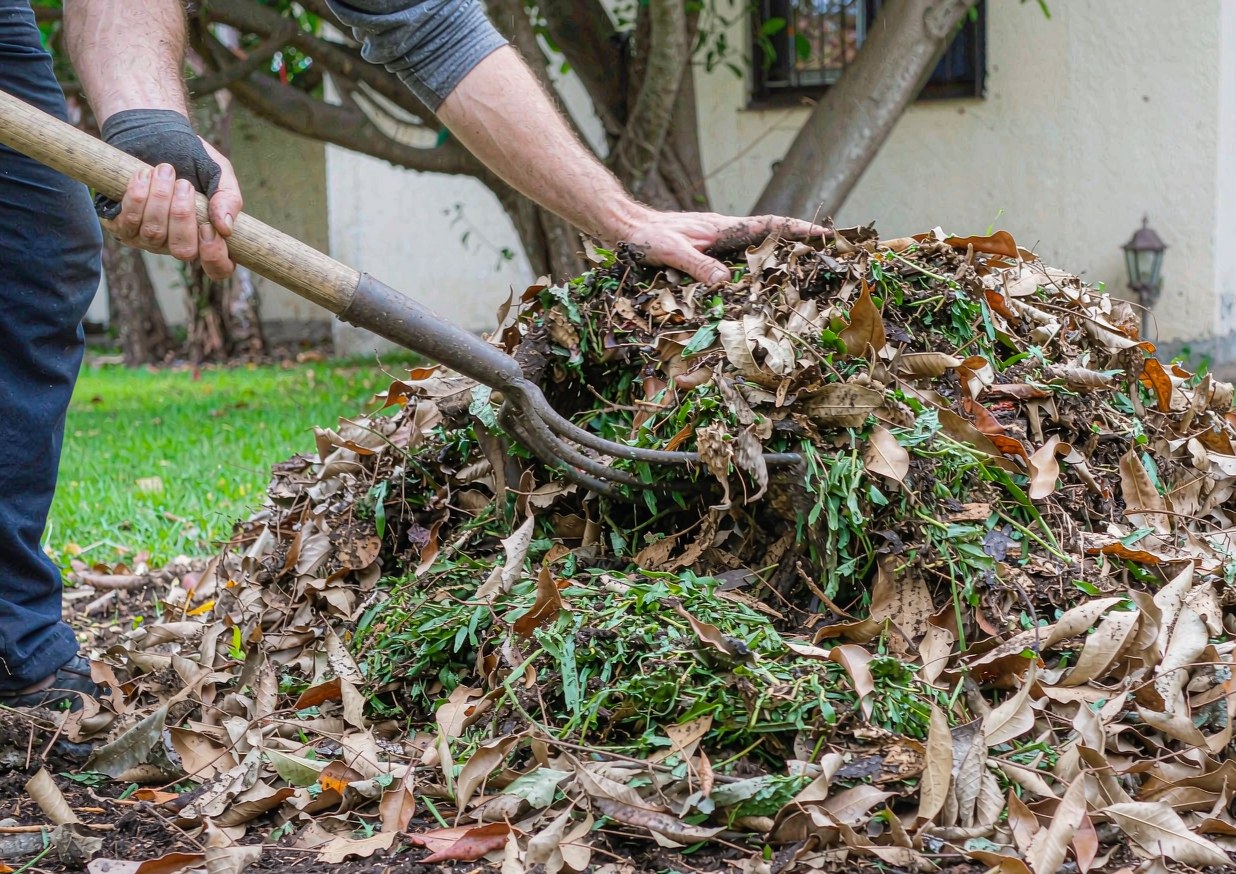
Turning — mixing the pile with a fork or tumbler — is how you put oxygen back into it. The common beginner mistake is either never turning (smell) or turning daily (which cools the pile and slows breakdown). I settled on once a week for an active pile, and that single habit keeps mine odor-free through summer. Turning moves the smelly, oxygen-starved center material to the outside where it gets air, and it evens out moisture.
I don’t overthink the technique. Once a week I fork the pile: outside material to the middle, middle to the outside, and break up any clumps. If it smells at all while I’m turning, I know it was due — and by the next day it’s fine. In winter I drop to every two or three weeks because cold slows everything anyway. The point isn’t a rigid schedule; it’s not letting the center sit untouched for weeks. A weekly turn is the cheapest insurance against a stinky pile you’ll be embarrassed to stand near.
What to Toss In — and What to Keep Out
Kitchen scraps that are safe (and the ones that attract pests)
Most kitchen waste is great compost fuel: vegetable and fruit peels, coffee grounds and filters, tea bags (minus the staple), eggshells, stale bread, and cooked plain rice or pasta in small amounts. These are all “greens” and break down fast. The ones to be careful with are strong-smelling or fatty scraps — onion, garlic, and citrus in moderation are fine, but large amounts can slow worms and annoy pests, and anything oily or meaty should stay out of a simple backyard pile (more on the “never” list below).
The pest angle is where smell and nuisance overlap. Food scraps on the surface are what draw flies, raccoons, and rats, and a pest problem usually starts as a smell problem. My rule: never leave greens exposed. Every scrap goes in and gets a brown blanket on top the same day. I also avoid adding a lot of one strongly aromatic thing at once — a whole bag of onion skins, say — because concentrated odors attract attention. Keep scraps buried and balanced and the bin stays both quiet and critter-free.
Yard waste, paper, and the “never” list
Your yard is the best source of free browns: fall leaves, spent annuals, small prunings (chipped or shredded), straw, and pine needles in moderation. Shredded paper, cardboard, and newspaper are browns too and are gold for balancing a kitchen-heavy pile. Grass clippings are greens and excellent in thin layers, but a thick fresh layer mats and smells, so I always mix them with leaves immediately.
Then there’s the never list, and it matters for smell and safety alike: meat, fish, bones, dairy, oily food, and pet waste don’t belong in a basic backyard pile. They smell terrible as they rot, they attract pests, and pet waste can carry pathogens you don’t want near food gardens. Treated lumber, glossy colored paper, and weeds that have gone to seed are also out. Stick to plant and plain-food scraps and clean paper, and you remove the most common sources of a foul, pest-prone pile before you even start.
Keeping Pets and Kids Safe Around the Bin
Why dogs and compost don’t mix
This section is worth saying plainly, because it’s a real hazard that gets overlooked. Compost — especially scraps like moldy bread, fruit, and coffee grounds — can be toxic to dogs. As it ferments, it can produce compounds and molds that cause serious illness if a dog digs in and eats a mouthful. My dog once knocked the lid off an unsecured bin and helped himself; he was fine after a vet visit, but it was a scare I could have avoided with a latch.
So I treat the bin as off-limits, not a toy. The practical steps: use a bin with a secure, dog-proof latch, site it where the dog can’t shoulder it open, and never leave finished or half-finished compost in an open pile within reach. If you garden with pets, it’s worth checking any plant material you add against a poison-control resource — the ASPCA toxic and non-toxic plant list is the one I use. The bottom line, and I want to be clear about this: this is general safety information, not veterinary advice. If you think a pet has eaten compost or a questionable plant, call your veterinarian or the ASPCA Animal Poison Control Center at (888) 426-4435 rather than waiting to see what happens.
A fence and a lid solved my raccoon problem
Dogs aren’t the only visitors. In my old neighborhood, raccoons figured out the bin within a week and scattered it every few nights. The smell of exposed food was the lure. Two changes ended it: a weighted lid with a latch and a simple ring of garden fencing (the short wire mesh kind) strapped around the bin so it can’t be tipped. No more midnight raids, and no more smell escaping.
For kids, the main risks are less about the compost itself and more about what they might put in it or trip over. I keep the bin in a corner of the yard, not on a path, and I’ve taught my nieces and nephews that it’s “grown-up gardening equipment,” not a sandbox. If you have little ones, a enclosed bin with a lid also keeps them from poking into half-decomposed material. None of this is complicated — a lid, a latch, and a sensible location handle the vast majority of pet and child safety concerns around a home compost setup.
A Simple Weekly Routine That Stays Quiet
The five-minute check I do every Saturday
The reason my pile stays odor-free now is that I turned composting into a tiny weekly habit instead of a project I ignored for a month. Every Saturday I spend about five minutes: I add the week’s browns and greens in layers, give it one fork-turn, and do the wrung-out-sponge check on moisture. If it’s dry I sprinkle a little water; if it’s wet I add browns. That’s the whole routine.
Doing it weekly means problems never accumulate. A smell that’s caught on day seven is a ten-minute fix; a smell ignored for a month is a restructure. I also keep a small “browns reserve” — a tote of shredded cardboard and a bag of leaves — right next to the bin so there’s never an excuse to skip the covering step. The Illinois Extension and other university guides all converge on the same message: consistent, light maintenance beats heroic occasional fixes. Make it a Saturday habit and the pile basically runs itself.
Troubleshooting the pile by season
Seasons change what your compost pile needs, and adjusting keeps it quiet year-round. In spring and summer, things heat up fast and piles dry out, so I check moisture more often and add water during dry spells. In fall, the leaf bonanza gives me free browns for months — I bag extras so I have them in spring when greens outnumber browns. In winter, the pile slows and can get wet under snow cover; I turn less and keep the lid on, accepting slower breakdown until it warms.
The seasonal trap is over-watering in wet months and letting a summer pile go bone dry. Both lead to smell or stalled rot. I keep a cheap rain gauge nearby and ease off adding water during rainy weeks. If you compost through a cold winter, don’t panic when activity drops — a quiet, cool pile that doesn’t smell is doing fine; it’s just paused. Adjust to the season, keep the weekly five-minute habit, and you’ll have finished compost by the time your gardens need it.
Troubleshooting: Symptoms, Causes and Fixes
Most compost problems show up as a smell or a stalled pile, and nearly all trace back to one of five causes. Here’s the table I keep by the bin.
| Symptom | Likely cause | Fix |
|---|---|---|
| Rotten-egg or sewer smell | Too many greens, not enough air (anaerobic) | Mix in browns, turn to add air, leave lid cracked |
| Ammonia / urine smell | Excess nitrogen, greens sitting exposed | Cover scraps with a thick brown layer; reduce fresh grass |
| Soggy, matted, no heat | Too wet; compacted center | Add dry leaves/cardboard, turn, lift onto a pallet |
| Pile just sits there, dry | Too many browns, too dry | Add greens and a little water; aim for wrung-out sponge |
| Fruit flies / pests around bin | Greens left on the surface | Bury all food scraps under browns; secure the lid |
| Strong smell only after rain | Waterlogged, poor drainage | Move to higher ground or pallet; cover top during storms |
FAQs
Why does my compost pile smell like rotten eggs?
That specific smell is hydrogen sulfide, and it’s a clear signal the pile has gone anaerobic — microbes are breaking material down without oxygen. It almost always means there’s too much nitrogen-rich green material (food scraps, fresh grass) and not enough air. The fastest fix is to mix in a generous amount of browns like dry leaves or shredded cardboard, fork the pile to punch oxygen through the center, and leave the lid slightly open so it can breathe. Within a few days the rotten-egg note should be replaced by a plain earthy smell. Going forward, keep the 3:1 brown-to-green ratio and turn weekly so the center never sits starved of air long enough to turn anaerobic.
Can a compost pile be completely odor-free?
For a well-run backyard pile, “odor-free” means it smells like damp earth, not nothing — and that’s the goal. A pile that smells like a forest floor after rain is healthy. Truly offensive smells (rotten egg, ammonia, sour) are always a sign of imbalance, never normal. If you keep greens buried under browns, maintain moisture like a wrung-out sponge, and turn once a week, you can stand right over the bin and only notice a mild, pleasant earthiness. The only times mine smells at all are the brief moments right after I add a big batch of greens, and even then a quick turn settles it within a day. So yes — quiet and earthy is very achievable; silent isn’t the target, non-offensive is.
What should I do if my pile already smells bad?
Don’t panic and don’t scrap it. Start by opening it up: remove the lid, and if it’s in a closed bin, fork the contents out into a loose pile. Then add a large volume of browns — I use dry leaves or shredded cardboard — mixing them through so greens are no longer clumped. Turn thoroughly to introduce air, and if it’s soggy, let it sit uncovered for a day or two to dry slightly. That combination (more browns + more air + less water) reverses anaerobic conditions quickly. My worst pile smelled for a month before I did exactly this, and it was fine four days later. The lesson is that a smelly pile is recoverable; it’s feedback, not failure.
Is it OK to compost in winter when it’s cold?
Yes, though the pace changes. In winter a compost pile cools and microbial activity slows, so material breaks down much more slowly — but it doesn’t rot or smell if you keep it balanced. I keep adding kitchen scraps through winter, cover the bin, and turn only every two or three weeks instead of weekly. The main winter risk is waterlogging from snow and rain on a closed bin, so I make sure the lid sheds water and the base drains. You won’t get finished compost in January the way you do in July, but the material keeps accumulating and kicks back into fast decomposition the moment it warms. A quiet, cool pile that doesn’t smell is exactly what you want in winter.
Are there things I should never put in a compost pile?
Yes, and avoiding them prevents most smell and pest problems. Keep out meat, fish, bones, dairy, oily or greasy food, and pet waste — these rot foul-smelling, attract raccoons and rats, and pet waste can carry pathogens unsafe near food gardens. Also avoid treated lumber, glossy or coated paper, and weeds that have already set seed (they’ll sprout in your finished compost). Diseased plants are best left out too, unless your pile reliably reaches hot enough temperatures to kill pathogens. Everything else from the kitchen (vegetable and fruit scraps, coffee, eggshells, plain bread) and the yard (leaves, straw, shredded paper, small prunings) is fair game. Stay within that safe list and the pile stays both productive and odor-free.
Sources and Further Reading
- U.S. EPA — Composting at Home
- University of Illinois Extension — Composting
- Michigan State University Extension — Composting Basics
- Missouri Botanical Garden — Composting
- ASPCA — Toxic and Non-Toxic Plants List
About the author
Samantha has been gardening and arranging her own cut flowers for more than ten years, and has built more than 30 centerpieces from grocery-store bunches, clippings off the cedars behind her house, and a handful of dollar-store experiments that didn’t work. She writes practical, low-cost guides for beginners, including the versions that failed. Prices quoted in her articles are what she actually paid at US grocery and craft stores; nothing is sponsored and no brand pays for a mention. She is not a certified florist, a veterinarian or a horticulturist, and says so wherever a topic touches on plant safety or pet health.
Published: Oct 25, 2026 · Last updated: Oct 25, 2026.
{
“@context”: “https://schema.org”,
“@graph”: [
{
“@type”: “Article”,
“headline”: “How to Start a Compost Pile That Does Not Smell”,
“description”: “A smelly compost pile almost always means too many greens and not enough air. Use a 3:1 brown-to-green ratio, keep the pile as damp as a wrung-out sponge, and turn it weekly to keep a backyard pile odor-free.”,
“image”: [
“images/compost-hero-clean.jpg”,
“images/compost-materials-clean.jpg”,
“images/compost-process-clean.jpg”
],
“author”: { “@type”: “Person”, “name”: “Samantha” },
“publisher”: { “@type”: “Organization”, “name”: “gmmur.com” },
“datePublished”: “2026-10-25”,
“dateModified”: “2026-10-25”,
“mainEntityOfPage”: {
“@type”: “WebPage”,
“@id”: “https://gmmur.com/2026/10/25/start-a-compost-pile-that-does-not-smell/”
}
},
{
“@type”: “FAQPage”,
“mainEntity”: [
{
“@type”: “Question”,
“name”: “Why does my compost pile smell like rotten eggs?”,
“acceptedAnswer”: {
“@type”: “Answer”,
“text”: “That smell is hydrogen sulfide, a sign the pile has gone anaerobic — microbes are breaking material down without oxygen. It almost always means too much nitrogen-rich green material and not enough air. Mix in browns like dry leaves or shredded cardboard, fork the pile to add oxygen, and leave the lid slightly open. Within a few days the smell should become a plain earthy odor. Keep a 3:1 brown-to-green ratio and turn weekly.”
}
},
{
“@type”: “Question”,
“name”: “Can a compost pile be completely odor-free?”,
“acceptedAnswer”: {
“@type”: “Answer”,
“text”: “A well-run pile smells like damp earth, not nothing, and that is the healthy goal. Offensive smells like rotten egg or ammonia are always a sign of imbalance, never normal. Keep greens buried under browns, maintain moisture like a wrung-out sponge, and turn once a week, and you can stand over the bin noticing only mild earthiness. The target is non-offensive, not silent.”
}
},
{
“@type”: “Question”,
“name”: “What should I do if my pile already smells bad?”,
“acceptedAnswer”: {
“@type”: “Answer”,
“text”: “Open it up: remove the lid and fork the contents into a loose pile. Add a large volume of browns, mixing them through so greens are not clumped, turn thoroughly to introduce air, and if soggy let it sit uncovered a day or two to dry. More browns plus more air plus less water reverses anaerobic conditions quickly. A smelly pile is recoverable feedback, not failure.”
}
},
{
“@type”: “Question”,
“name”: “Is it OK to compost in winter when it is cold?”,
“acceptedAnswer”: {
“@type”: “Answer”,
“text”: “Yes. In winter the pile cools and breaks down slowly but will not smell if kept balanced. Keep adding kitchen scraps, cover the bin, and turn every two or three weeks instead of weekly. The main winter risk is waterlogging from snow and rain, so ensure the lid sheds water and the base drains. You will not get finished compost in January, but material accumulates and resumes fast decomposition when it warms.”
}
},
{
“@type”: “Question”,
“name”: “Are there things I should never put in a compost pile?”,
“acceptedAnswer”: {
“@type”: “Answer”,
“text”: “Keep out meat, fish, bones, dairy, oily food, and pet waste — these rot foul-smelling, attract pests, and pet waste can carry pathogens unsafe near food gardens. Also avoid treated lumber, glossy coated paper, and weeds that have set seed. Everything else from the kitchen and yard, including vegetable scraps, coffee, eggshells, leaves, straw, and shredded paper, is fine. Stay within that list and the pile stays productive and odor-free.”
}
}
]
}
]
}