
If you’ve ever stood in the garden center wondering which bag of fertilizer to buy, you already know the guessing game I’m talking about. For my first two gardening seasons I bought whatever was on sale, dumped it on the beds, and wondered why some plants thrived while others sulked. The turning point was finally sending a soil test to my state lab. The report told me my soil was already high in phosphorus and slightly acidic — so all that “balanced” fertilizer I’d been spreading was the wrong move. A garden soil test takes the guesswork out: it tells you what’s actually in your dirt and what it’s missing, so you add only what your plants need. In this article I’ll show you exactly how I sample, how I read the numbers, and how I turn a confusing report into a simple plan — including the mistakes that made my early results useless.
Quick answer: testing your garden soil comes down to three steps. First, take a representative sample by scooping a thin slice of soil from 10 to 15 spots across the bed, mixing them in a clean bucket, and sending a cup of that blend to a lab or using a home kit. Second, read the two things that matter most: pH (how acidic or alkaline the soil is) and the N-P-K levels (nitrogen, phosphorus, potassium), plus organic matter. Third, act only on what’s low — if a number is already in the good range, don’t add it. Most university labs return a report with exact amendment recommendations, so you stop wasting money on fertilizer your soil doesn’t need. Everything below walks through each step.
- 1. Why a Soil Test Beats Guessing With Fertilizer
- 2. When to Test (and How Often)
- 3. Gathering a Good Sample Without Contaminating It
- 4. Reading pH and Why It Controls Everything
- 5. Making Sense of Nitrogen, Phosphorus and Potassium
- 6. Organic Matter and Texture: The Quiet Winners
- 7. Turning the Report Into a Real Plan
- 8. Common Mistakes That Make Results Misleading
- 9. Troubleshooting: Symptoms, Causes and Fixes
- 10. FAQs
- 11. Sources and Further Reading
Why a Soil Test Beats Guessing With Fertilizer
The three numbers on a soil test report
When your soil test results come back, the page can look like a chemistry exam. The headline numbers are almost always pH and the three macronutrients: nitrogen (N), phosphorus (P), and potassium (K). Most reports also list calcium, magnesium, and a measure of organic matter. The lab usually rates each as “low,” “medium,” “optimum,” or “high,” and often prints a recommended pounds-per-1000-square-feet amendment right there. You don’t need a degree to use it — you need to know which lines say “add more” and which say “you’re fine.”
I treat the report like a checklist, not a textbook. If pH is in range and N-P-K all read “optimum,” I add nothing but compost. If something reads “low,” I add exactly the supplement the report names. The NC State Extension Gardener Handbook’s soils chapter lays out exactly how each nutrient functions, which helped me stop panicking at the table of numbers. The big picture: a test converts “my plants look unhappy” into “my soil is low in X,” and that’s a problem you can actually fix.
Why I wasted a year over-fertilizing
I’ll be honest about the mistake that pushed me to test. My tomato bed looked pale in year one, so I reached for a high-nitrogen fertilizer. The next year the leaves were dark green but I got almost no fruit — classic too much nitrogen, not enough of what mattered. I’d been feeding the plant the wrong thing for two seasons because I was guessing from symptoms. A $14 soil test revealed the truth: my phosphorus was already excessive and my pH was low enough that nutrients were locked up and unavailable.
That report saved me a third wasted year. Once I stopped adding phosphorus and nudged the pH up with lime (exactly as the lab suggested), the following season’s tomatoes finally produced. The lesson stuck: symptoms lie, because a dozen different problems look the same above ground. A soil test is the only way to know which one you actually have. If you’ve been buying fertilizer on intuition, this is the habit that pays for itself in one season. Don’t be like me and wait two years to check.
When to Test (and How Often)
The best time of year to sample
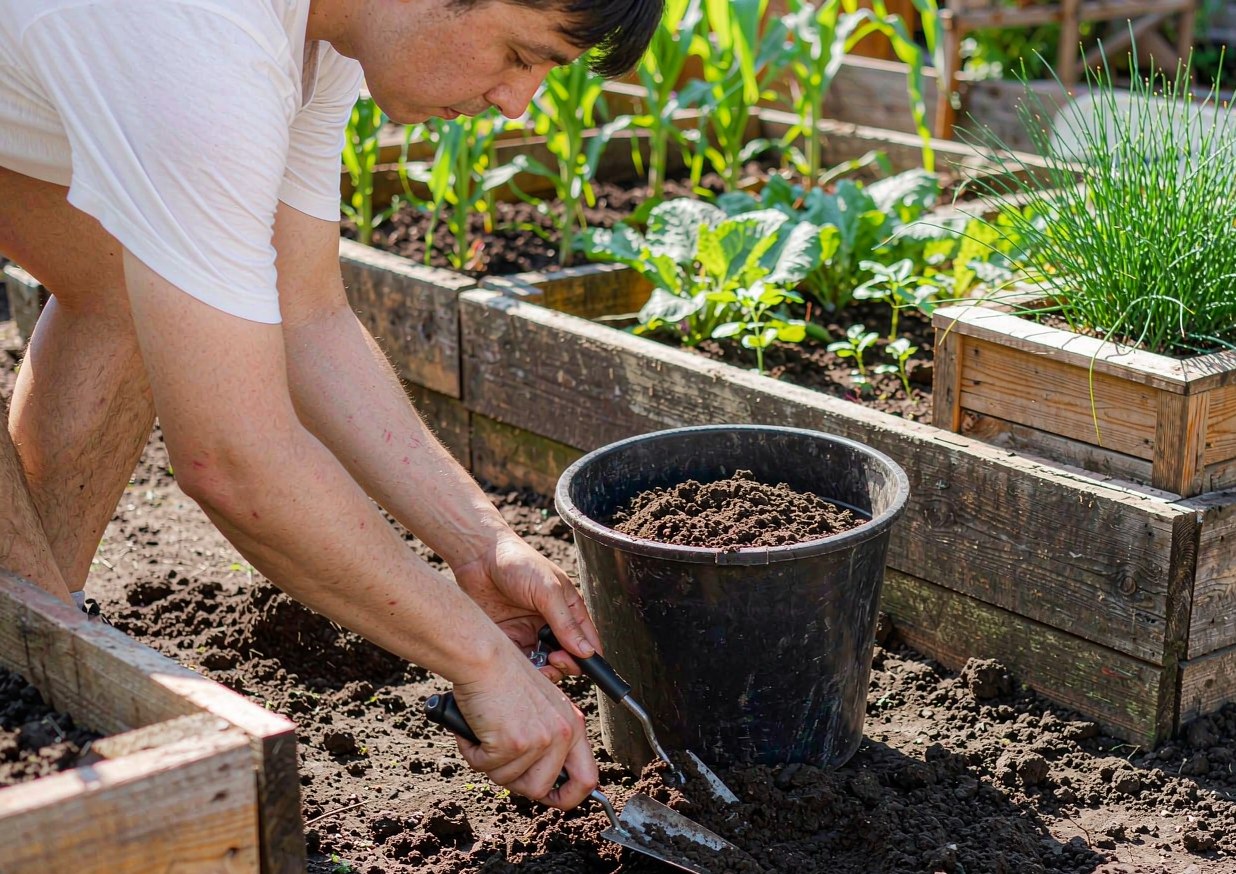
Timing affects how useful your soil test is. The best windows are early spring (before you plant and amend) and fall (after harvest, so you can add slow-acting lime or compost and let it work over winter). I prefer fall for pH adjustments because lime takes months to fully shift pH, so applying it in autumn means it’s ready by planting time. Spring testing is great for a last-minute read on what to add right before the season.
Avoid sampling right after you’ve added fertilizer or lime, because the numbers will reflect that input rather than your true baseline — wait a few weeks. Also skip testing bone-dry summer dirt if you can; slightly moist soil samples mix and bag more reliably. The Michigan State University guide on how to test your soil recommends testing every two to three years for established beds, which matches my routine. Pick a calm season, sample properly, and you’ve set up the whole year’s feeding plan.
How many tests you actually need
You don’t need a separate test for every plant. Soil varies more by area than by crop, so I test by zone: one sample for the vegetable beds, one for the lawn, one for the flower border, and a separate one for any spot that’s behaved strangely. Distinct areas with different histories deserve their own test; a single uniform bed is one test. This keeps costs down while still being accurate.
If you’re starting a brand-new garden, test once before you build the beds so you know what you’re working with. After that, every two to three years is plenty for most home gardens, unless a plant is obviously struggling — then re-test that zone. The University of Illinois Extension soil resources also note that retesting on a steady cadence is more useful than testing once and assuming the soil never changes. Soil does change as you add amendments and as plants pull nutrients out, so a periodic check is worth it.
Gathering a Good Sample Without Contaminating It
The zig-zag sampling pattern I use
The single biggest cause of a misleading soil test is a bad sample. You’re not testing one hole — you’re testing the average of the whole bed. I walk a zig-zag or W pattern across the area and take a thin vertical slice from 10 to 15 spots, each about 6 inches deep for a vegetable bed (3 to 4 inches for a lawn). Dump them all in a clean plastic bucket, break up clumps, mix thoroughly, and scoop out the cup or two the lab asks for.
Mixing matters because one corner of a bed can be totally different from another — I once sampled only the rich spot near the compost pile and got a glowing report that didn’t match the rest of the bed. Now I force myself to hit the boring, weedy parts too. The goal is a blend that represents the whole area, not the best or worst inch. Take the time to do 10 to 15 slices and you’ll get a number you can actually trust and build a plan around.
Tools and containers that won’t skew results
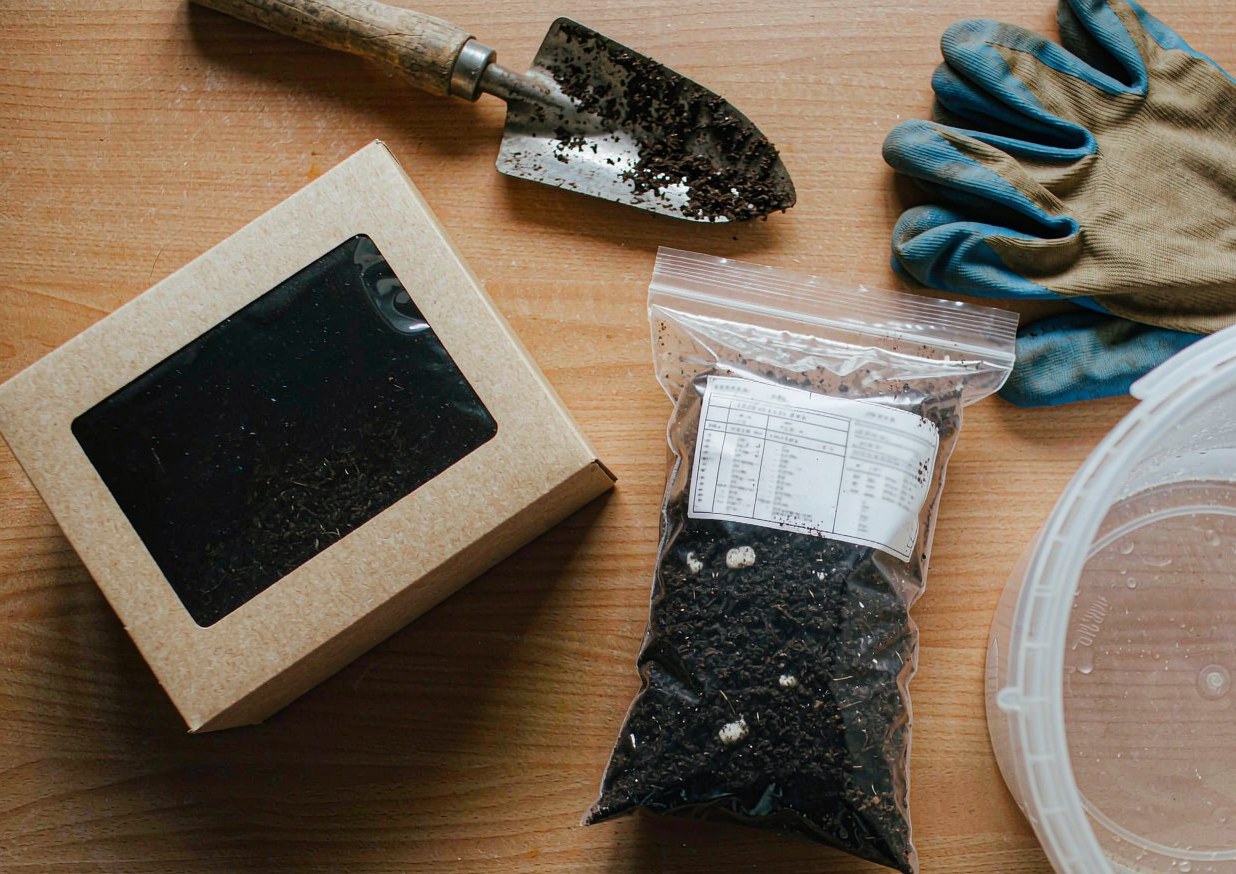
Use a clean garden trowel or soil probe and a bucket that hasn’t held fertilizer or compost. Residue from a previously used pot or a fertilizer-stained container can contaminate the sample and throw the numbers off — I keep one dedicated clean bucket just for sampling. Avoid sampling right next to a fence, foundation, or where you piled wood ash or lime last year, since those spots are artificially high.
For the actual collection cup, most labs mail you a clean bag or box; if you’re using a home kit, follow its container exactly. Don’t use a galvanized or rusty scoop, and don’t let the sample sit damp in a sealed bag for weeks before sending — dry it at room temperature first if needed. The Oregon State University Extension gardening pages emphasize clean technique for reliable results. A careful, uncontaminated sample is what makes the rest of the report worth reading.
Reading pH and Why It Controls Everything
What “too acidic” and “too alkaline” mean for plants
Of all the numbers on a soil test, pH is the one I check first, because it controls whether plants can even access the other nutrients. pH runs from 0 (very acidic) to 14 (very alkaline), with 7 neutral. Most vegetables and flowers want a slightly acidic range around 6.0 to 6.8. If pH is too low (acidic) or too high (alkaline), nutrients get chemically “locked up” and plants can’t take them up even when they’re present in the soil.
This is the trap I fell into: my pH was low, so the fertilizer I kept adding just sat there unavailable. When pH is off, you can pour on nutrients and still see deficiency symptoms, because the plants literally can’t absorb them. Fix the pH and suddenly the existing nutrients become usable. The Missouri Botanical Garden soil guide explains this lock-up effect clearly. So before you chase any individual nutrient, look at pH — it’s the master valve on everything else.
How I adjust pH with lime or sulfur
Adjusting pH is straightforward once the report tells you to. To raise a low pH (make acidic soil less acidic), you add agricultural lime (calcitic or dolomitic). To lower a high pH, you add elemental sulfur or, for pots, acidifying amendments. The exact amount depends on your soil texture — clay needs more lime than sand to move the same amount — which is exactly why the lab prints a specific rate instead of a vague “add some lime.”
I follow the lab’s printed rate to the letter and never guess, because over-liming is as harmful as under-liming. Lime is slow: it can take three to six months to fully react, which is why fall application works so well. Sulfur is also slow and should be applied moderately and re-tested. The key habit is test first, amend to the number, then re-test later — never dump lime or sulfur based on a hunch. Let the report set the dose and pH becomes a solved problem rather than a mystery.
Making Sense of Nitrogen, Phosphorus and Potassium
What each number does for your plants
The N-P-K on your soil test is the trio behind almost every fertilizer bag. Nitrogen (N) drives leafy, green growth — great for lawns and lettuce, but too much reduces flowering and fruiting. Phosphorus (P) supports roots, flowers, and fruit set. Potassium (K) builds overall plant strength, drought tolerance, and disease resistance. They do different jobs, which is why “more fertilizer” is never the right answer — you have to know which one is actually short.
In my own reports, nitrogen reads low most often because it washes out of soil and gets used up fast, so it’s the one I replenish yearly with compost and a light organic feed. Phosphorus, as I learned the hard way, was already excessive, so adding more would have been wasteful and environmentally risky. Reading the three separately changed how I shop: I now buy by the deficiency, not by the prettiest bag. Understanding what each number does is what turns a confusing report into confident action.
When you actually read the values, most labs use plain language tags rather than raw chemistry. You’ll see each nutrient marked “low,” “medium,” “optimum,” or “high,” and often a specific recommendation like “add 2 lb of nitrogen per 1,000 sq ft.” I ignore the medium readings and act only on lows, because medium means the soil can still supply enough for most crops. A practical example: if my report says nitrogen low, phosphorus optimum, potassium medium, my shopping list is a single nitrogen source — not a triple-action product that would over-feed the other two. Matching the purchase to the tags is the whole game.
Why more is not better
The most common error after getting a soil test is treating “low” as “pile it on.” More nitrogen doesn’t make plants healthier — it makes them soft, leafy, and pest-prone, and excess runs off into waterways. Excess phosphorus is a particular problem because it doesn’t wash away; it builds up and can pollute streams and lakes. The lab’s “low” rating already accounts for what plants need, so adding the recommended amount is enough.
I’ve come to respect the “optimum” and “high” ratings as stop signs. If potassium reads high, I don’t add any, full stop. If everything reads optimum, I just maintain with compost and skip synthetic fertilizer entirely. The Illinois Extension and others repeatedly warn that over-application is both wasteful and polluting. The whole point of testing is restraint: give the soil exactly what’s missing and nothing it already has in abundance.
There’s also a practical, regulatory side to this. Many areas now restrict phosphorus use on lawns and gardens precisely because excess P runs off and feeds algae blooms in lakes and rivers. A soil test that shows you don’t need phosphorus is your permission — and in some places your legal requirement — to skip it. I keep that in mind whenever a sale sign pushes a “complete” fertilizer; if my report doesn’t call for phosphorus, I leave it on the shelf. Responsible feeding isn’t just cheaper, it’s better citizenship for the waterways downstream of your beds.
Organic Matter and Texture: The Quiet Winners
Why I care more about texture than N-P-K
Here’s what years of testing taught me: the number that predicts long-term garden success isn’t N, P, or K — it’s organic matter and texture. Organic matter is the decaying plant and animal material in soil; it holds water, feeds microbes, and slowly releases nutrients. A soil with good organic matter and decent structure will outperform a “perfect” chemical balance every time, because it’s alive and resilient.
My oldest bed started as dead clay, and the single change that transformed it was yearly compost, which lifted organic matter and opened up the structure. The soil test tracks organic matter as a percentage, and I treat anything under about 3% as a call to add more compost. Texture — the ratio of sand, silt, and clay — tells me how the bed holds water and how it’ll behave. If I could only see two numbers, I’d pick organic matter and texture over the fertilizer trio, because they’re the foundation everything else sits on.
The jar test for sand, silt and clay
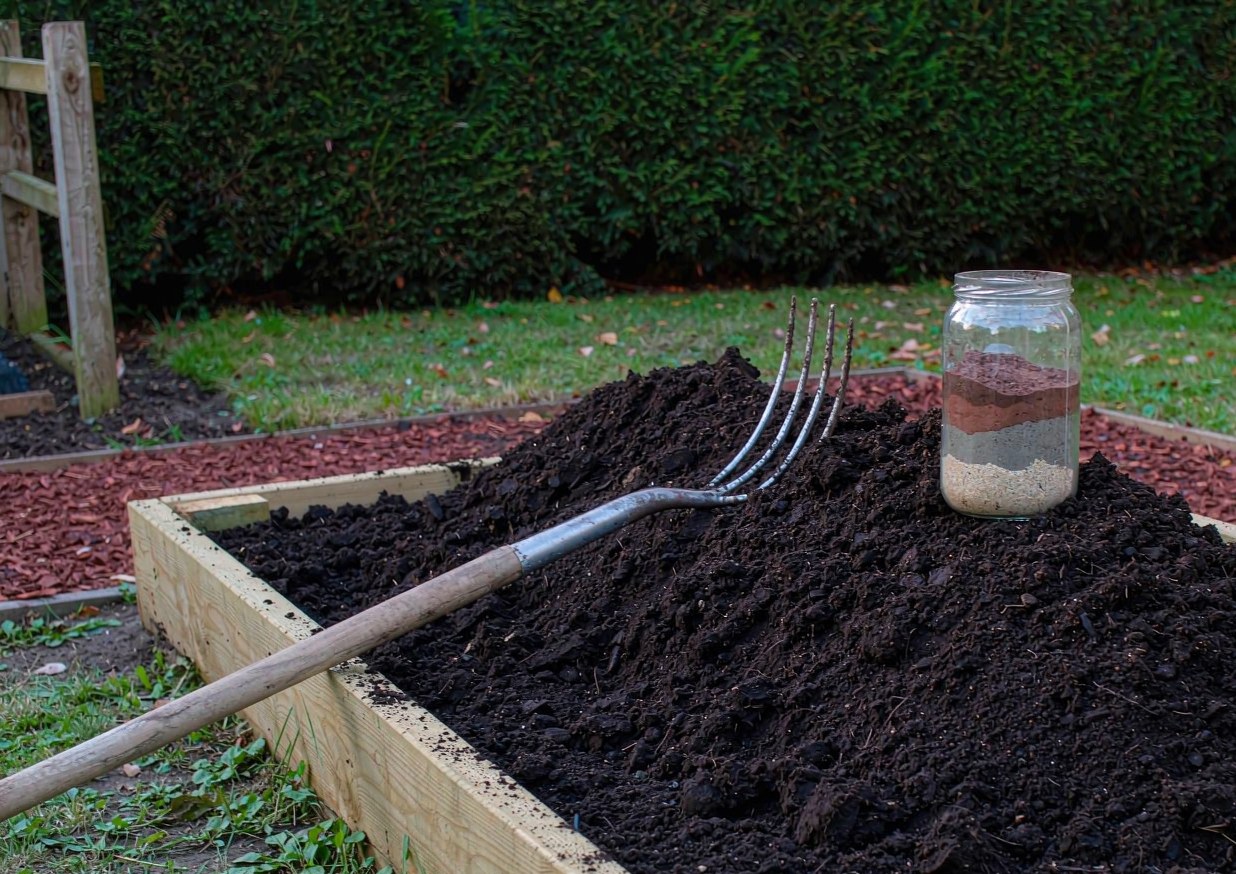
You don’t need a lab to learn your soil’s texture — the jar test is a classic I still use. Fill a clear jar a third with soil, add water and a drop of dish soap, shake hard, and let it sit overnight. Sand settles first (within minutes), silt next, and clay stays suspended longest, forming layers. The proportions of those layers tell you if you have sandy, loamy, or clay soil.
Knowing texture changes how I garden: sandy soil drains fast and needs more organic matter and frequent light watering; clay holds water and nutrients but compacts, so I add compost and avoid working it wet. The NC State soils chapter explains how texture drives drainage and fertility. The jar test is free, takes two minutes of effort, and pairs perfectly with a lab soil test to give you the full picture of what your garden is working with.
Turning the Report Into a Real Plan
Matching amendments to what your soil lacks
A soil test is only useful if it changes what you do, so I turn the report into a short amendment list. If pH is low, lime goes on the plan. If nitrogen is low, compost plus a light organic nitrogen source. If phosphorus or potassium read low, I add the specific amendment the lab names at the rate it prints. Everything rated optimum or high gets a zero — no product, no cost. This list is my shopping ticket, and it’s usually shorter (and cheaper) than my old guesswork cart.
I write the plan right on the report and tape it inside the garden shed. The discipline is matching the fix to the gap: a low number gets exactly its corrective amendment, never a broad “all-purpose” product that might over-feed something else. The MSU soil-testing guide is explicit that following the lab’s recommendation is safer and more effective than improvising. Treat the report as a prescription, not a suggestion, and your beds improve steadily instead of lurching from one problem to the next.
A simple fall vs. spring amendment schedule
Timing the plan keeps it from feeling overwhelming. In fall, I apply the slow movers: lime (if pH needs raising) and a thick layer of compost, both of which work over the winter. In spring, I apply faster-acting needs revealed by the test — a light nitrogen feed for hungry crops, or potassium if it read low — right before planting. Splitting it this way means the slow chemistry finishes before the plants arrive.
This schedule also prevents the mistake of dumping everything at once. Lime and fresh manure or high-nitrogen fertilizer shouldn’t go down together in a way that causes issues, and compost is best worked in gently. I keep fall for building soil structure and spring for targeted feeding. The result is a garden soil that gets a little better every year, guided by data instead of hope. Once you have two or three years of reports, you’ll see trends — and trend-spotting is where soil testing really pays off.
Common Mistakes That Make Results Misleading
Sampling at the wrong depth
The first mistake that ruins a soil test is sampling too deep or too shallow. Nutrient levels change with depth — the top few inches are richest from compost and leaf litter, while deeper soil is different entirely. If you scoop a foot down, you’ll get a number that doesn’t match where plant roots actually feed, and your plan will be off. For vegetable beds I stick to about 6 inches; for lawns, 3 to 4 inches.
I keep a small ruler in the sampling bucket as a reminder. Consistent depth across all 10 to 15 slices is what makes the blended sample honest. The other depth error is sampling only the loose amended top of a raised bed and ignoring the native soil below — but for a raised bed that’s actually fine, since that’s where the plants live. Match depth to the root zone you care about and keep it uniform, and the report will describe the soil your plants are actually growing in.
Testing once and never again
The second mistake is treating one test as permanent. Soil is dynamic: plants pull nutrients out every season, compost and amendments shift pH, and heavy rain leaches nitrogen away. A report from three years ago is a starting point, not gospel. I re-test every two to three years, and sooner if a bed suddenly underperforms.
The payoff of retesting showed up when my established bed’s pH crept back down and a previously “optimum” potassium level dropped to low after several heavy harvests. The old report would have told me to do nothing; the new one caught the decline. The Oregon State Extension guidance on periodic testing reflects this reality. Soil testing isn’t a one-time chore — it’s a checkup, and like any checkup, its value comes from doing it on a rhythm rather than once and forgetting.
Troubleshooting: Symptoms, Causes and Fixes
When a soil test seems off or the garden still struggles after amending, one of these is usually the cause.
| Symptom | Likely cause | Fix |
|---|---|---|
| Plants yellow but soil N reads “optimum” | pH too low; nutrients locked up | Raise pH with lime per lab rate; re-test in a season |
| Report says “low” yet plants look fine | Sampling wrong area or depth | Re-sample across the bed at correct depth, retest |
| Nothing changed after amending | Amended too recently; lime needs months | Wait; re-test before adding more |
| Test kit gives weird colors | Expired or contaminated reagents | Use fresh kit or send to a lab instead |
| Lawn thin despite feeding | Compacted soil, not nutrient lack | Aerate; test separately from beds |
| Excess phosphorus flagged | Years of over-fertilizing | Stop P additions; use compost only; retest in 2–3 yrs |
FAQs
How do I take a soil sample at home?
You don’t need special gear to start. Take a clean trowel and a clean plastic bucket, then walk a zig-zag across the bed and scoop a thin 6-inch slice from 10 to 15 spots for a vegetable area (3 to 4 inches for lawn). Drop them all in the bucket, break up clumps, mix thoroughly, and fill the bag or cup your lab or kit provides. Avoid spots near foundations, fences, or old lime and ash piles, and don’t use a container that held fertilizer. The goal is one blended sample that represents the whole area, not a single good or bad hole. Send it to your state university lab or use a reputable home kit, and you’ll get numbers you can trust.
What does soil pH actually tell me?
pH tells you how acidic or alkaline your soil is on a 0-to-14 scale, with 7 neutral and most garden plants preferring roughly 6.0 to 6.8. It matters because pH controls nutrient availability: if the pH is too far off, plants can’t absorb the nutrients that are present, so you can have rich soil and still see deficiency symptoms. That’s why I check pH before chasing any individual nutrient. If it’s low, agricultural lime raises it; if it’s high, elemental sulfur lowers it — but always by the rate your report specifies, since over-correcting creates a new problem. Fix pH first and the rest of your soil test becomes far more meaningful.
How often should I test my garden soil?
For established beds, every two to three years is plenty, with an extra test anytime a bed suddenly underperforms. Test before you build new beds to set a baseline, and test in fall or early spring so you can act on the results that season. The key is not “once and done” — soil changes as plants remove nutrients and amendments shift pH, so periodic checks catch declines a stale report would miss. I keep a simple rhythm: baseline when starting, then a re-test every couple of years, plus a targeted re-test on any bed that looks off. That cadence has caught pH drift and dropping potassium that an old report would have hidden.
Can I use a home soil test kit instead of a lab?
Yes, a home kit is a reasonable starting point, especially for pH and a rough N-P-K read, and it’s faster and cheaper than mailing a sample. The trade-off is accuracy: kits are less precise than a university lab, and their color charts can be hard to read, especially if reagents are old. For a new gardener wanting a general sense, a kit is fine; for a serious amendment plan — particularly pH correction with lime — I’d send a sample to a state lab, because their reports include exact application rates. If a kit gives you odd or conflicting colors, trust a lab over the kit. Either way, the act of testing beats guessing with fertilizer.
What if my soil test says everything is already optimum?
That’s a great result, not a problem — it means you should stop adding fertilizer and just maintain with compost. The biggest win of testing is learning when to do nothing, because over-applying wastes money and can pollute waterways, especially with phosphorus. I treat “optimum” as a stop sign: no synthetic N-P-K, just an annual layer of compost for organic matter and structure. Keep testing every few years to catch slow drift, but for now, enjoy not having to buy a bag of anything. A soil that tests optimum and gets compost maintenance will quietly outperform one that’s constantly force-fed.
Sources and Further Reading
- NC State Extension Gardener Handbook — Soils and Plant Nutrients
- Michigan State University Extension — How to Test Your Soil
- Missouri Botanical Garden — Soil
- University of Illinois Extension — Soil
- Oregon State University Extension — Gardening
About the author
Samantha has been gardening and arranging her own cut flowers for more than ten years, and has built more than 30 centerpieces from grocery-store bunches, clippings off the cedars behind her house, and a handful of dollar-store experiments that didn’t work. She writes practical, low-cost guides for beginners, including the versions that failed. Prices quoted in her articles are what she actually paid at US grocery and craft stores; nothing is sponsored and no brand pays for a mention. She is not a certified florist, a veterinarian or a horticulturist, and says so wherever a topic touches on plant safety or pet health.
Published: Oct 25, 2026 · Last updated: Oct 25, 2026.
{
“@context”: “https://schema.org”,
“@graph”: [
{
“@type”: “Article”,
“headline”: “How to Test Your Garden Soil and Read the Results”,
“description”: “A soil test removes the guesswork from fertilizing. Learn how to sample across the bed, read pH and N-P-K, understand organic matter and texture, and turn the report into a simple fall-and-spring amendment plan.”,
“image”: [
“images/soil-hero-clean.jpg”,
“images/soil-materials-clean.jpg”,
“images/soil-process-clean.jpg”
],
“author”: { “@type”: “Person”, “name”: “Samantha” },
“publisher”: { “@type”: “Organization”, “name”: “gmmur.com” },
“datePublished”: “2026-10-25”,
“dateModified”: “2026-10-25”,
“mainEntityOfPage”: {
“@type”: “WebPage”,
“@id”: “https://gmmur.com/2026/10/25/how-to-test-your-garden-soil-and-read-results/”
}
},
{
“@type”: “FAQPage”,
“mainEntity”: [
{
“@type”: “Question”,
“name”: “How do I take a soil sample at home?”,
“acceptedAnswer”: {
“@type”: “Answer”,
“text”: “Use a clean trowel and a clean plastic bucket. Walk a zig-zag across the bed and scoop a thin 6-inch slice from 10 to 15 spots for a vegetable area, or 3 to 4 inches for lawn. Mix them all in the bucket, break up clumps, and fill the bag or cup your lab or kit provides. Avoid spots near foundations, fences, or old lime and ash piles, and never use a container that held fertilizer. The goal is one blended sample representing the whole area, not a single good or bad hole.”
}
},
{
“@type”: “Question”,
“name”: “What does soil pH actually tell me?”,
“acceptedAnswer”: {
“@type”: “Answer”,
“text”: “pH shows how acidic or alkaline your soil is on a 0-to-14 scale, with most garden plants preferring roughly 6.0 to 6.8. It controls nutrient availability: if pH is too far off, plants cannot absorb the nutrients present, so you can have rich soil and still see deficiency symptoms. Check pH before chasing any individual nutrient. If low, agricultural lime raises it; if high, elemental sulfur lowers it, always by the rate your report specifies.”
}
},
{
“@type”: “Question”,
“name”: “How often should I test my garden soil?”,
“acceptedAnswer”: {
“@type”: “Answer”,
“text”: “For established beds, every two to three years is plenty, with an extra test anytime a bed suddenly underperforms. Test before building new beds to set a baseline, and test in fall or early spring so you can act that season. Soil changes as plants remove nutrients and amendments shift pH, so periodic checks catch declines a stale report would miss. Keep a simple rhythm and retest any bed that looks off.”
}
},
{
“@type”: “Question”,
“name”: “Can I use a home soil test kit instead of a lab?”,
“acceptedAnswer”: {
“@type”: “Answer”,
“text”: “Yes, a home kit is a reasonable starting point for pH and a rough N-P-K read, and it is faster and cheaper than mailing a sample. The trade-off is accuracy: kits are less precise than a university lab and their color charts can be hard to read if reagents are old. For a serious amendment plan, especially pH correction with lime, send a sample to a state lab for exact rates. If a kit gives odd colors, trust a lab over the kit.”
}
},
{
“@type”: “Question”,
“name”: “What if my soil test says everything is already optimum?”,
“acceptedAnswer”: {
“@type”: “Answer”,
“text”: “That is a great result. It means stop adding fertilizer and just maintain with compost. The biggest win of testing is learning when to do nothing, because over-applying wastes money and can pollute waterways, especially with phosphorus. Treat optimum as a stop sign: no synthetic N-P-K, just an annual layer of compost for organic matter and structure. Keep testing every few years to catch slow drift.”
}
}
]
}
]
}