
If you’re standing in the garden aisle deciding between a bag of shredded bark and a pile of river rock, you’re asking the right question at the right time. A few years ago I ringed a brand-new maple with a tidy mound of stone because I thought it looked “clean” and would never need replacing. Within two summers the trunk had a wet, dark patch at the base and the tree’s new growth had stalled. I’d done exactly the thing every arborist warns against, and I didn’t even know it until a neighbor who happens to be a tree guy pointed at the rock and said, “That’s cooking the roots.” So this isn’t a theoretical comparison for me. Below I’ll walk through what mulch and stone each actually do around trees and beds, where each one fails, and how to choose without repeating my $90 mistake. Let’s go through it together.
Quick answer: for most trees and planting beds, organic mulch wins — shredded bark, wood chips, or compost laid 2 to 4 inches deep and pulled a few inches off the trunk. Stone is only the better call where you want a permanent, no-refresh surface and you accept that it heats the soil, sheds no nutrients, and makes future planting harder. The three decisions that settle it are: (1) will the material touch a tree trunk? (never let either touch bark); (2) do you want to feed the soil or just cover it? (mulch feeds, stone only covers); and (3) how much annual upkeep do you want? (stone is near-zero, mulch needs a yearly top-up). Everything below explains the why and the exact depths and widths that matter.
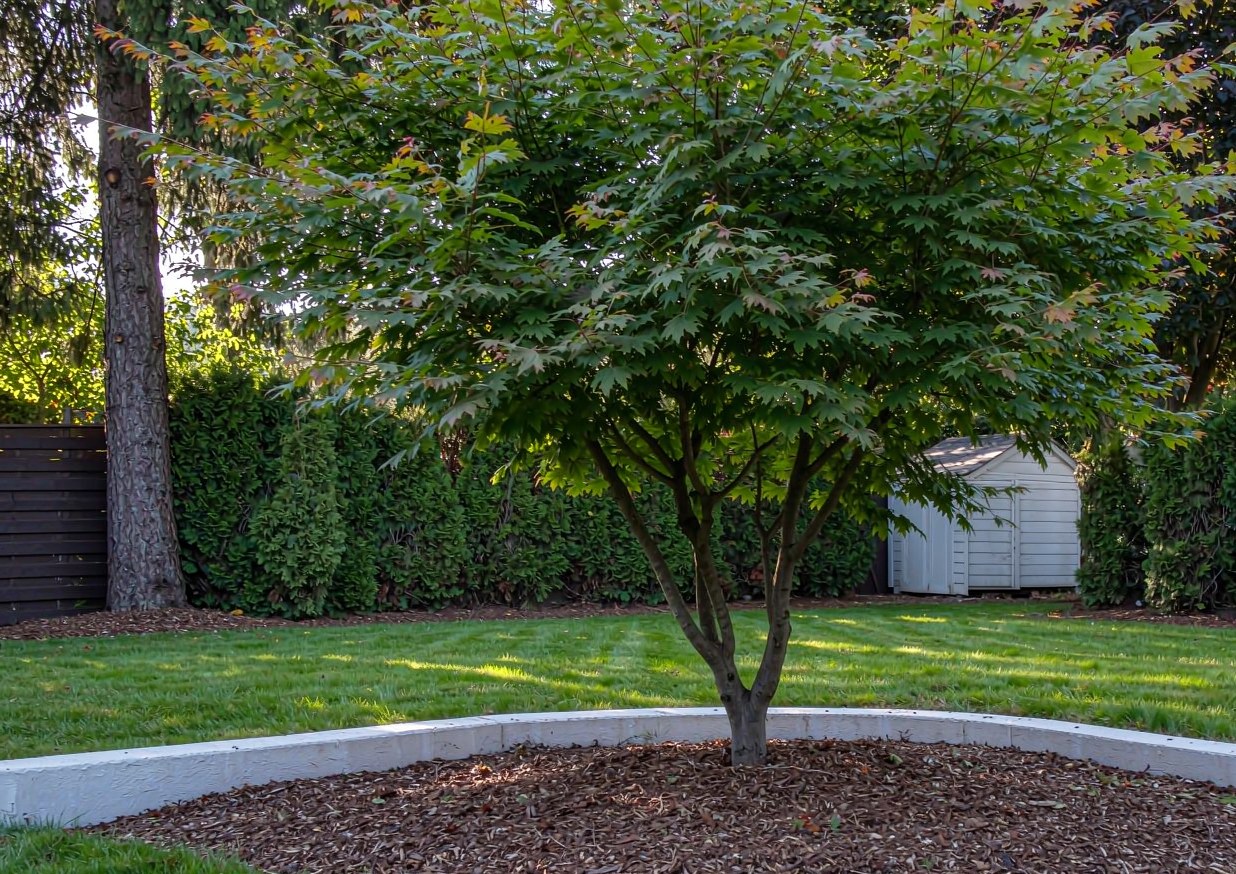 Photos provided by Pixabay
- 1. Mulch vs. Stone: Which One Actually Belongs Around Your Trees
- 2. Choosing a Mulch: Organic Options and What They Cost
- 3. Stone and Gravel: When Hardscape Mulch Makes Sense
- 4. Around Trees: The Right (and Wrong) Way to Ring a Trunk
- 5. Around Beds: Edging, Weed Control, and Moisture
- 6. Common Beginner Mistakes
- 7. Styling the Landscape: Color, Texture, and Cost
- 8. A Seasonal Checklist for Avoiding Problems
- 9. Troubleshooting: Symptoms, Causes and Fixes
- 10. FAQs
- 11. Sources and Further Reading
Mulch vs. Stone: Which One Actually Belongs Around Your Trees
What mulch and stone each do for a planting bed
Before you pick, it helps to be honest about what these two materials are. Mulch is any loose material spread over bare soil — usually organic (shredded bark, wood chips, leaves, compost) but sometimes inorganic (rubber, landscape fabric topped with gravel). Its job is to hold moisture, block weeds, keep soil temperature steadier, and, in the organic case, slowly feed the soil as it breaks down. Stone — river rock, pea gravel, crushed granite, decomposed granite — is a hardscape material. It covers soil, slows erosion, and looks permanent, but it does nothing for soil life and it changes how heat moves through the ground.
I used to think of them as interchangeable “ground cover,” and that’s the mistake. They solve different problems. The first bed I mulched properly was under a row of shrubs along the driveway; I laid 3 inches of shredded hardwood, kept it off the stems, and by midsummer the soil underneath was still cool and damp after a hot week while the bare patch next to it had cracked. That single对比 sold me on mulch for planted areas. Stone, by contrast, I now reserve for spots where I genuinely never want to plant again — a strip beside the air-conditioning unit, a French-drain cap, a path edge. Match the material to the job and you stop fighting the landscape every season.
The one mistake I made that killed a young maple
Here’s the failure I opened with, in detail, because it’s the most common one I see. I’d read that stone “lasts forever,” so around a 2-inch-caliber maple I mounded 3 inches of 1- to 2-inch river rock right up to the bark, thinking the tree would appreciate the neat look. Two problems stacked: the rock sat against the trunk (trapping moisture against bark and hiding the flare), and the dark stone baked the root zone in summer because rock radiates stored heat. The tree didn’t die outright, but it lost its leader’s vigor and developed a weeping lesion at the soil line that took a full year to dry out after I pulled the stone back.
The fix, which I’ll repeat throughout this article, is almost embarrassingly simple: keep any material several inches off the trunk and let the root flare show, and prefer organic mulch where you want the tree to thrive. The Oregon State Extension gardening pages put it plainly: mulching is one of the best things you can do for landscape plants, but piling it against the trunk is one of the worst. If you remember nothing else, remember the donut, not the volcano.
Choosing a Mulch: Organic Options and What They Cost
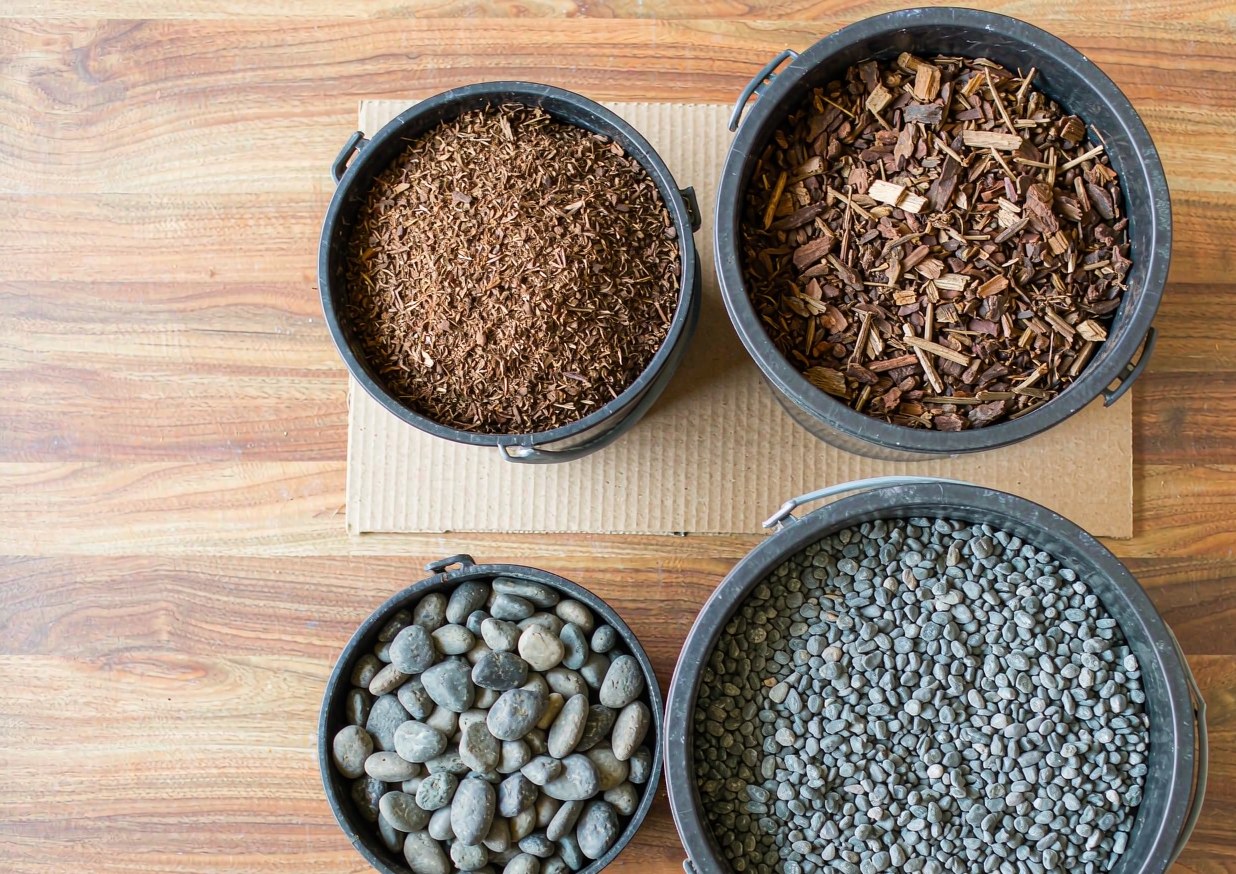
Organic mulch is the default for almost every tree and bed, but “organic mulch” is a whole aisle of options. The big split is between shredded bark/hardwood (the bagged stuff), wood chips (coarser, often free from tree services), and composted material (leaf mold, compost, finely shredded yard waste). Each behaves a little differently once it’s on the ground.
- Shredded hardwood bark — the most common bagged mulch; mats together so it doesn’t blow away, breaks down in 1–2 years, runs roughly $3–$5 per 2-cubic-foot bag.
- Wood chips — coarser, lasts 2–3 years, frequently free if a local tree crew drops a load; great for trees, a bit chunky for tidy front beds.
- Compost / leaf mold — feeds soil fastest, dark and fine, but needs a top layer of bark to stop it crusting; often $30–$45 per cubic yard in bulk.
- Pine straw — popular in the Southeast, acidic, neat, cheap by the bale, but it’s a regional product and not what you’ll find in a Northern big-box store.
 Photos provided by Pixabay
Shredded bark, wood chips, and compost — which to pick
The choice really comes down to where the material is going and how much you want to spend per year. For tree rings and informal shrub beds, coarser wood chips are my pick — they’re cheap or free, they last, and trees don’t care about neatness. For front-of-house perennial beds where appearance matters, shredded hardwood bark lays down cleanly and stays put in wind. For vegetable or renewal beds, I use compost as a thin mulch because it actually improves the soil instead of just covering it.
A note from the Michigan State University extension that changed how I buy: they emphasize that the single most important thing is not the type but applying it correctly — right depth, right distance from the trunk. I spent years paying extra for “premium” dyed mulch before I realized a free chip drop from a tree service did the same job. Don’t overthink the bag; nail the depth and the gap.
How deep is too deep (and why depth matters more than type)
This is the number that trips up almost everyone: 2 to 4 inches is the sweet spot for most organic mulches. Under 2 inches and weeds punch through and moisture evaporates; over 4 inches and you starve the soil of oxygen, hold too much water against roots, and invite rodents to nest against bark. I’ve pulled back 8-inch “mulch volcanoes” that homeowners thought were generous — the roots near the surface were literally suffocating.
Depth matters more than brand because mulch’s job is moderation: it should buffer temperature and moisture, not seal the ground like a lid. The same MSU resource on landscape mulches notes that organic mulches improve soil structure and water penetration as they decompose, but only when layered thinly enough to let air through. When in doubt, rake it flat to 3 inches and step back. You can always add a little; you can’t easily undo a foot of soggy bark.
Stone and Gravel: When Hardscape Mulch Makes Sense
Stone isn’t “bad” — it’s just a different tool. Around trees it’s usually the wrong tool, but there are real places where I reach for gravel first. The key is to choose stone only where you accept its trade-offs: it heats up, it’s permanent, and it complicates any future digging.
River rock, pea gravel, and crushed stone compared
The three stones you’ll actually be offered are river rock (smooth, 1–3 inch rounded stones, decorative), pea gravel (small 3/8-inch rounded, comfortable to walk on), and crushed stone / decomposed granite (angular, compacts, good for paths). River rock looks the most “landscape-y” and is what I mistakenly used on the maple. Pea gravel is friendlier underfoot and self-levels. Crushed stone locks in place, which makes it ideal for a firm edge but a pain if you later want to plant through it.
Cost runs roughly $40–$70 per cubic yard for plain gravel and $80–$150 per cubic yard for decorative river rock, plus delivery if you’re not hauling it yourself. On a per-year basis stone looks cheap because you “never replace it” — but as the University of Illinois LawnTalk and other extension services point out, the real cost shows up later: stone migrates into beds, sinks into soil, and has to be shoveled out by hand if you ever change your mind. I’ve done that shoveling. It is not fun.
Where stone wins and where it backfires
Stone wins in a handful of specific spots: a drainage swale or French drain cap, a strip beside the foundation where you want zero organic matter near siding, a high-traffic path, or a xeriscape area with drought-tolerant plants that hate wet feet. It also reads as “finished” immediately and needs no annual refresh.
Stone backfires around most trees and moisture-loving beds, and against the house if it traps moisture against the wall. The biggest surprise for me was heat: dark stone in full sun can push soil temperatures well above what shallow roots want, and it reflects that heat back onto low plantings. So I now use stone as an accent and a problem-solver, not as a blanket covering for living beds. If the area holds a plant you care about, mulch it; if it holds nothing but you want it to look intentional, stone it.
Around Trees: The Right (and Wrong) Way to Ring a Trunk
Trees deserve their own section because this is where the costly mistakes happen. A tree’s root flare — the spot where trunk meets roots — must stay visible and dry. Anything piled against it is a slow-motion problem.
Volcano mulching and the rot it causes
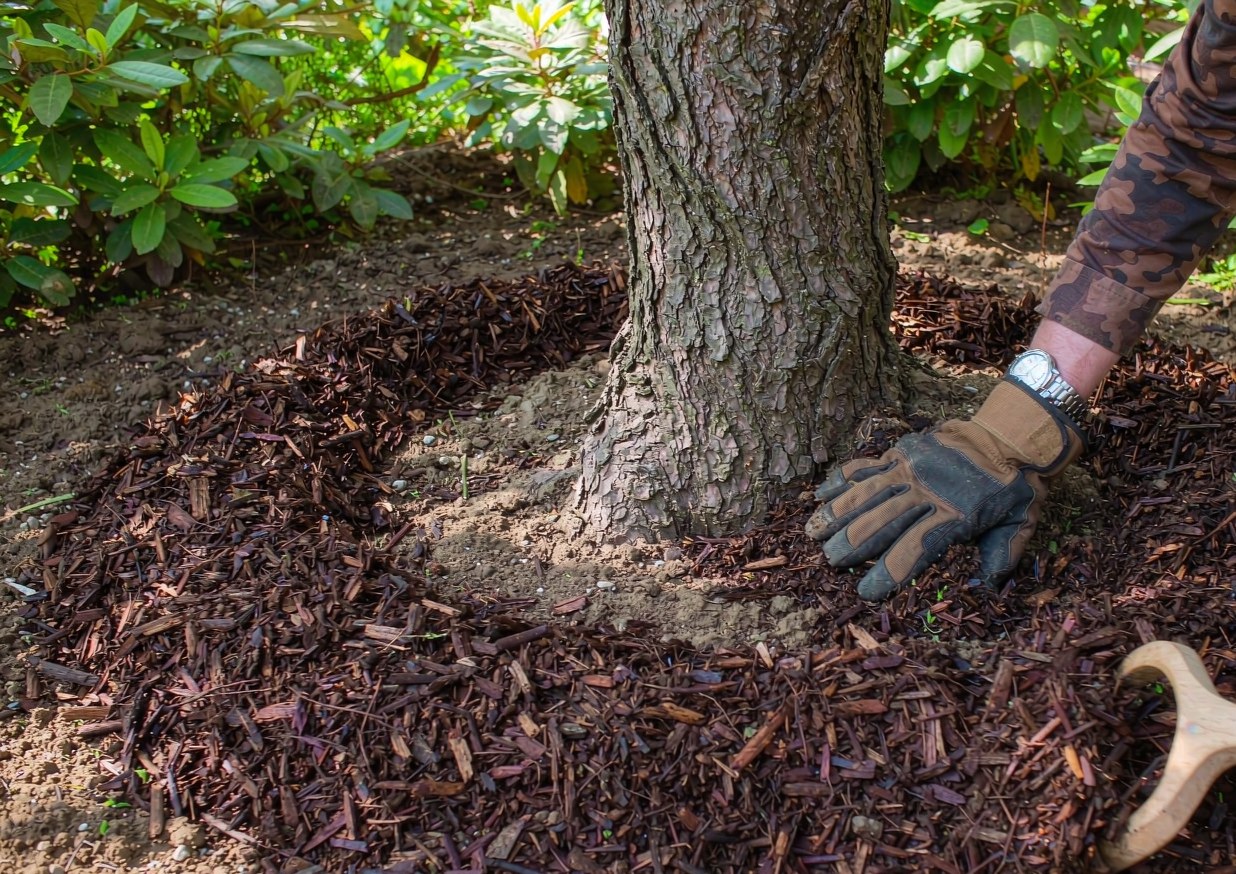
Volcano mulching is the cone of mulch mounded up the trunk like a witches’-hat. It’s everywhere, it looks “done,” and it’s harmful. Constant moisture against bark invites cankers, rot, and boring insects, and it hides the flare so you can’t see girdling roots forming. The maple I damaged basically suffered a mild version of this under stone.
The correction is to pull every bit of material back so the root flare is exposed and the soil within 3 to 6 inches of the trunk is bare. Think of a flat donut, not a pyramid. The Oregon State guidance and every other extension source I’ve read agree: keep mulch off the bark. After I corrected the maple, raking the rock 6 inches back from the trunk and exposing the flare, the weeping lesion finally dried and the following spring’s growth looked normal again. That’s how I know it works, not just that someone said so.
How wide the mulch ring should be
Width matters nearly as much as depth. A good rule: mulch out to the drip line if you can (the circle beneath the outermost branches), because that’s where the feeder roots are. Realistically, most yards can’t spare that much, so aim for at least a 3-foot radius for small trees and wider for big ones. The wider the ring, the more Weed War you win and the more root zone you protect from mower damage — which, honestly, is the real value. I’ve lost more shrub trunks to string-trimmer nicks than to anything else, and a wide mulch ring is what keeps the trimmer away.
If you’re working with an established bed, just extend the bed’s mulch to meet the tree rather than building a separate island. The MSU mulching guide frames the tree’s mulched area as part of one continuous bed for exactly this reason — fewer edges to maintain, more protected roots. Wider is better right up until it meets a walkway or lawn you want to keep.
 Photos provided by Pixabay
Around Beds: Edging, Weed Control, and Moisture
Beds are more forgiving than trees, but they’re where mulch-vs-stone really shows its personality on a daily basis. How you handle edges and weeds decides your weekend workload for the whole season.
How mulch and stone each handle weeds
Both materials suppress weeds by blocking light, but they do it differently. Mulch smothers small weeds and, because it’s loose, lets you pull the occasional breakthrough easily; the downside is that wind-blown seeds still land on top and root into the mulch itself, so you get a few “mulch weeds” each year. Stone blocks light just as well and seeds don’t root into it as readily, but once soil works up between the stones (it always does), weeds erupt from below and are miserable to extract because the roots wrap the rock.
My practical take: for a low-maintenance front bed I rarely touch, a 2- to 3-inch mulch layer over a thin landscape-fabric or newspaper base keeps weeds down for a season or two before I refresh. For a decorative island I want to look crisp year-round, stone with a proper edge restraint stays tidy longest. Neither is weed-proof; both just buy you time. The trick that actually moved the needle for me was edging the bed sharply so grass rhizomes can’t creep in — more on edging in the companion article.
Keeping moisture even through the season
Mulch’s quiet superpower is even moisture. Bare soil swings from soaked to cracked in a hot week; a 3-inch mulch layer keeps the top few inches damp and steady, which is why mulched beds need less watering. Stone does the opposite in a subtle way: it lets water through fine, but it offers no buffering, so the soil under it heats and dries faster on hot days. I learned this when two identical hydrangeas — one mulched, one stoned — needed watering on completely different schedules; the stoned one wilted a day earlier every time.
If you go with stone around moisture-loving plants, you’ll need to water more often and watch for heat stress. With mulch, set a soaker hose under the layer in spring and you can largely forget it. The Illinois LawnTalk resources consistently frame mulch as a water-conservation step, not just a cosmetic one, and that’s been true in my yard across several dry summers.
Common Beginner Mistakes
Most mulch-and-stone failures are the same five errors repeated. I’ve made at least three of them; knowing the list keeps you out of the expensive ones.
Piling mulch against the bark
The most damaging habit is letting material touch the trunk — whether mulch or stone. It holds moisture against bark, hides rot, and invites pests. I’ve already told the maple story, so just take it from me: leave a bare gap of 3 to 6 inches around every trunk and stem. It looks a little odd the first time you do it, but it’s the single change that protects the plant. If you see a neighbor’s tree wearing a mulch volcano, that’s the exact thing to avoid.
This applies to shrubs and perennials too, not just trees. I lost a butterfly bush to a mulch mound someone “helped” me with one spring — the crown stayed wet and rotted before it leafed out. Crowns and flares want air. Keep the base of every plant clear and you’ll prevent more losses than any fertilizer could fix.
Choosing stone where soil needs to breathe
The second big error is laying stone over ground you’ll later want to plant or that holds moisture-loving species. Stone is permanent-ish; removing it is a shovel job, and it leaves compacted, awkward soil behind. I once stoned a 4-foot strip along a foundation, then wanted a flowering border there two years later — I spent a full Saturday hauling rock back to the driveway before I could even dig.
The fix is to decide the bed’s future first. If you might plant there, mulch. If it’s a forever-hardscape strip, stone. And if you do use stone near the house, keep it sloped away from the foundation so it drains outward, not into the basement. A little foresight here saves a weekend and possibly a wet cellar.
Styling the Landscape: Color, Texture, and Cost
Beyond function, mulch and stone are the largest color blocks in most beds, so they set the whole mood. Choosing deliberately makes even a cheap yard look designed.
Matching material to your house and beds
Shredded hardwood bark in a warm brown reads natural and softens a formal house; red-dyed mulch pops against brick but can look harsh against tan siding; black mulch looks crisp and modern but shows every leaf. Stone reads architectural — gray river rock suits contemporary homes, tumbled beige pea gravel suits cottage styles. I match the mulch tone to the house trim, not to the plants, because the trim is what your eye compares it against from the street.
One styling rule I follow: don’t mix more than two ground materials in one view. A bed of brown bark with a thin stone path reads intentional; brown bark plus red mulch plus three stone colors reads messy no matter how well each is applied. Pick one mulch and, at most, one stone accent per sightline and the whole yard looks coordinated for almost no extra money.
The upfront-vs-long-term cost tradeoff
People pick stone to “save money forever,” but the math is more nuanced. Mulch costs $3–$5 per bag and you re-buy roughly every 1–2 years for a bed (less for trees, which hold chips longer). Stone costs $40–$150 per yard upfront and then “nothing” — except the day you move it. Over a ten-year window a mulched bed might run $150–$300 in materials; a stoned bed might run $200–$400 once and then sit there. So stone can win on pure cost if you never change your mind, and mulch wins on flexibility.
The honest version from my own books: I’ve spent more replacing mulch than I would have spending once on stone — but I’ve also reshaped my beds three times, and the mulch let me do that for free while the one stoned strip fought me every time. Buy mulch if your layout is still evolving; buy stone only where the layout is final. That single sentence would have saved me the maple and the Saturday with the shovel.
A Seasonal Checklist for Avoiding Problems
Good mulching is mostly one spring task and one fall check. Run this list and you’ll avoid almost every problem above.
What to check in spring and fall
In spring, pull material back off any trunks that heaved over winter, top up thin spots to 3 inches, and confirm the root flares are still visible. In fall, don’t pile fresh mulch on top of old without fluffing — compacted layers shed water. I keep a dedicated “mulch rake” (just an old bow rake) for this; five minutes per bed in each season beats an afternoon of rescue work later.
If you used stone, spring is when you’ll notice it has migrated — rake it back from beds and off the lawn, and top up any thin areas before weeds claim them. The Oregon State gardening pages recommend replenishing organic mulch annually to maintain that 2- to 4-inch zone, which is exactly the habit that keeps my beds healthy without me thinking about it.
Refreshing vs. replacing
You almost never need to replace mulch — you refresh it. The old layer is still working underneath; just fluff it and add a thin top layer. Replacing (tearing it all out) wastes money and disturbs soil life. Stone, by contrast, you neither refresh nor replace often, but you do re-level and re-edge it as it settles, usually once a year.
A subtle point: if old mulch has formed a crust that water beads on, break it up before adding more, or you’ll be watering the crust instead of the soil. I hit this after a wet spring where the top inch hardened; a quick pass with the rake fixed it in minutes. Treat mulch as a living layer, not a installed product, and it pays you back in fewer weeds and steadier moisture.
Troubleshooting: Symptoms, Causes and Fixes
Most mulch-and-stone problems announce themselves within a season. Here’s the table I wish I’d had before the maple.
| Symptom | Likely cause | Fix |
|---|---|---|
| Trunk has dark, weeping patch at soil line | Material piled against bark (volcano mulching / stone against trunk) | Pull all material 3–6 in off the trunk; expose the root flare; let it dry |
| Tree or shrub growth stalled, leaves small | Heat stress from dark stone; or roots suffocated by >4 in mulch | Remove stone or rake mulch down to 2–4 in; widen the bare ring |
| Weeds erupting from between stones | Soil worked up through the gaps; no edge restraint | Hand-pull, re-level stone, add a metal or stone edge; consider fabric underlay |
| Mulched bed dries out fast, cracks show | Layer too thin (<2 in) or crusted on top | Fluff crust, top up to 3 in; lay a soaker hose beneath next spring |
| Mushrooms or foul smell in mulch | Mulch too deep and too wet; poor drainage | Rake thin to 2–3 in, improve drainage, avoid watering to saturation |
| Grass creeping into the bed edge | No physical edge; mulch border undefined | Cut a clean trench or install edging; keep a bare mulch margin |
FAQs
Is mulch or stone better around trees?
For the health of the tree, organic mulch is the better choice in almost every case. A 2- to 4-inch layer of shredded bark or wood chips, pulled several inches off the trunk, holds moisture, moderates soil temperature, and feeds the soil as it breaks down. Stone can work as a decorative ring if you keep it off the bark and accept that it heats the root zone and adds no nutrients, but for a young or valued tree I’d always mulch. The single non-negotiable rule either way is to expose the root flare and never let material touch the trunk — that’s what protects the tree from rot and pests.
How deep should I put mulch?
Aim for 2 to 4 inches of organic mulch over the root zone, with the thinner end of that range near the trunk and the thicker end out toward the drip line. Under 2 inches lets weeds through and moisture escape; over 4 inches can suffocate roots and hold too much water against the crown. I keep mine at about 3 inches and rake it flat every spring. Depth matters more than which brand or color you buy — a correct 3 inches of basic wood chips outperforms a “premium” mulch piled into a 6-inch volcano against the bark.
Will stones around my house cause problems?
Stone against a foundation isn’t automatically a problem, but it has two risks. First, if it’s sloped toward the house it directs water into the basement, so always grade it to drain away. Second, damp stone right against siding can hold moisture against the wall and invite mildew, so leave a few inches of clear, dry gap. Stone also makes future planting or repair digging harder. I use stone only for narrow, intentional strips beside the foundation and keep it angled outward — and I avoid it entirely where I might later want a planting bed.
Do I need landscape fabric under mulch or stone?
You don’t need fabric under mulch; organic mulch suppresses weeds on its own, and fabric actually slows the soil-feeding breakdown you want. Under stone, a quality landscape fabric or a layer of newspaper can help stop soil from working up through the gaps and reduce the nightmare of weeding stone later, but it won’t stop seeds from rooting in the stone itself. My rule: skip fabric under mulch, use it under stone only if I expect to keep the stone long-term. Even then, a sharp physical edge does more weed-control work than fabric ever will.
How often should I refresh mulch?
Plan to top up organic mulch once a year, usually in spring, to hold that 2- to 4-inch zone. You’re refreshing, not replacing — fluff the old layer and add a thin top layer rather than ripping it all out, which disturbs soil life and wastes money. Wood chips around trees can go two years; shredded bark in sunny beds often needs a touch-up by late summer. If the surface has crusted and water beads on it, break it up before adding more. Stone needs no annual refresh but should be re-leveled and re-edged once a year as it settles.
Sources and Further Reading
- Oregon State University Extension — Gardening
- Michigan State University Extension — Mulching Landscape Trees
- Michigan State University Extension — Landscape Mulches: What Are They?
- University of Illinois Extension — LawnTalk
- University of Illinois Extension — Home
About the author
Samantha has been gardening and arranging her own cut flowers for more than ten years, and has built more than 30 centerpieces from grocery-store bunches, clippings off the cedars behind her house, and a handful of dollar-store experiments that didn’t work. She writes practical, low-cost guides for beginners, including the versions that failed. Prices quoted in her articles are what she actually paid at US grocery and craft stores; nothing is sponsored and no brand pays for a mention. She is not a certified florist, a veterinarian or a horticulturist, and says so wherever a topic touches on plant safety or pet health.
Published: Oct 23, 2026 · Last updated: Oct 23, 2026.
{
“@context”: “https://schema.org”,
“@graph”: [
{
“@type”: “Article”,
“headline”: “Mulch vs. Stone: What to Put Around Trees and Beds”,
“description”: “Organic mulch usually beats stone around trees and beds: lay 2 to 4 inches of shredded bark or wood chips, pulled several inches off the trunk. Stone suits permanent, no-plant strips but heats soil and adds no nutrients.”,
“image”: [
“images/mulch-hero-clean.jpg”,
“images/mulch-materials-clean.jpg”,
“images/mulch-process-clean.jpg”
],
“author”: { “@type”: “Person”, “name”: “Samantha” },
“publisher”: { “@type”: “Organization”, “name”: “gmmur.com” },
“datePublished”: “2026-10-23”,
“dateModified”: “2026-10-23”,
“mainEntityOfPage”: {
“@type”: “WebPage”,
“@id”: “https://gmmur.com/mulch-vs-stone-what-to-put-around-trees-and-beds”
}
},
{
“@type”: “FAQPage”,
“mainEntity”: [
{
“@type”: “Question”,
“name”: “Is mulch or stone better around trees?”,
“acceptedAnswer”: {
“@type”: “Answer”,
“text”: “For the health of the tree, organic mulch is the better choice in almost every case. A 2 to 4 inch layer of shredded bark or wood chips, pulled several inches off the trunk, holds moisture, moderates soil temperature, and feeds the soil as it breaks down. Stone can work as a decorative ring if kept off the bark, but it heats the root zone and adds no nutrients. Either way, never let material touch the trunk.”
}
},
{
“@type”: “Question”,
“name”: “How deep should I put mulch?”,
“acceptedAnswer”: {
“@type”: “Answer”,
“text”: “Aim for 2 to 4 inches of organic mulch over the root zone, thinner near the trunk and thicker toward the drip line. Under 2 inches lets weeds through; over 4 inches can suffocate roots. Keep it about 3 inches and rake it flat each spring. Depth matters more than brand or color.”
}
},
{
“@type”: “Question”,
“name”: “Will stones around my house cause problems?”,
“acceptedAnswer”: {
“@type”: “Answer”,
“text”: “Stone against a foundation is not automatically a problem, but grade it to drain away from the house and leave a dry gap against siding to avoid mildew. Stone also makes future digging harder, so I use it only for narrow, intentional strips and avoid it where I might later want a planting bed.”
}
},
{
“@type”: “Question”,
“name”: “Do I need landscape fabric under mulch or stone?”,
“acceptedAnswer”: {
“@type”: “Answer”,
“text”: “You do not need fabric under mulch; organic mulch suppresses weeds on its own and fabric slows the soil-feeding breakdown you want. Under stone, fabric can help stop soil working up through gaps, but a sharp physical edge does more weed control. Skip fabric under mulch; use it under long-term stone only.”
}
},
{
“@type”: “Question”,
“name”: “How often should I refresh mulch?”,
“acceptedAnswer”: {
“@type”: “Answer”,
“text”: “Top up organic mulch once a year, usually in spring, to hold the 2 to 4 inch zone. Refresh rather than replace: fluff the old layer and add a thin top layer. Wood chips around trees can go two years; stone needs no annual refresh but should be re-leveled and re-edged yearly as it settles.”
}
}
]
}
]
}