
If you’ve ever started tomato seeds on a windowsill and watched them turn into pale, floppy strings reaching for the glass, you already know why I built a grow light setup. My first attempt was a disaster: I clipped a regular shop light to a shelf, hung it about two inches above the trays because “more is better,” and walked away. Three days later the seedling tops were bleached white and crispy — I’d cooked them. That failure is exactly why this guide exists. In it I’ll explain what a beginner actually needs from a grow light, which specs are worth your money, how far to hang it, and the cheap shelf rig I use now that hasn’t lost a tray since. No jargon, no upsells — just what works, including the parts that didn’t.
Quick answer: most beginners need a full-spectrum LED panel rated around 20–40 watts for a standard 2×4 foot shelf, hung 6–12 inches above the seedlings and run 14–16 hours a day on a timer. Ignore raw “lumens” on the box — what matters is that the light covers the right spectrum (look for “full spectrum” or a color temperature near 4000–6500K) and delivers enough intensity that seedlings don’t stretch. A complete setup costs $40–$120 depending on whether you buy a panel or a ready-made shelf. The three mistakes that hurt plants most are hanging the light too close (scorch), too far (stretch), and buying a bulb by lumens instead of by spectrum and coverage. Everything below explains the why.
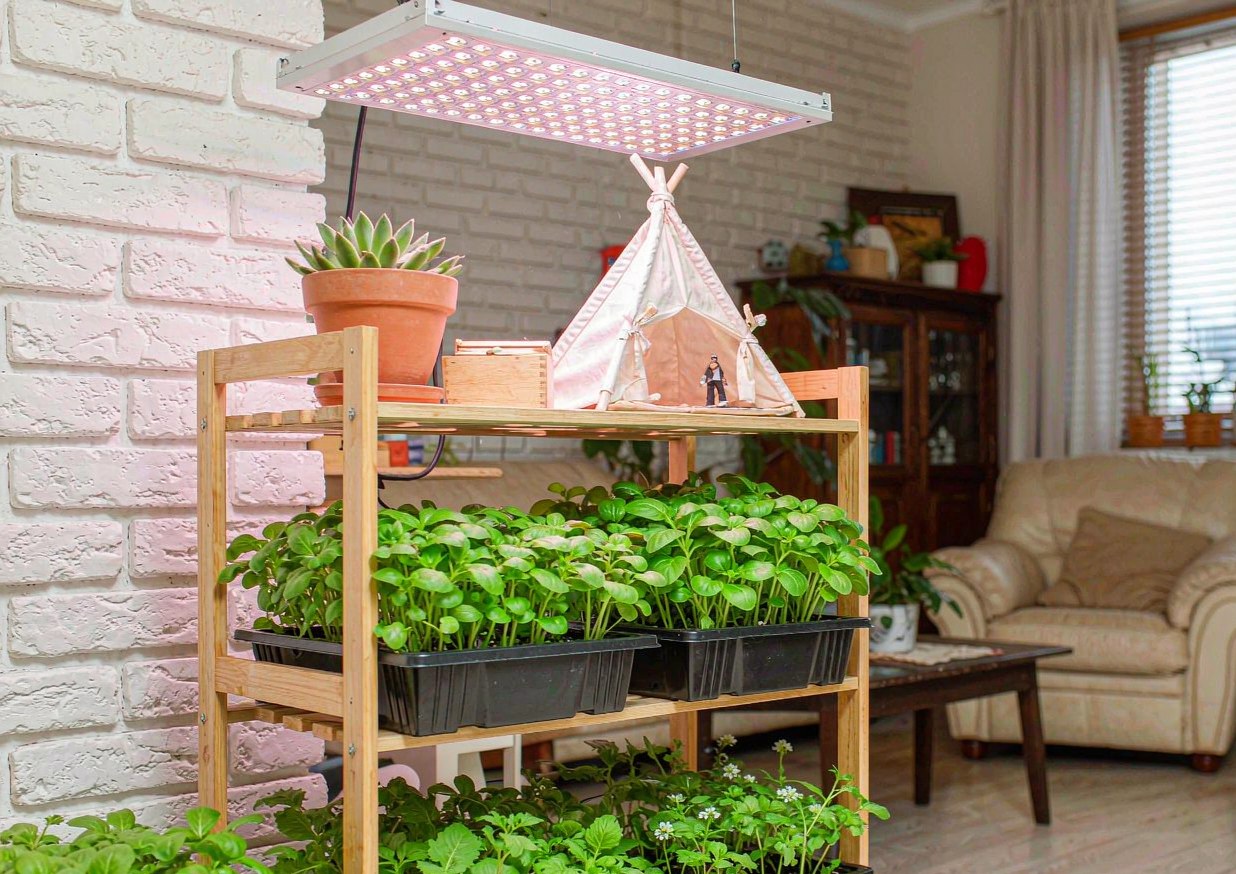 An indoor seed-starting shelf lit by a LED grow light.
- 1. The Three Numbers That Actually Matter
- 2. LED vs. Fluorescent: What I’d Buy Now
- 3. How Much Light Your Plants Really Want
- 4. Hanging Height and Why It’s the Part People Skip
- 5. Setting Up a Simple Shelf Unit
- 6. Power, Heat and Safety in a Small Room
- 7. Matching the Light to the Job
- 8. What to Buy and What to Skip
- 9. Troubleshooting: Symptoms, Causes and Fixes
- 10. FAQs
- 11. Sources and Further Reading
The Three Numbers That Actually Matter
Lumens vs. PPFD — what to ignore
Walk into any store and the boxes shout “10,000 lumens!” as if that settles it. Lumens measure how bright a light looks to the human eye, not how useful it is to a plant. Plants care about photosynthetically active radiation — roughly, the red and blue wavelengths — and the honest metric is PPFD (photosynthetic photon flux density), the amount of usable light landing on the leaves. A bulb can be blinding to you and still useless to a seedling if its spectrum is wrong.
I wasted a season with a bright “daylight” LED shop bulb that looked great and grew pale, leggy seedlings, because its spectrum and intensity at leaf height were both off. The lesson: ignore lumens on the marketing and look for “full spectrum” plus a real wattage figure. If a listing gives PPFD at a stated distance, even better — but for a beginner, a reputable full-spectrum panel of the right wattage will outperform any lumen-chasing bulb. The plant cares about spectrum and intensity, not how dazzling the box claims to be.
Color temperature in Kelvin
The other number worth a glance is color temperature, measured in Kelvin (K). Grow lights are often sold as “warm” (around 2700–3000K, reddish) or “cool” (5000–6500K, bluish), and marketing still pushes the old idea that blue makes leafy growth and red makes flowers. In practice, a full-spectrum light that spans both ends — typically labeled 4000–6500K — covers seedlings through mature plants without swapping bulbs. I keep one full-spectrum panel rather than juggling a red and a blue tube like I did my first year.
If you only have a choice between one or the other, lean cool/blue for seedlings (they stay compact) and warm/red for flowering houseplants late in the season, but a full-spectrum panel does both. The “Kelvin” number is a convenient shortcut, not gospel — what you really want is that full spread of wavelengths, which is why I treat “full spectrum” as the minimum bar and Kelvin as the tiebreaker when two panels are otherwise equal.
LED vs. Fluorescent: What I’d Buy Now
Why I stopped using T5 tubes
For years the standard beginner answer was a T5 fluorescent shop light, and I used them for three seasons. They work, but they have downsides I got tired of: the tubes dim with age and need replacing every year or two, they run warm (which limits how close you can hang them), and they’re fragile. The final straw was a tube that flickered for a month before dying mid-start, setting my peppers back two weeks. Fluorescents aren’t bad; they’re just no longer the best value.
The reason I switched is that LED panels solved all three problems at a comparable price. They hold their brightness for years, run cool enough to hang close, and survive being knocked around. If you already own a working T5 fixture, use it — don’t throw money at an upgrade for the sake of it. But if you’re buying from scratch in 2026, an LED panel beats a new fluorescent fixture on every axis that matters to a beginner: cost per hour, heat, and lifespan.
The heat problem with old bulbs
Heat is the quiet killer in a small setup, and it’s why hanging distance matters so much. Old incandescent and even some compact fluorescents throw off enough heat that you must hang them far away, which then starves the plants of light — the classic catch-22 that scorched my first trays. LEDs run cool, so you can hang them close enough to deliver real intensity without cooking the leaves, which is the whole point. I measured it once: my old bulb’s housing hit 140°F an inch away, while my LED panel stays near room temperature at the same distance.
The practical takeaway is that cool-running light lets you cheat on distance. With a hot bulb you’re forced to choose between scorched tops and stretched stems; with an LED you can have both safety and intensity. That single property — low heat — is why the hanging-height advice below assumes an LED. If you’re on fluorescents, add a couple of inches of clearance and watch the tops for heat stress.
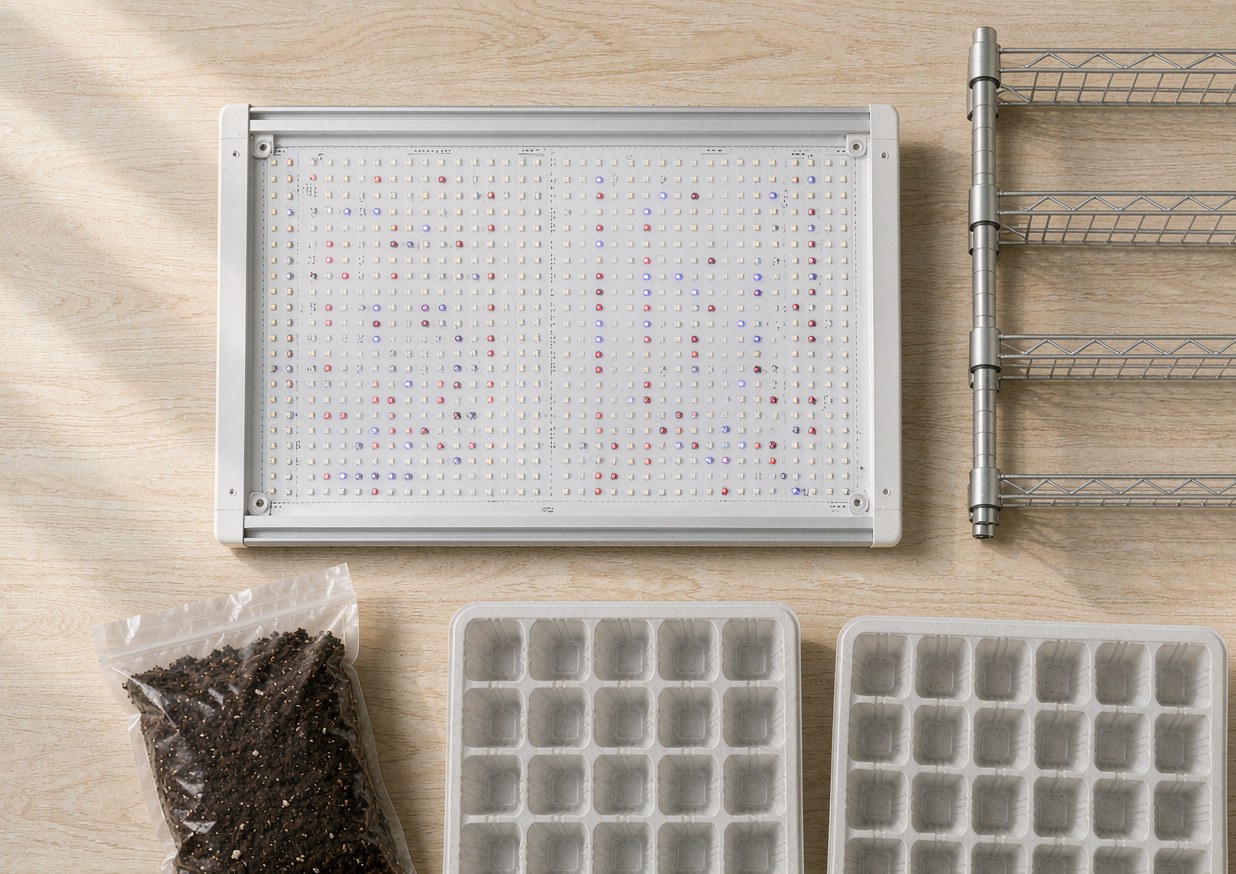 The components of a basic grow light setup.
How Much Light Your Plants Really Want
Seedlings vs. leafy greens vs. flowering
Not every plant wants the same dose, and this is where a timer helps you tune. Seedlings want the most — they’re building structure fast and will stretch without it, so I give them 16 hours. Leafy greens like lettuce and spinach are happy with 12–14 hours of moderate light. Flowering houseplants and anything setting fruit (like a mature pepper you overwintered) often prefer a slight day-length shift, but for a beginner running one shelf, 14–16 hours covers nearly everything from seed to harvest. I keep one schedule and pick plants that fit it rather than micromanaging photoperiods.
The mistake I made early was treating all plants alike — I gave my slow-growing herbs the same 16 hours as feverish tomato seedlings and they got a bit stressed. The rule I use now is match the run time to the plant’s ambition: vigorous seedlings get the full 16, lazy leafy greens get 12–14, and anything just being overwintered gets 10–12 to discourage etiolation without pushing growth. Start at 14 for everything and nudge from there by watching the plants, not the clock.
Reading the DLI
If you want to go one level deeper, the metric pros use is DLI — daily light integral, basically the total light a plant gets in a day. Seedlings and vegetables want a high DLI; a dim corner with a weak bulb can’t deliver it no matter how long you run the light, which is why a 14-hour run under a feeble bulb still produced stretchy seedlings for me. The fix isn’t more hours alone — it’s enough intensity at leaf height. For a beginner, the shortcut is: use a panel with real wattage (20W+ for a small shelf) and hang it close, and the DLI takes care of itself.
I don’t own a DLI meter, and you don’t need one. The plant tells you: tight, bluish, compact growth means enough light; long gaps between leaves and a lean toward the fixture means not enough. If you see stretch, either lower the light a couple of inches or, if it’s already as close as safely possible, accept that the panel is underpowered for that shelf and add a second one. Chasing DLI with a weak bulb and long hours just wastes electricity and still stretches the plants.
Hanging Height and Why It’s the Part People Skip
The too-close scorch
Hanging height is the step beginners rush, and it bit me on day three of my very first rig. Too close, and the leaf tips bleach and crisp — phototoxicity from intensity the seedling can’t handle yet. For most LED panels, the safe starting distance for tiny seedlings is about 12 inches, then you lower it to 6–8 inches as they grow and can take more. The exact number depends on the panel’s wattage, so I treat 12 inches as the conservative opener and watch the tops.
The tell-tale sign of too close is bleached or burnt leaf edges while the rest of the plant looks fine — it’s a local scorch, not a watering problem. If you see it, raise the light an inch or two and the new growth comes in green. I keep a small ruler clipped to the shelf and re-measure every week, because plants grow faster than you’d think and “close enough” drifts into “too close” within days. Height is not set-and-forget; it’s the one adjustment that protects the tray.
The too-far stretch
The opposite error — hanging too high — is more common and more sneaky, because the damage is slow. Too far, and the seedling reaches for the light, producing a pale, spindly stem with wide gaps between leaves. I see this constantly on windowsill starts and on shelves where someone set the panel at the top of a tall rack “to cover more.” The fix is simply to lower the light until the gap between nodes tightens and the stem stays short and sturdy.
There’s a nice middle ground: as plants grow, you lower the light to maintain the same distance rather than letting them skyrocket toward a fixed panel. I move mine down about an inch a week during the seedling stage. If you’ve lowered it as far as safely possible and the plants still stretch, the panel is underpowered for that shelf — that’s the moment to add a second light rather than crank the hours, which only wastes power. Distance is your first lever; intensity is the backstop.
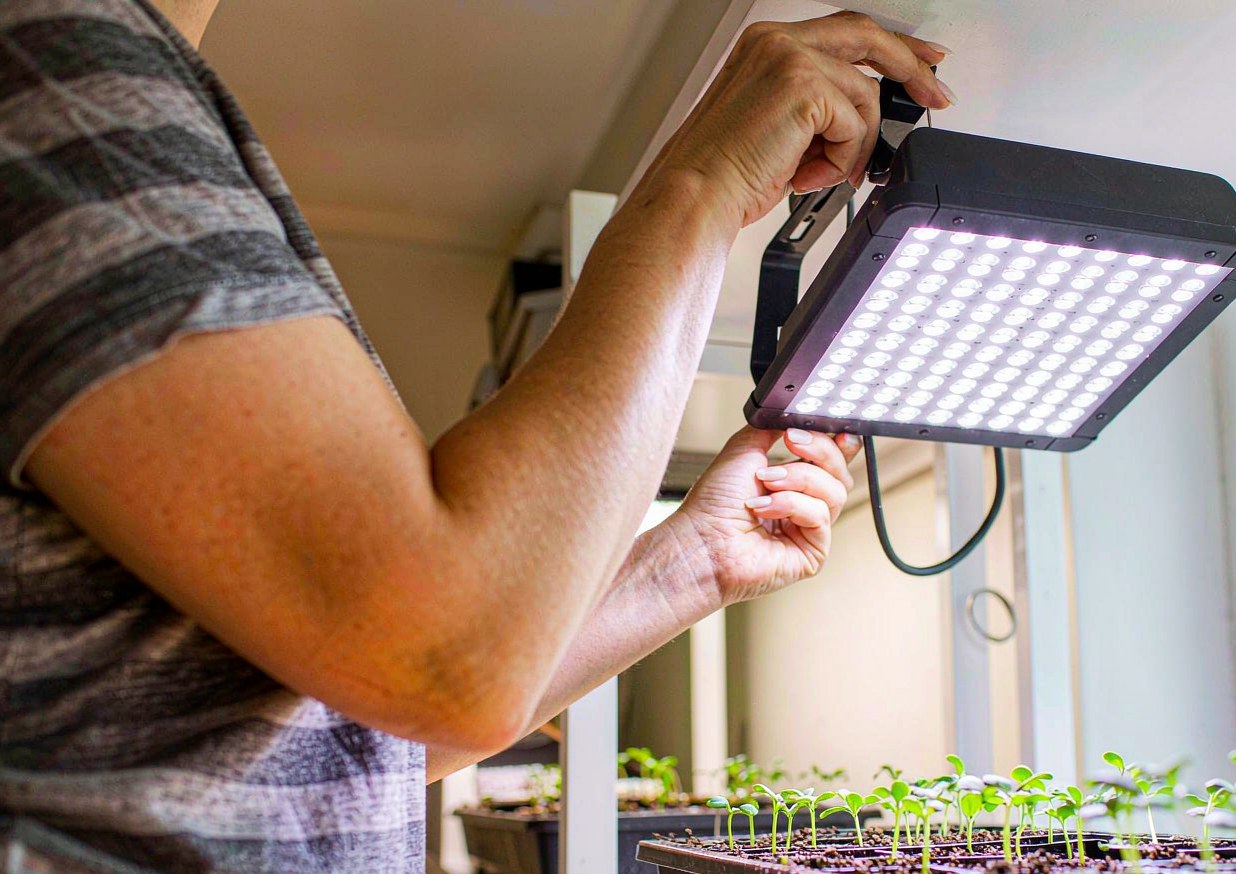 Adjusting the hanging height of the grow light.
Setting Up a Simple Shelf Unit
What I used for a $40 rig
You don’t need a purpose-built cabinet. My current rig is a wire shelving unit (the kind from any big-box store, about $30), one LED panel per shelf ($25–$45), a digital outlet timer ($12), and a few seed trays I already owned. Total around $40–$90 depending on how many shelves you light. The wire shelves let light pass through to the level below if you leave gaps, and they’re adjustable so I can set the perfect height per stage. I bolted a light to the underside of each shelf with the included straps and plugged them all into one timer.
The reason a shelf beats a fancy cabinet for a beginner is flexibility and price. I can reconfigure shelf spacing as plants grow, move the whole thing against a wall in winter, and replace one panel without touching the rest. The timer is the unsung hero here — without it you’ll forget a night and the seedlings lurch, or leave it on and stress them. One $12 timer running the whole shelf is what makes this genuinely hands-off, and it’s the upgrade I’d make before buying a second panel.
Timers and the 14–16 hour rule
A timer enforces the photoperiod so you’re not manually flipping a switch at 6 a.m. I set mine for a 15-hour day (say 6 a.m. to 9 p.m.) and leave it. The 14–16 hour window is a sweet spot: enough to keep seedlings compact and growing, not so much that you’re paying to light an empty room all night. Some growers swear by exact schedules per crop, but for a mixed beginner shelf, one consistent 15-hour day has served me without a single stretch or burnout.
The trap is the “more light is always better” myth. Run a seedling 24 hours and you can actually stress it — plants use the dark period for processes light interrupts, and some (like flowering types) need a real night to set buds. I keep a firm 8–10 hours of darkness minimum. If your schedule drifts because you’re toggling by hand, that’s the sign to spend the $12 on a timer; consistency matters more than the exact hour you pick.
Power, Heat and Safety in a Small Room
Don’t overload the circuit
A shelf of panels plus a heater in a basement can draw real current, and the easy mistake is plugging everything into one cheap power strip on a circuit that also runs the freezer. I tripped a breaker mid-winter and lost a week of growth before I noticed. The fix is boring but important: know what else is on the circuit, keep the load modest, and use a surge-protected strip rated for the total wattage. Add up the panel watts (a 40W panel is tiny, but five of them plus accessories adds up) before you daisy-chain.
A practical safety note worth stating plainly: this is general guidance, not professional electrical advice. If your setup needs more than plugging a few low-watt LED panels into an existing, grounded, surge-protected outlet, or if you smell heat or see flickering, stop and have it checked. Low-watt LEDs are forgiving, but a daisy-chained mess of adapters on an old circuit is not. I keep my rig on one dedicated strip and never run a heater on the same one as the lights.
Ventilation basics
Even cool LEDs add a little heat and, more importantly, still transpire plants in a closed room, raising humidity. Stagnant, humid air is how damping-off and mold find your seedlings. I keep a small fan on low to move air across the trays — it also strengthens stems, which is a nice bonus. A barely-there breeze is enough; you’re not trying to dry them out, just keep the air from going still and clammy around the leaves.
The cheapest ventilation is just not sealing the room. I leave the basement door ajar and run the little fan a few hours a day rather than building any ductwork. If you’re in a tiny closet, a fan becomes essential because there’s no air exchange at all. Watch for condensation on the light or walls — that’s your cue the air is too still and too wet, and it’s the precursor to the fungal problems that wipe out a flat overnight.
Matching the Light to the Job
Seed starting vs. overwintering houseplants
The same panel does two very different jobs through the year, and tuning to the job saves money. In spring it’s a seed-starting engine: intense, long days, lights dropped close to keep trays compact. In winter it’s an overwintering lifeline for houseplants that would otherwise decline in a dim room — there I hang the light higher, run it shorter (10–12 hours), and just aim to keep them alive and green rather than push growth. One shelf, two modes, no second purchase.
The key difference is intensity and duration. Seedlings want to be pushed; a resting houseplant wants to be maintained. I literally move the same panel up a foot and cut the timer to 11 hours in December, and the plants that looked rough in November steady out. Matching the light to the job is how a single $40 rig earns its place year-round instead of gathering dust after May. If you only grow in one season, sell or store it; if you garden year-round, this dual role is the payoff.
When a window is enough
Before you buy anything, be honest about your windows. A bright, unobstructed south-facing window can start seeds acceptably in late spring, and for a few herbs or a single houseplant it may be all you need. The reason most of us still buy a light is consistency: a window’s intensity swings with weather and season, and it’s almost always too dim in depth, so plants lean. I keep a couple of low-demand plants on the sill and reserve the shelf for the trays that really need even, intense light.
The test I use: if a seedling stays compact and green on the sill, the window is enough; if it stretches within a week, it needs the panel. Don’t buy a light to solve a problem a window can handle, but don’t blame yourself when a windowsill fails the stretch test — that’s the window, not your skill. For reliable starts, the panel wins; for a supplemental houseplant, the window may do. Match the tool to the plant and you’ll spend less and grow more.
What to Buy and What to Skip
The gear I’d buy again
If I were starting over tomorrow, the shortlist is small: one full-spectrum LED panel per shelf (20–40W, reputable brand, not the cheapest no-name), a wire shelving unit, a digital timer, and a small fan. That’s it. Those four items are the difference between trays that thrive and trays that stretch, and every one has paid for itself many times over in saved seeds and saved evenings. I’d buy the panel and timer first, then the shelf, then the fan — in that order of impact.
The thing I’d specifically buy again is the timer, because it’s cheap and it removes the one variable — human memory — that wrecked more of my early starts than any bulb ever did. The panel quality matters too; a no-name $10 panel I tried dimmed within a season and grew leggy seedlings, while the name-brand one is on its fourth year. Spend on the panel and timer; save on the shelf and trays, which are commodity items.
The gadgets that wasted my money
Now the skip list, learned the expensive way. I bought a clip-on “grow bulb” that screwed into a desk lamp — too weak and too hot, it did nothing but scorch one tray. I bought colored red and blue separate tubes before full-spectrum was common, and swapping them was a chore that added zero benefit. And I bought a fancy app-controlled controller that died in a power blip and took the schedule with it; the $12 mechanical timer has outlasted it.
The pattern in everything I’d skip is buying a gimmick instead of the basics. A weak bulb, a single-color tube, a smart controller — none of them beat a decent full-spectrum panel on a timer. If a product’s main selling point is that it’s “smart” or “magic spectrum,” I now assume it’s solving a problem the plant doesn’t have. Stick to spectrum, intensity, distance, and duration, and you’ll avoid every gadget that emptied my drawer.
Troubleshooting: Symptoms, Causes and Fixes
Most grow-light problems appear in the first two weeks, and nearly all trace back to one of six causes. This is the table I wish I’d had on day one.
| Symptom | Likely cause | Fix |
|---|---|---|
| Seedlings pale and stretched, big gaps between leaves | Light too far or too weak | Lower the panel 1–2 in; if already close, add a second panel |
| Leaf tips bleached or crispy while rest looks fine | Light too close (scorch) | Raise the panel 1–2 in and watch new growth |
| Seedlings flop and rot at the base | Still, humid air / damping-off | Add a small fan, improve air exchange, don’t overwater |
| Plants lean hard to one side | Uneven light or single-side window | Center the panel; rotate trays; avoid relying on one window |
| Growth stalls, no stretch or scorch | Run time too short / too much darkness | Lengthen to 14–16 hrs; ensure 8–10 hrs darkness min |
| Breaker trips or strip feels hot | Circuit overload or daisy-chained adapters | Reduce load, use a rated surge strip, check the circuit |
FAQs
What kind of grow light should a beginner buy?
Buy a full-spectrum LED panel in the 20–40 watt range for a standard small shelf, plus a digital timer. Ignore the “lumens” number on the box and look for “full spectrum” with a real wattage, because plants respond to spectrum and intensity, not how bright the bulb looks to you. A complete setup — panel, shelf, timer, trays — runs about $40–$120. I’d buy the panel and timer first since those deliver the most benefit, then the shelf, then a small fan for air movement. Skip no-name bulbs and single-color tubes; a reputable full-spectrum panel outperforms them.
How far above my seedlings should the light be?
For most LED panels, start about 12 inches above tiny seedlings, then lower to 6–8 inches as they grow and can handle more intensity. Too close and the leaf tips bleach and scorch; too far and the seedlings stretch into pale, spindly strings. The exact distance depends on the panel’s wattage, so treat 12 inches as a safe opener and adjust by watching the plants: tight compact growth means you’re right, bleaching means raise it, stretching means lower it. Re-measure weekly because plants grow faster than you’d expect.
How many hours a day should grow lights run?
For seedlings and most vegetables, run the light 14–16 hours a day; leafy greens are fine at 12–14, and plants being overwintered do well at 10–12. Keep a firm 8–10 hours of darkness, because plants use the dark period for processes light interrupts, and some need a real night to set buds. More light is not always better — a 24-hour run can stress plants. A timer makes this hands-off; I set one 15-hour day for the whole shelf and adjust only by watching the plants, not the calendar.
Can a regular LED or shop light work as a grow light?
Sometimes, but it’s a gamble. A standard LED shop light may have the right color temperature yet lack the spectrum balance and intensity plants need at leaf height, which is why my bright “daylight” bulb grew pale, leggy seedlings. If you try one, look for a high color temperature (5000–6500K) and hang it close, but expect to add a second if the plants stretch. A purpose-built full-spectrum grow panel is the safer bet because it’s designed for the red and blue wavelengths plants actually use. For a single low-demand houseplant, a bright window may beat a weak bulb entirely.
Do grow lights use a lot of electricity?
Less than most people fear, because modern LED panels are efficient. A 40-watt panel running 15 hours a day draws about 0.6 kWh daily — at typical US rates that’s a few dollars a month, not a bill shock. The cost climbs only if you run many high-watt panels or daisy-chain them on an overloaded circuit, which is also a safety issue. I keep my rig on one surge-protected strip and never add a heater to the same circuit. The bigger “cost” is usually buying the wrong gadget, not the electricity the right panel uses.
Sources and Further Reading
- Royal Horticultural Society — Houseplants (light needs)
- University of Wisconsin Horticulture — Houseplant Care
- Missouri Botanical Garden — Plant Finder
- Oregon State University Extension — Gardening
About the author
Samantha has been gardening and arranging her own cut flowers for more than ten years, and has built more than 30 centerpieces from grocery-store bunches, clippings off the cedars behind her house, and a handful of dollar-store experiments that didn’t work. She writes practical, low-cost guides for beginners, including the versions that failed. Prices quoted in her articles are what she actually paid at US grocery and craft stores; nothing is sponsored and no brand pays for a mention. She is not a certified florist, a veterinarian or a horticulturist, and says so wherever a topic touches on plant safety or pet health.
Published: Oct 22, 2026 · Last updated: Oct 22, 2026.
{
“@context”: “https://schema.org”,
“@graph”: [
{
“@type”: “Article”,
“headline”: “Grow Lights Explained: What Beginners Actually Need”,
“description”: “A beginner-friendly guide to grow lights: the specs that matter, LED vs. fluorescent, how much light plants want, hanging height, a cheap shelf setup, and the mistakes that scorch or stretch seedlings.”,
“image”: [
“images/grow-hero-clean.jpg”,
“images/grow-materials-clean.jpg”,
“images/grow-process-clean.jpg”
],
“author”: { “@type”: “Person”, “name”: “Samantha” },
“publisher”: { “@type”: “Organization”, “name”: “Gmmur” },
“datePublished”: “2026-10-22”,
“dateModified”: “2026-10-22”,
“mainEntityOfPage”: {
“@type”: “WebPage”,
“@id”: “https://gmmur.com/grow-lights-explained-what-beginners-need”
}
},
{
“@type”: “FAQPage”,
“mainEntity”: [
{
“@type”: “Question”,
“name”: “What kind of grow light should a beginner buy?”,
“acceptedAnswer”: {
“@type”: “Answer”,
“text”: “Buy a full-spectrum LED panel in the 20–40 watt range for a small shelf, plus a digital timer. Ignore lumens and look for full spectrum with a real wattage, because plants respond to spectrum and intensity. A complete setup runs about $40–$120. Buy the panel and timer first, then the shelf, then a small fan. Skip no-name bulbs and single-color tubes.”
}
},
{
“@type”: “Question”,
“name”: “How far above my seedlings should the light be?”,
“acceptedAnswer”: {
“@type”: “Answer”,
“text”: “For most LED panels, start about 12 inches above tiny seedlings, then lower to 6–8 inches as they grow. Too close bleaches and scorches the leaf tips; too far stretches them into pale strings. The exact distance depends on wattage, so treat 12 inches as a safe opener and adjust by watching the plants: bleaching means raise it, stretching means lower it. Re-measure weekly.”
}
},
{
“@type”: “Question”,
“name”: “How many hours a day should grow lights run?”,
“acceptedAnswer”: {
“@type”: “Answer”,
“text”: “Run seedlings and most vegetables 14–16 hours a day; leafy greens 12–14; overwintered plants 10–12. Keep a firm 8–10 hours of darkness because plants use the dark period for processes light interrupts. More light is not always better — a 24-hour run can stress plants. A timer makes this hands-off; I use one 15-hour day for the whole shelf.”
}
},
{
“@type”: “Question”,
“name”: “Can a regular LED or shop light work as a grow light?”,
“acceptedAnswer”: {
“@type”: “Answer”,
“text”: “Sometimes, but it is a gamble. A standard LED shop light may have the right color temperature yet lack the spectrum balance and intensity plants need at leaf height, which is why a bright daylight bulb can still grow pale seedlings. If you try one, look for 5000–6500K and hang it close, but expect to add a second if plants stretch. A purpose-built full-spectrum panel is the safer bet.”
}
},
{
“@type”: “Question”,
“name”: “Do grow lights use a lot of electricity?”,
“acceptedAnswer”: {
“@type”: “Answer”,
“text”: “Less than most people fear. A 40-watt panel running 15 hours a day draws about 0.6 kWh daily — a few dollars a month at typical US rates. Cost climbs only if you run many high-watt panels or overload a circuit, which is also a safety issue. Keep the rig on one surge-protected strip and never add a heater to the same circuit.”
}
}
]
}
]
}