
If you’ve been telling yourself you’ll start a vegetable garden “next year,” a raised garden bed is the shortcut that finally makes it happen. I put mine off for two seasons because I pictured a weekend of carpentry, a trip to three hardware stores, and a result that would still look crooked. Then one Saturday I built a 4×8 foot bed between lunch and dinner, filled it, and had lettuce up within two weeks. The secret wasn’t skill — it was keeping the design simple and the materials ordinary. My first attempt did lean a little (I skipped squaring the corners, a mistake I’ll walk you through avoiding), but the plants didn’t care, and I’d already beaten the years of “someday.” This guide gives you the exact steps I use now, including the parts I got wrong so you don’t have to.
Quick answer: to build a raised garden bed in one afternoon, pick a flat, sunny spot, cut two 8-foot and two 4-foot boards (cedar or composite, 2×10 or 2×12), screw the corners together with exterior corner brackets or stakes, set it level on the ground, line the bottom if needed, and fill it with a mix of topsoil, compost, and a coarse amendment rather than straight garden soil or all bagged “potting mix.” Keep the bed no wider than 4 feet so you can reach the middle from either side without stepping in it. A basic 4×8 bed costs roughly $80–$160 in materials and takes two to three hours of actual work. Everything below fills in the details that keep it square, level, and productive.
- 1. Why a Raised Bed Is Worth the Afternoon
- 2. Picking a Spot and a Size That Fits
- 3. Choosing Your Materials Without Overthinking
- 4. Tools and Supplies You’ll Actually Use
- 5. Building the Frame Step by Step
- 6. Setting It Down and Filling It Right
- 7. Planting Your First Crops the Easy Way
- 8. Keeping the Bed Productive Next Season
- 9. Troubleshooting: Symptoms, Causes and Fixes
- 10. FAQs
- 11. Sources and Further Reading
Why a Raised Bed Is Worth the Afternoon
The problems a raised bed solves
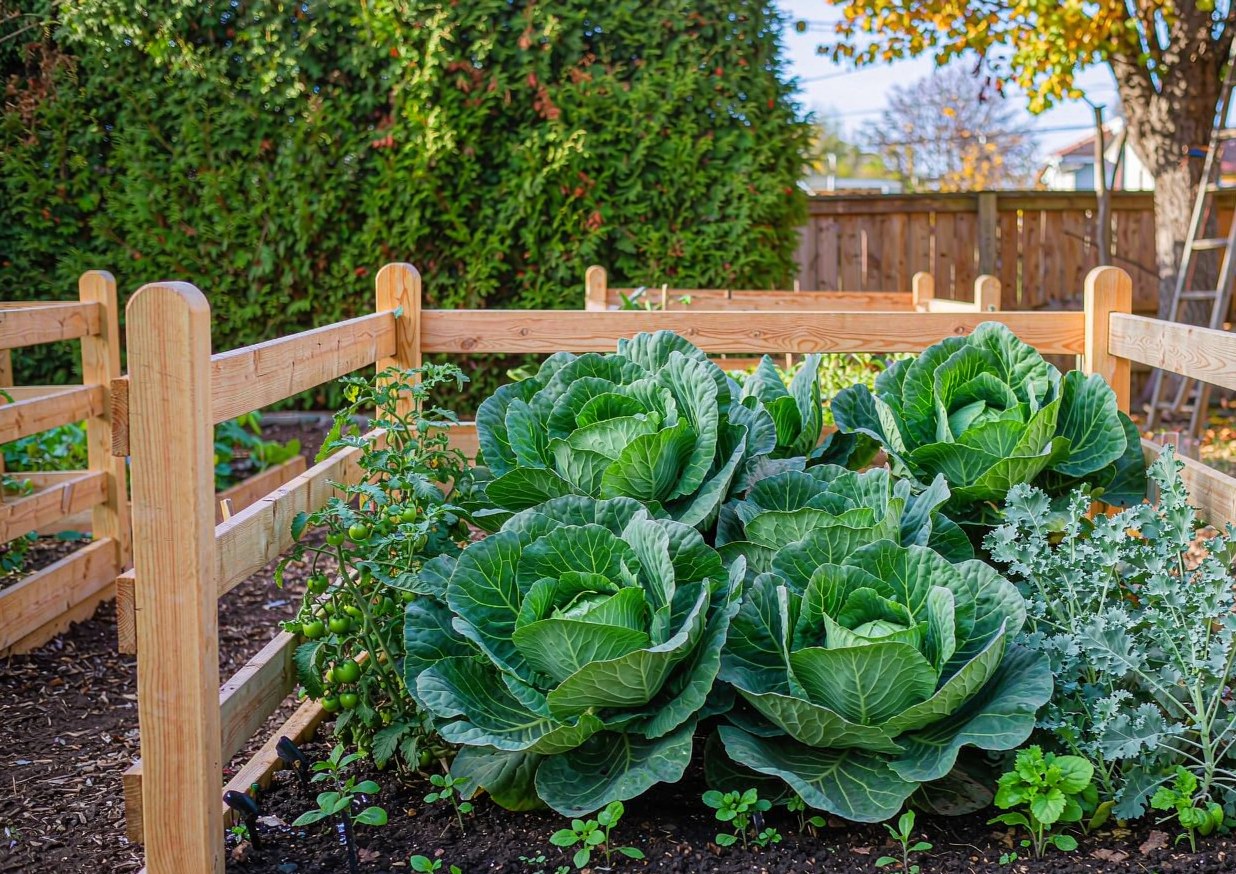
A raised bed earns its keep by fixing the three things that stop most first gardens: bad soil, poor drainage, and the feeling that you don’t know where to start. By bringing in your own filled mix, you skip whatever clay, sand, or compacted mess is underfoot and give roots a loose, fertile home from day one. Because the soil sits above the ground, it warms earlier in spring and drains after rain instead of pooling — which means you plant sooner and lose fewer seedlings to rot. For me, the biggest win was psychological: a defined 32-square-foot rectangle felt manageable where a whole yard had felt overwhelming.
There’s a practical upside too. A raised bed keeps paths clear and soil where it belongs, so you’re not fighting weeds across a wide row and you’re not compacting the planting area with your feet. It also lifts the work off your back — a bed 10 to 12 inches tall is noticeably kinder than stooping over a flat row. I built mine partly because my knees complained, and the difference at harvest time was immediate. If you’ve failed at in-ground gardening before, a raised bed removes most of the reasons why, which is exactly why it’s the right first project for a hesitant gardener.
What “one afternoon” realistically means
Let me be honest about the timeline so you can plan it. Shopping for materials takes about 45 minutes if you go in with a list. Cutting and assembling the frame takes roughly 60 to 90 minutes, especially the first time you’re measuring twice. Moving and leveling the empty frame, then filling it with soil, is another 60 to 90 minutes depending on how far you carry the bags. All in, budget three to four hours of elapsed time with breaks — that’s a single afternoon, not a full weekend. The first bed I built ran long only because I drove back to the store for brackets I’d forgotten, which is why the supply list below is non-negotiable.
The parts that eat time are filling and leveling, not building. Soil is heavy — a 4×8 bed 10 inches deep needs roughly 26 cubic feet, which is a lot of bags to haul — so I now have the soil delivered or use a wheelbarrow in stages. If you can recruit one other person, the whole job drops to under three hours and the heavy lifting gets safe. “One afternoon” assumes you’re not also researching every decision on the spot, so read this guide once, make your material list, and then go. The work itself is straightforward carpentry and digging, not expertise.
Picking a Spot and a Size That Fits
Sun, slope and water runoff
Most vegetables want a minimum of six hours of direct sun, and eight is better, so the single most important site decision is light. Watch your yard through a day, or just note where snow melts first and where the lawn browns last — those sunny, dry spots are your bed locations. Avoid the north side of a tall fence or the drip line of a big tree, both of which steal light and, in the tree’s case, water and roots. I sited my first bed in a spot that got morning shade from the garage, and the tomatoes never quite ripened; moving the second bed into full sun fixed it without changing a thing about my care.
Slope and drainage matter too. A gentle slope is fine and even helps shed excess water, but a steep slope means your bed will sit crooked unless you build it level, which is harder on a hill. More importantly, avoid low spots where rain collects, because a bed sitting in a puddle defeats the drainage benefit. Check where water goes after a storm and pick the higher, sunnier ground. If the only sunny spot is sloped, you can still build there — just plan to level the frame with shims or dig one side down — but flat ground is the friendlier starter choice for an afternoon project.
Width, length and height that make sense
The rule I give every beginner is: never build a bed wider than 4 feet. That width lets you reach the center from either side without stepping onto the soil, which keeps it loose and uncompacted. Length is flexible — 8 feet is a common, comfortable size that uses standard board lengths without waste, but 6 feet or even 4 feet square works if your space is small. Height is where people overthink: 10 to 12 inches is enough for most crops, while 18 to 24 inches suits deep-rooted things like carrots and tomatoes and is easier on your back, at the cost of more soil to fill.
For a first bed, I recommend a 4×8 foot frame at 10 or 12 inches tall. It’s a manageable size to build solo, uses two 8-foot and two 4-foot boards with almost no offcut, and holds enough to feel like a real garden without becoming a chore. If you have the room and the budget, two of these side by side with a path between them is a great next step, but start with one. The mistake is going big — a 4×16 monster sounds efficient until you’re hauling forty bags of soil and can’t reach the middle. Keep it to 4 feet wide and let the length follow your space.
Choosing Your Materials Without Overthinking
Wood, composite and metal compared
For the frame, the three realistic options are cedar or another rot-resistant wood, composite lumber, and galvanized metal. Cedar is the classic choice: it resists rot naturally, is easy to cut and screw, and looks right in a garden, lasting roughly seven to ten years in the ground. Composite (recycled plastic-wood) lasts far longer and never rots but costs more and can be fussy to fasten. Galvanized steel troughs are durable and modern-looking, though they can heat up in full sun and need careful edge handling. For a first afternoon build, cedar is the sweet spot of cost, workability, and lifespan.
Whatever you choose, avoid treated lumber that isn’t rated for garden use, and skip anything you’re unsure about near food crops — the whole point is a safe place to grow vegetables. I used plain cedar for my beds and they’ve held up through several wet winters without a hint of rot. Composite is worth it if you want a “build it once” bed and don’t mind the higher price; metal is worth it if you like the look and have a level spot. The material barely changes the building steps, so pick on budget and appearance, then follow the same frame assembly regardless of what you chose.
What to avoid near food crops
This is the one place to be careful. Older pressure-treated wood used arsenic-based preservatives that you do not want leaching near edible plants, and while modern treated lumber is formulated differently, many gardeners still prefer to keep it out of vegetable beds. I avoid railroad ties and any reclaimed wood of unknown history for the same reason. The safe, simple answer for a food bed is cedar, cypress, or a food-safe composite, and to line the inside with a landscape fabric if you want a barrier between soil and any questionable surface underneath. Following that rule keeps the bed productive and the harvest worry-free.
There’s also the question of what’s underneath the bed. If you’re setting it on a weedy lawn, a layer of cardboard under the soil smothers grass and breaks down harmlessly — a trick I use every time. What you don’t want is to skip any barrier and let invading grass creep up through the loose fill, which turns a low-maintenance bed into a weeding battle by midsummer. The material choices above, plus a cardboard or fabric base, give you a clean, safe growing space without overthinking the chemistry. Keep food safety simple: known-safe wood, a barrier below, and soil you trust.
Tools and Supplies You’ll Actually Use
The short tool list
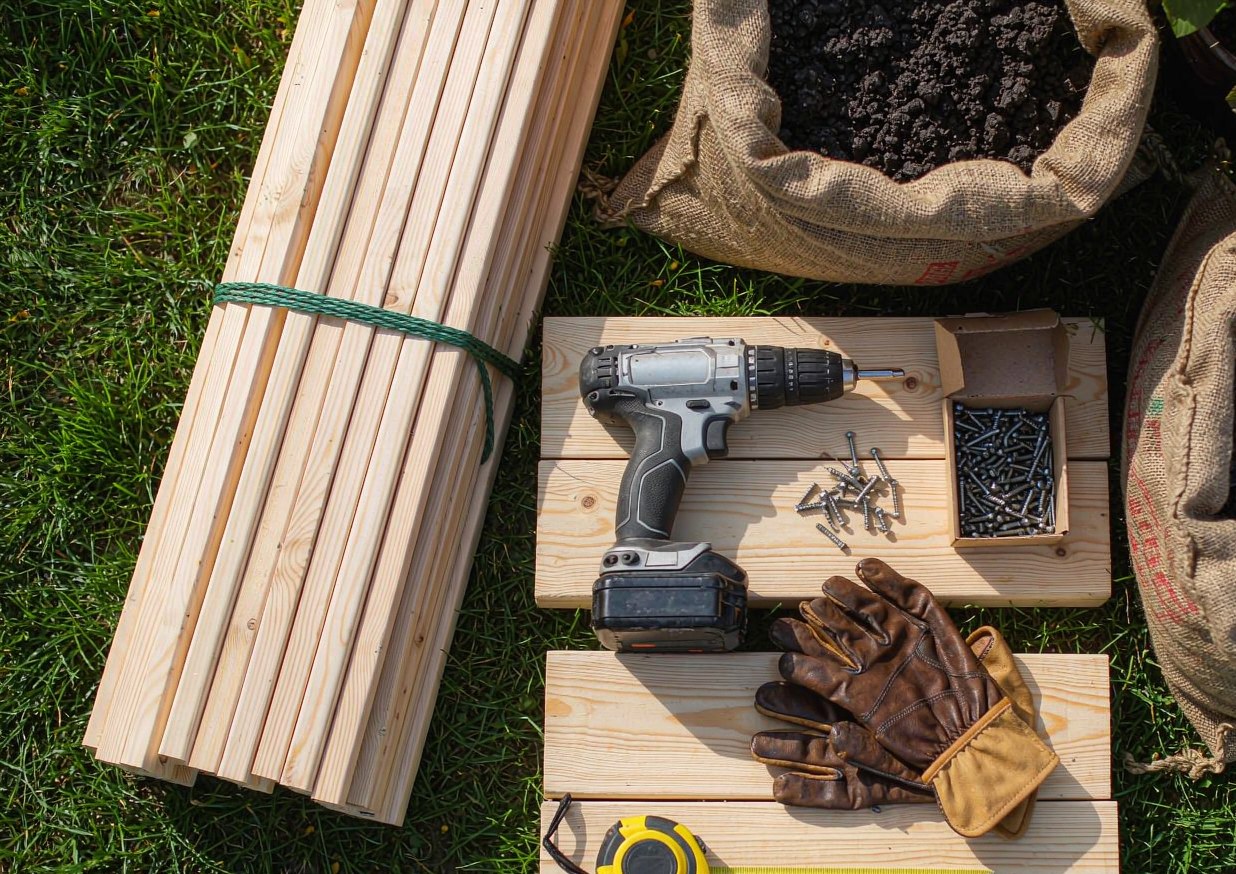
You don’t need a workshop, just a handful of common tools. A tape measure and a pencil for marking, a handsaw or circular saw for cutting boards to length, a drill/driver with screws, and a speed square to keep cuts square are the core. For the corners you’ll want exterior corner brackets or wooden stakes and long screws; brackets are faster and squarer for a beginner. Add a level for setting the frame, a wheelbarrow or tarp for moving soil, and a garden rake for smoothing the fill. That’s the whole list — no specialized carpentry gear required for a basic rectangular bed.
I keep a small bin of these so the next bed is a grab-and-go job. The one tool people forget is the level, and it’s the difference between a bed that looks intentional and one that leans. A rubber mallet is handy if you use stakes, and work gloves save your hands on rough cedar. If you’d rather not cut anything, many stores will rip boards to length at the saw, which trades a little cost for a big time saving on an afternoon build. The point is to assemble, not to invest in tools you’ll use once — borrow what you can and buy only the screws and brackets you’ll consume.
Fasteners, liner and the bits people forget
The supplies that actually derail a build are the small ones. Use exterior-grade or deck screws (or the screws that come with your brackets) — indoor screws corrode and let the corners loosen within a season. If you line the bottom, buy a roll of landscape fabric or just save flat cardboard boxes. People also forget the soil math: a 4×8 bed at 10 inches deep needs about 26 cubic feet of mix, which is roughly thirteen 2-cubic-foot bags, so buy before you start or you’ll be making a second trip mid-build like I did the first time. A few landscape stakes to pin the frame against frost heave are a quiet upgrade worth having.
Don’t skip the corner solution. Screwing board ends directly into each other end-grain is weak and twists; brackets or an internal wooden stake driven across the corner hold the rectangle square through a winter of wet soil pressure. I learned this when my first bracket-less bed bowed outward by spring and I had to re-square it. Spend the few dollars on proper corners — it’s the cheapest insurance in the whole project. With brackets, screws, a liner, and your soil pre-ordered, the actual assembly is almost relaxing because nothing is missing.
Building the Frame Step by Step
Cutting and assembling the corners
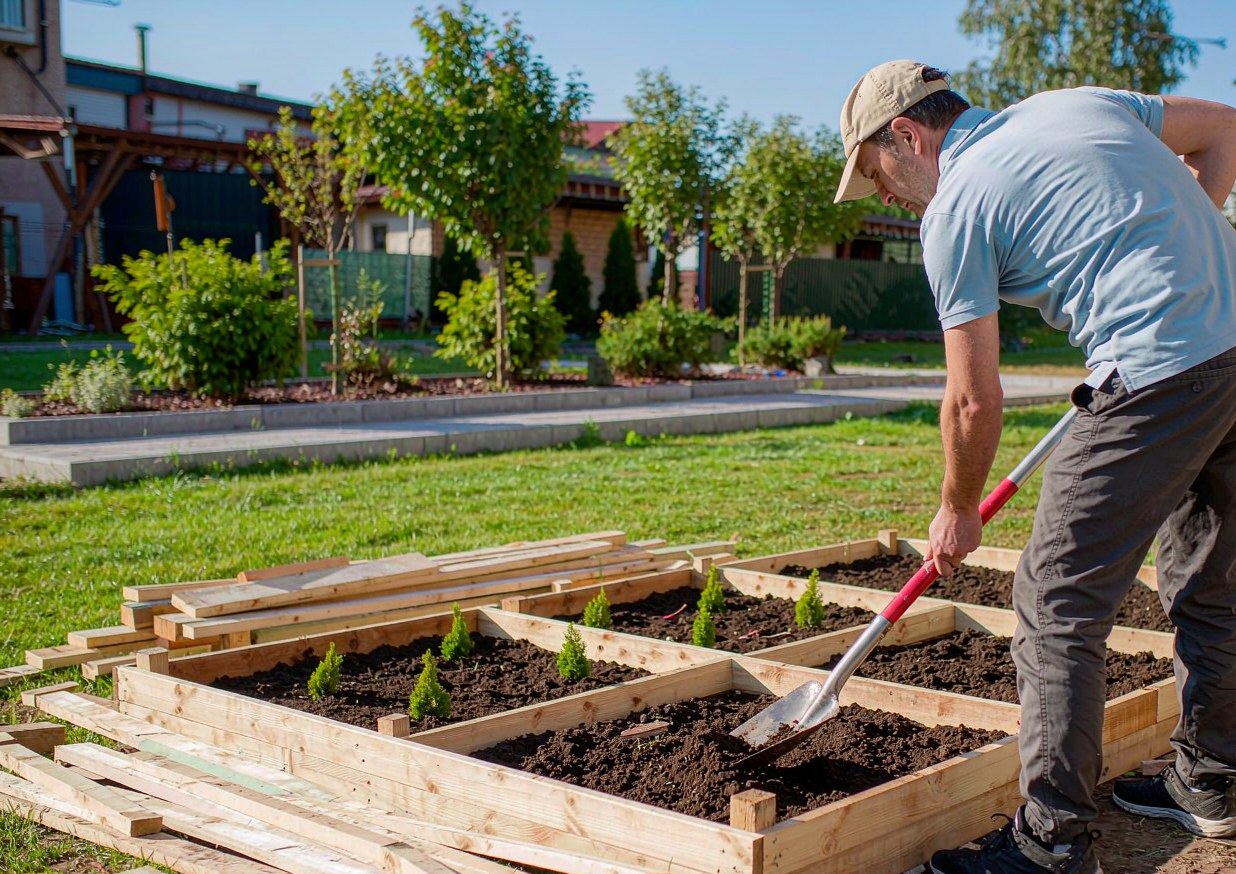
Start by cutting your boards to length — two at 8 feet (the long sides) and two at 4 feet (the ends) for a 4×8 bed — and check that the cuts are square with your speed square so the corners meet flush. Lay the four boards on a flat surface in a rectangle, then at each corner either clamp a corner bracket to the outside and drive the screws, or position a wooden stake across the joint on the inside and screw through it into both boards. Brackets are faster and hold square better, which is why I recommend them for a first build. Drive screws until the heads sit flush but don’t overdrive and split the cedar, which is soft enough to crack if you bully it.
The reason corners get special treatment is that a raised bed is a box full of heavy, wet soil pushing outward all season. A weak corner opens like a book by spring, and then the whole rectangle racks out of square. With brackets or solid stakes, the joint resists that pressure and the bed stays a true rectangle. I assemble mine lying down, then stand it up and check the diagonal corners with a tape measure — if both diagonals match, the frame is square. That five-second check saves the frustration of a bed that looks fine until you try to lay a straight row of carrots in it.
Squaring and leveling the bed
Once the frame is together, carry or drag it to the site and set it down. Now the level earns its place: rest it across the top edges in both directions and adjust by digging out high ground or packing soil under low spots until the frame sits level. A level bed fills evenly, waters evenly, and looks right; a tilted one pools water on one end and leaves the other dry. On a slight slope I shim the low corner with a little soil or a flat stone, then recheck. This step is the one I skipped on my first bed, and the resulting lean bugged me every time I looked at it, so don’t rush it.
After leveling, walk the perimeter and press down to settle it, then re-level. If you used stakes at the corners, drive them a few inches into the ground on the outside to anchor the frame against frost heave and soil push. I also run a final diagonal measurement across the top to confirm it’s still square after moving it — moving a frame can tweak a corner. Once it’s level and square, the structural work is done and the satisfying part begins. Everything from here is filling and planting, and a square, level frame makes both of those easier than you’d expect.
Setting It Down and Filling It Right
Prepping the ground underneath
Before soil goes in, deal with what’s under the bed. If it’s lawn or weeds, lay down a layer of cardboard (plain, tape and staples removed) or landscape fabric across the footprint; it smothers grass, lets water through, and breaks down into the soil over a season. I do this every time — without it, nimble grass sends runners up through the loose fill and you’re weeding by July. If voles or burrowing pests are a problem in your area, a hardware-cloth layer under the cardboard adds protection, though most backyard beds do fine with cardboard alone. This prep takes ten minutes and prevents a summer of annoyance.
One more under-bed decision is whether to line the sides. Cedar doesn’t strictly need a liner and will last years untreated, but a thin landscape fabric stapled to the inside slows the wood’s contact with wet soil and can extend its life. I skip liners on cedar for simplicity, but if you chose a less rot-resistant wood, line the interior. Either way, the ground prep underneath matters more than the side lining, because that’s where the weeds come from. Cardboard down, frame level, and you’re ready to fill — the step where the bed finally starts looking like a garden.
What soil mix to fill with (and what to skip)
The fill is where beginners go wrong, so here’s the simple rule: do not fill a raised bed with straight dense garden soil, and do not fill it with all-purpose potting mix either. Garden soil compacts and drains poorly in a contained bed; bagged potting mix is too light and expensive to fill a whole bed and dries out fast. The mix I use and recommend is roughly 60% screened topsoil, 30% compost, and 10% a coarse amendment like perlite, coarse sand, or shredded bark for drainage. This gives roots loam that holds moisture yet drains, and the compost feeds the plants through the season.
If measuring ratios feels like too much, a practical shortcut is to buy a few bags of “garden soil” and an equal volume of compost and blend them in the bed with a rake, then top with a little compost. Avoid “topsoil” that’s unnamed fill dirt — it can be dead clay. I fill in layers, lightly tamping and watering each layer so it settles before adding the next, which prevents the bed from sinking into a trough a month later. Fill to about an inch below the rim to leave room for mulch and watering. Get the mix right and the bed practically grows the plants for you; get it wrong and you’ll fight drainage and fertility all season.
Planting Your First Crops the Easy Way
Easiest vegetables for a new bed
For a first bed, choose crops that forgive mistakes. Lettuce, radishes, bush beans, spinach, and cherry tomatoes are dependable and quick, and they teach you the rhythm of watering and harvesting without much drama. Herbs like basil, parsley, and chives are nearly foolproof and reward a new bed with something useful from early summer on. I started with a mix of cut-and-come-again lettuce and a couple of cherry-tomato plants, and having food on the table within weeks is what turned “gardening” from a chore into a habit. Skip the fussy first-timers — cauliflower, celery, and long-season peppers — until you’ve got a season behind you.
Seed packets and transplant tags tell you spacing and sun, and for a 4×8 bed you have room for, say, a row of lettuce, a row of beans, a couple of tomato plants, and a border of herbs without crowding. If you’re unsure what suits your climate, a plant database helps you match species to your conditions before you buy — the Missouri Botanical Garden Plant Finder is a solid reference for plant needs. Start with three or four easy crops rather than ten ambitious ones; a small success beats a large failure, and you can always expand the bed next year once you know what your site actually does.
Spacing and watering from day one
Spacing is the quiet factor that decides yield. Crowded plants compete for light, water, and nutrients and reward you with less, not more, so follow the tag’s spacing even when the bed looks empty at planting — it fills in fast. Water deeply and less often rather than a daily sprinkle, which trains roots downward and makes plants sturdier; a raised bed drains quickly, so in hot weather it may need a thorough soak every couple of days rather than a mist each morning. I check the top inch of soil with a finger and water when it’s dry, which avoids both drowning and drought stress. A layer of mulch on top cuts evaporation and keeps the soil cooler.
From the first day, build the watering habit rather than reacting to wilting. A bed that dries out completely is harder to rewet and stresses seedlings, so a consistent deep routine pays off all season. Because raised beds warm and dry faster than ground, they’re a little more demanding of attention in summer — but that same quick drainage is why they outperform in wet springs. Get spacing and watering right and the easy crops listed above will carry you to a real harvest. The bed does the hard structural work; your job is mainly keeping it evenly moist and picking things when they’re ready.
Keeping the Bed Productive Next Season
End-of-season cleanup
When the season winds down, a little cleanup sets the bed up to perform again. Pull spent annuals and any diseased foliage (don’t compost the diseased stuff — it spreads), then either cut perennials back or leave them for winter habitat, depending on your preference. I clear the obvious debris, loosen the top few inches of soil with a fork, and top up with a fresh layer of compost so it can weather in over winter. This takes an hour and means spring starts with a bed that’s already fed and loosened rather than a crusty, empty box. Skipping it just pushes the work into the busy planting window.
Avoid the temptation to till the bed hard or leave it bare and compacted all winter. Light loosening, not churning, preserves the soil structure the earthworms and microbes built, and a compost top-dressing feeds it passively. If you garden where winters are cold, the freeze-thaw actually helps break down that compost layer. I treat end-of-season as a light tidy plus a feed, not a renovation, and the bed comes back in spring looking better than it started. That low-effort rhythm is exactly why raised beds stay productive year after year instead of wearing out.
Refreshing soil without starting over
Raised-bed soil settles and depletes a little each year, but you almost never need to replace it — you refresh it. Each spring, add another 1 to 2 inches of compost on top and fork it lightly into the top layer; this replaces what the previous crops consumed and restores structure. Every few years, if the level has dropped noticeably, top up with more of your soil mix. I’ve kept the same two beds going for several seasons this way, and the only “rebuild” they’ve needed is a corner re-squared once. The bed frame is a long-term structure; the soil inside is a living system you top up, not a disposable bag you dump out.
The only time to consider a fuller change is if you started with poor fill or a crop disease took hold in the soil, in which case solarizing or replacing the top portion helps. For normal use, annual compost is enough, and it’s far cheaper and easier than rebuilding. Think of the bed like a savings account: small regular deposits of compost keep it rich, and the plants draw on it all season. Stay consistent with that one habit and a single afternoon of building pays you back for many years of harvests.
Troubleshooting: Symptoms, Causes and Fixes
Most raised-bed problems appear in the first season and trace back to one of six causes. This is the table I wish I’d had before my first leaning, weedy, half-drowned bed.
| Symptom | Likely cause | Fix |
|---|---|---|
| Bed bows outward by spring | Weak corners (no brackets or stakes) | Add corner brackets or drive stakes across each joint |
| Water pools on one end | Frame not level | Lift low corner, dig out or shim, re-check with a level |
| Grass grows up through the soil | No cardboard or fabric barrier underneath | Lay cardboard under the fill; pull runners as they appear |
| Soil shrinks into a trough | Filled all at once without settling | Fill in layers, water each, top up with more mix |
| Plants wilt despite watering | Wrong fill: all potting mix or dense clay | Blend in topsoil/compost; improve drainage |
| Crops stunted midseason | Soil depleted, no compost refresh | Top-dress with 1–2 in of compost; water it in |
FAQs
How long does it really take to build a raised bed?
For a basic 4×8 foot wooden bed, plan on three to four hours of elapsed time in a single afternoon: about 45 minutes shopping with a list, one to one-and-a-half hours cutting and assembling the frame, and another one to one-and-a-half hours moving, leveling, and filling it. The work slows down mostly at filling, because soil is heavy and a 10-inch-deep bed needs roughly 26 cubic feet of mix. Having a second person and pre-ordering soil drops the time under three hours. The carpentry itself is simple; the hauling is what you should budget for. With the material list from this guide in hand, it is genuinely a one-afternoon project.
What is the best wood for a raised garden bed?
Cedar is the best all-round choice for a food bed: it resists rot naturally, is easy to cut and screw, and lasts about seven to ten years in the ground at a reasonable cost. Cypress is a similar alternative where available. Composite lumber lasts much longer and never rots but costs more and can be fussier to fasten, while galvanized steel troughs are durable and modern but can heat up in full sun. Avoid older arsenic-treated lumber and any reclaimed wood of unknown history near edibles. For a first build, cedar with corner brackets gives you the best balance of cost, lifespan, and ease, and it looks right in almost any yard.
What should I fill a raised bed with?
Fill with a blend rather than a single product: roughly 60% screened topsoil, 30% compost, and 10% coarse drainage material like perlite, coarse sand, or shredded bark. Do not use straight dense garden soil, which compacts and drains poorly in a contained bed, and do not use all-purpose potting mix, which is too light, costly, and fast-drying to fill a whole bed. A practical shortcut is to blend bagged garden soil with an equal volume of compost and rake in a little coarse amendment. Fill in layers, watering each so it settles, and stop about an inch below the rim. Get the mix right and drainage, moisture, and fertility all fall into place.
How wide should a raised bed be?
Keep a raised bed no wider than 4 feet so you can reach the middle from either side without stepping onto the soil and compacting it. Length is flexible — 8 feet is common because it uses standard board lengths with little waste, but 4 to 6 feet works in small spaces. Height of 10 to 12 inches suits most crops; go to 18–24 inches for deep-rooted vegetables or to spare your back, accepting the extra soil cost. For a first bed, a 4×8 frame at 10 or 12 inches is the manageable,高效率 size that uses materials efficiently and still feels like a real garden rather than a token planter.
Do I need to line the bottom of a raised bed?
You don’t strictly need a solid liner, but you should put down a barrier that stops weeds without blocking water. A layer of plain cardboard (tape and staples removed) or landscape fabric across the footprint smothers grass and breaks down harmlessly, which prevents weeds from creeping up through the loose fill. If burrowing pests like voles are a problem in your area, add hardware cloth under the cardboard for protection. Side liners are optional; cedar lasts years without one, though a thin fabric on the inside can extend the life of less rot-resistant wood. The under-bed barrier matters far more than side lining, so don’t skip the cardboard.
Sources and Further Reading
- Michigan State University Extension — Raised Bed Gardening Tips for First-Time Gardeners
- Oregon State University Extension — Vegetable Gardening
- NC State Extension — Extension Gardener Handbook
- Missouri Botanical Garden — Plant Finder
- University of Wisconsin Horticulture — Extension
About the author
Samantha has been gardening and arranging her own cut flowers for more than ten years, and has built more than 30 centerpieces from grocery-store bunches, clippings off the cedars behind her house, and a handful of dollar-store experiments that didn’t work. She writes practical, low-cost guides for beginners, including the versions that failed. Prices quoted in her articles are what she actually paid at US grocery and craft stores; nothing is sponsored and no brand pays for a mention. She is not a certified florist, a veterinarian or a horticulturist, and says so wherever a topic touches on plant safety or pet health.
Published: Oct 21, 2026 · Last updated: Oct 21, 2026.
{
“@context”: “https://schema.org”,
“@graph”: [
{
“@type”: “Article”,
“headline”: “How to Build a Raised Garden Bed in One Afternoon”,
“description”: “A step-by-step beginner guide to building a raised garden bed in a single afternoon: picking a sunny spot and size, choosing cedar or composite, the tools and supplies you need, framing and leveling, the right soil mix, easy first crops, and year-to-year care.”,
“image”: [
“images/raised-bed-hero-clean.jpg”,
“images/raised-bed-materials-clean.jpg”,
“images/raised-bed-build-clean.jpg”
],
“author”: { “@type”: “Person”, “name”: “Samantha” },
“publisher”: { “@type”: “Organization”, “name”: “Gmmur” },
“datePublished”: “2026-10-21”,
“dateModified”: “2026-10-21”,
“mainEntityOfPage”: {
“@type”: “WebPage”,
“@id”: “https://gmmur.com/how-to-build-a-raised-garden-bed-in-one-afternoon”
}
},
{
“@type”: “FAQPage”,
“mainEntity”: [
{
“@type”: “Question”,
“name”: “How long does it really take to build a raised bed?”,
“acceptedAnswer”: {
“@type”: “Answer”,
“text”: “For a basic 4×8 foot wooden bed, plan on three to four hours in a single afternoon: about 45 minutes shopping, one to one-and-a-half hours building the frame, and one to one-and-a-half hours moving, leveling, and filling. Soil is heavy, so hauling and filling take the most time. A second person and pre-ordered soil bring it under three hours. The carpentry is simple; budget for the hauling.”
}
},
{
“@type”: “Question”,
“name”: “What is the best wood for a raised garden bed?”,
“acceptedAnswer”: {
“@type”: “Answer”,
“text”: “Cedar is the best all-round choice for a food bed: it resists rot naturally, is easy to work, and lasts about seven to ten years at a reasonable cost. Cypress is similar. Composite lasts longer but costs more; galvanized steel is durable but can heat up in sun. Avoid older arsenic-treated lumber and unknown reclaimed wood near edibles. For a first build, cedar with corner brackets offers the best balance of cost, lifespan, and ease.”
}
},
{
“@type”: “Question”,
“name”: “What should I fill a raised bed with?”,
“acceptedAnswer”: {
“@type”: “Answer”,
“text”: “Fill with a blend rather than one product: roughly 60% screened topsoil, 30% compost, and 10% coarse drainage material like perlite, coarse sand, or shredded bark. Do not use straight dense garden soil, which compacts, and do not use all-purpose potting mix, which is too light and costly to fill a whole bed. A shortcut is to blend bagged garden soil with equal compost and rake in a little coarse amendment. Fill in layers, watering each to settle.”
}
},
{
“@type”: “Question”,
“name”: “How wide should a raised bed be?”,
“acceptedAnswer”: {
“@type”: “Answer”,
“text”: “Keep a raised bed no wider than 4 feet so you can reach the middle from either side without stepping on the soil and compacting it. Length is flexible; 8 feet is common because it uses standard boards with little waste, but 4 to 6 feet works in small spaces. A height of 10 to 12 inches suits most crops; 18 to 24 inches helps deep-rooted vegetables or your back. A 4×8 frame at 10 or 12 inches is the manageable first-bed size.”
}
},
{
“@type”: “Question”,
“name”: “Do I need to line the bottom of a raised bed?”,
“acceptedAnswer”: {
“@type”: “Answer”,
“text”: “You do not need a solid liner, but you should put down a barrier that stops weeds without blocking water. A layer of plain cardboard or landscape fabric across the footprint smothers grass and breaks down harmlessly, preventing weeds from creeping up through the fill. If voles are a problem, add hardware cloth under the cardboard. Side liners are optional; cedar lasts years without one. The under-bed barrier matters far more than side lining.”
}
}
]
}
]
}