
If you have ever stood at the sink with a handful of coffee grounds wondering whether they belong in the garden or the trash, you are in exactly the place I was three years ago. The internet told me coffee grounds were a miracle — free fertilizer, pest repellent, acid booster, the works — so I started sprinkling them on every pot I owned. Within a month my basil was yellow, the soil on top had gone a weird crusty gray, and a slug had set up camp in the very pot I was trying to protect. That failure is the reason I am writing this: most of what gets shared about kitchen scraps in the garden is half-true at best, and a few bits are flat wrong. The good news is that coffee grounds, eggshells and vegetable scraps do help — but only if you know which claim is real and which is folklore. In this article I walk through what I now do with every scrape from my own kitchen, the mistakes I made, and the small, boring habits that actually moved my soil from dead dirt to something that grows.
Quick answer: three kitchen scraps earn their keep, and the rest are mostly compost fodder. First, coffee grounds are a modest nitrogen source and a useful soil conditioner, but they are not a fertilizer you can rely on alone — work them in lightly, about a half-inch at a time, and never as a crust on top. Second, eggshells add calcium, but only after they are crushed to a powder and only over a timescale of months; they will not fix blossom-end rot this season. Third, most vegetable scraps should be composted rather than buried raw, because raw buried scraps attract pests and rot instead of feeding plants. Everything below explains the how and the why, with the pet-safety caveats I wish someone had pinned to my fridge.
- 1. What Kitchen Scraps Actually Help Your Garden
- 2. Coffee Grounds: The Most Over-Hyped Scrap
- 3. Eggshells: Slow, Not Magic
- 4. Vegetable Scraps You Can Regrow or Bury
- 5. What to Keep Out of the Garden (Pet Safety First)
- 6. Building a Simple Kitchen-Scrap System
- 7. Common Mistakes That Undo the Good
- 8. How Long Before You See a Difference
- 9. Coffee Grounds as a Slug Deterrent: Fact or Fiction
- 10. Eggshells for Blossom-End Rot: the Calcium Myth
- 11. When Kitchen Scraps Aren’t Enough
- 12. Troubleshooting: Symptoms, Causes and Fixes
- 13. FAQs
- 14. Sources and Further Reading
What Kitchen Scraps Actually Help Your Garden (and What’s a Waste)
Why I started saving every scrape
When I first got serious about not wasting food, I treated the compost bin like a magic portal: anything organic went in, and somehow the garden would thank me. It did not work that way. I dumped a week of coffee grounds straight onto a raised bed, tossed in whole eggshells, and buried apple cores an inch under the surface. Two weeks later the bed smelled sour, the soil had a pale film on top, and nothing had noticeably improved. I had confused adding organic matter with feeding plants, and those are very different things. Organic scraps have to break down before roots can use them, and some of them barely break down at all in a single season.
So I slowed down and started treating each scrap as a separate ingredient with its own job. Coffee grounds are a nitrogen-rich “green” that conditions soil. Eggshells are a slow calcium source. Vegetable peels are compost material first and a soil additive second. Once I stopped expecting every scrape to be a quick fix, the garden actually started responding — because I was finally giving the soil what it could absorb. If you are just starting, the single most useful habit is to separate “compost this” from “sprinkle this lightly,” and the next two sections do exactly that.
The three that earn their keep
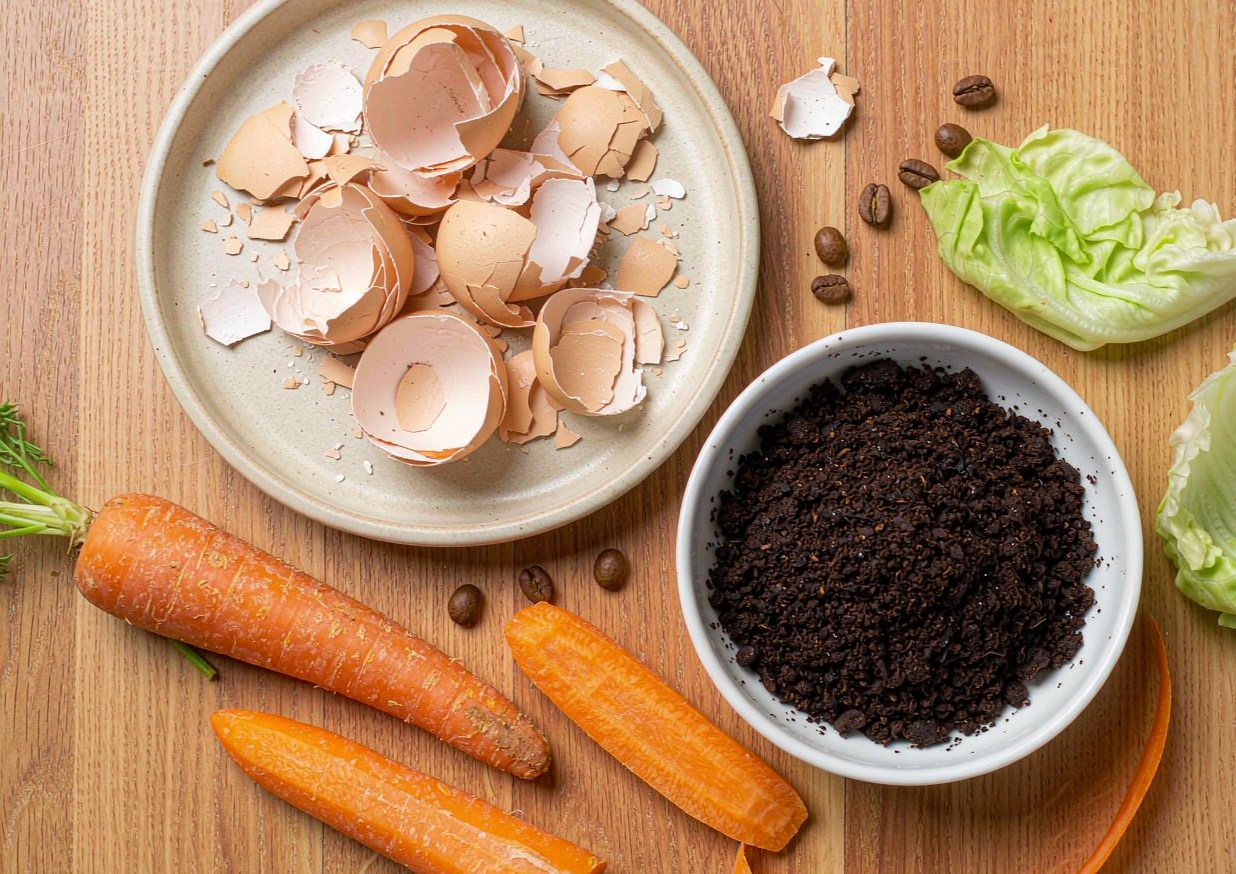
If you only change one thing after reading this, make it this short list. The scraps worth keeping for the garden, in order of how reliably they help, are coffee grounds, eggshells, and composted vegetable scraps. Coffee grounds loosen clay and add a little nitrogen. Eggshells buffer calcium over time. Vegetable scraps, once composted, return a broad mix of nutrients and a lot of organic matter that holds water and air in the soil. Everything else — citrus, cooked food, meat, dairy, oily scraps — belongs in a municipal compost or the trash, not your beds.
I keep a tiny sticky note on the cupboard that says “grounds light, shells crushed, peels composted.” It sounds silly, but it stops me from repeating the crusty-gray disaster from my first year. The point is not perfection; it is avoiding the few moves that actively hurt. A small, consistent routine beats a heroic weekend of dumping everything at once, and it keeps the pets in the house safe, which matters more than any yield bump. The rest of this article fills in the how for each of those three.
 Photos provided by Pixabay
Coffee Grounds: The Most Over-Hyped Scrap
 Photos provided by Pixabay
What coffee grounds actually do to soil
Here is the part the memes leave out: used coffee grounds are roughly 2% nitrogen by weight, which sounds impressive until you realize that a half-cup of grounds adds a trace amount of nitrogen to a whole bed. They are a conditioner, not a fertilizer. What they do really well is improve soil texture — in my heavy clay beds they loosened the top few inches within a season, and in my sandy pots they helped hold moisture a little longer. They also have a near-neutral pH once brewed, despite the myth that they acidify soil; the acid mostly ends up in your cup, not the grounds. The Oregon State Extension gardening pages are clear that spent grounds are a minor soil amendment, not a substitute for balanced feeding.
The other real benefit is worm appeal. Earthworms love coffee grounds, and where worms thrive, soil structure improves on its own. I mix a thin layer into the top of a bed in early spring and the worm casts show up within weeks. What grounds do not do is repel every pest, fertilize your tomatoes, or acidify a bed enough to matter for blueberries. Treating them as a light, regular soil conditioner is the move that actually pays off; treating them as a cure-all is how you end up with the crusty gray top I described earlier.
How I use them without overdoing it
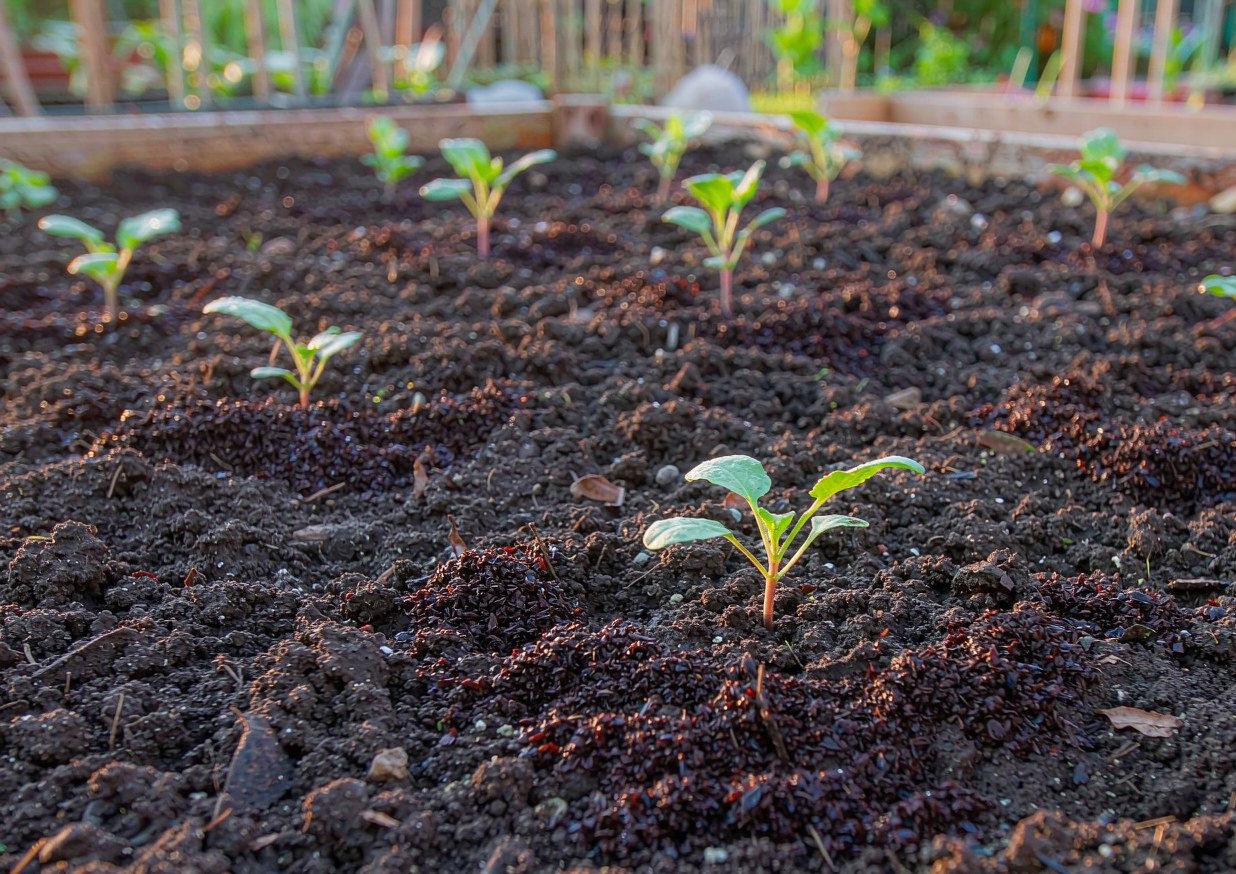
My rule now is simple: never more than a half-inch of grounds worked into the top inch of soil, and never a dry crust left on the surface. A surface crust can shed water and, worse, can slow seedlings trying to push through. I stir grounds into the topsoil with my fingers or a hand fork, then water lightly so they settle in. For containers I use even less — a tablespoon mixed into a 10-inch pot of potting mix is plenty. If you brew a pot a day like I do, that is still a lot of grounds over a month, so I rotate which bed gets them so no single spot gets overloaded.
One more habit that saved me: I let fresh grounds cool and dry on a tray for a day before using them, which keeps mold down. And I avoid using them around very young seedlings, which seem to stall if grounds sit right against the stem. The Illinois Extension composting guide notes that grounds are a “green” in compost math, so if you compost them instead of applying directly, just balance with plenty of “browns” like shredded leaves. Either path works; the key is restraint.
Eggshells: Slow, Not Magic
What eggshells really add (and what they don’t)
Eggshells are almost pure calcium carbonate, the same mineral as agricultural lime. That makes them useful for one specific thing: slowly raising soil calcium. What they do not do is deliver a fast fix, because a whole eggshell takes a long time to break down in soil, and even then the calcium moves slowly to roots. I learned this the hard way when I tucked three crushed shells next to a tomato plant with blossom-end rot and saw zero change that season. The calcium was there, technically, but the plant could not reach it in time. The NC State Extension Gardener Handbook treats eggshells as a long-game soil amendment, not a seasonal remedy.
So the honest answer is: eggshells help over years, not weeks. If your soil is genuinely calcium-deficient, they are a free, gentle way to nudge it in the right direction. If you are fighting a specific deficiency this year, you need a soluble source, not shells. I now save shells in a jar, rinse and dry them, and think of the jar as a slow-release calcium bank I keep topping up rather than a medicine I apply to a sick plant.
How to prep them so they work
Preparation is everything with eggshells. A whole shell in the soil is basically a rock for the first year. The fix is to dry the shells, then crush them as fine as you can — a mortar and pestle, a rolling pin, or a quick blitz in a coffee grinder you never use for coffee. The finer the powder, the faster it breaks down. I aim for a texture close to coarse sand. Then I work it into the top few inches of a bed in fall, so it has the whole winter and spring to begin releasing. For containers I mix a teaspoon of shell powder into the potting mix at planting time.
I also rinse shells before drying to remove the membrane and any egg white, which keeps them from smelling as they sit in the jar. Baked shells (ten minutes at 200°F) crush more easily and store without odor. None of this is complicated, but it is a small chore, and that is exactly why most people’s shells sit in a pile doing nothing. Treat shell prep like a Sunday five-minute task and the calcium actually makes it into the soil instead of the landfill. The EPA’s home-composting guidance is a good reminder that yard and kitchen “browns” like crushed shells belong in the slow, steady loop, not a quick fix.
Vegetable Scraps You Can Regrow or Bury
The ones worth regrowing on the windowsill
Before anything goes in the compost, a few scraps are worth a second life on the kitchen windowsill. The classic winners are green onion bottoms, lettuce hearts, and celery bases — stand them in a shallow dish of water and they push out new leaves for a few weeks. I keep a jar of green-onion stubs by the sink and snip from it all summer; it is not a huge harvest, but it is free herbs for the price of a windowsill. Potato eyes and sweet-potato slips also regrow readily if you have garden space, though those go in the ground, not a glass. These are the scraps where “regrow” clearly beats “bury.”
The catch is that windowsill regrowth is a novelty harvest, not a substitute for growing from seed or starts. The lettuce you regrow from a heart is tougher and bolts fast, so I treat it as a bonus, not a crop. Still, it is a gentle way to show kids (or skeptical adults) that food waste is not always waste. I started my nieces on green onions and they now police the scrap bowl for anything regrowable, which is its own small win. Just keep the water clean and change it every couple of days so it does not go slimy.
The ones to compost, not bury raw
Most vegetable scraps should be composted, not buried straight into a bed. Raw buried peels and cores rot slowly, smell, and — in my experience — attract every rodent and raccoon on the block. I learned this after burying a banana peel an inch down and finding it, still recognizable, three weeks later, with a suspiciously happy squirrel nearby. The Missouri Botanical Garden’s plant resources and most extension services agree: scraps feed the soil best after they have decomposed into humus, not as chunks under the mulch.
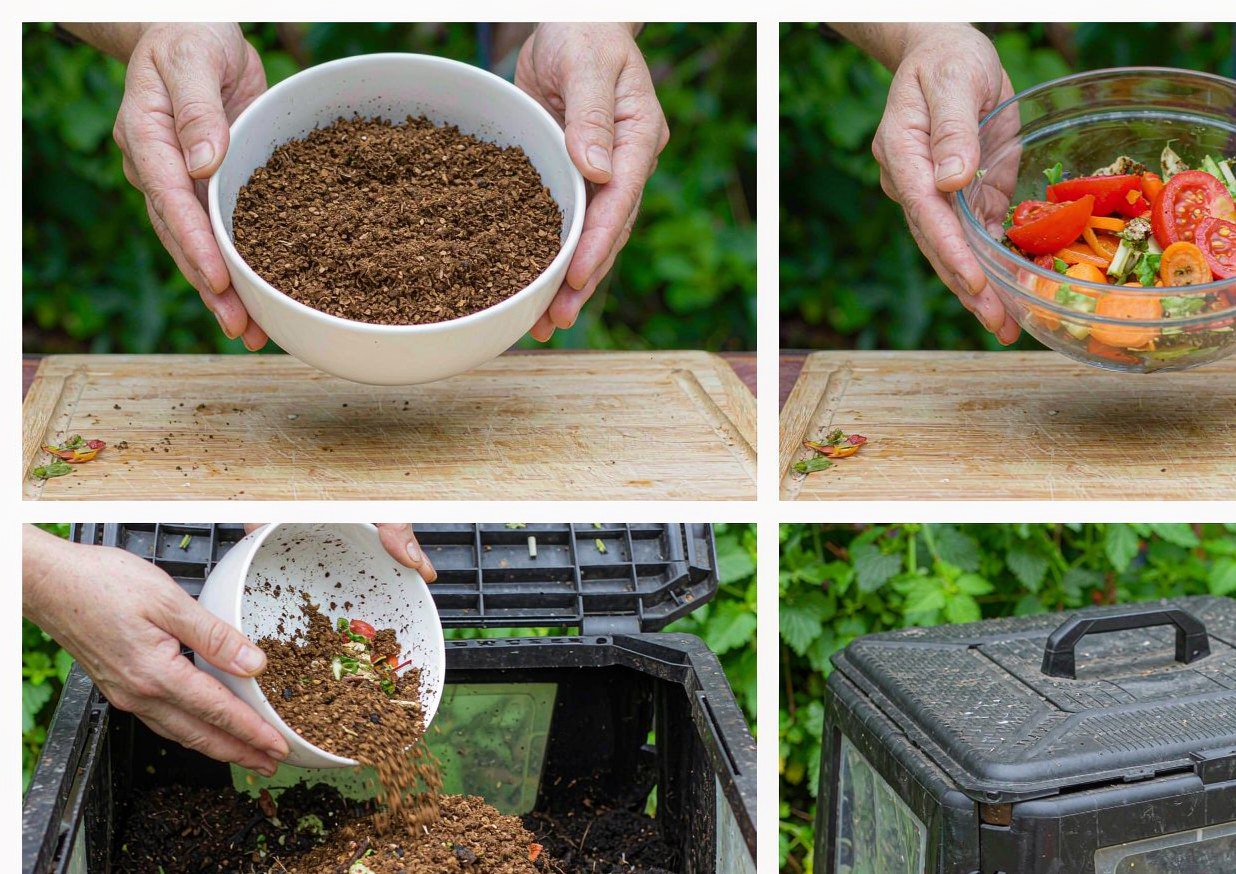
So my default is to compost first. If you do not have a bin, a simple pile in a corner with a layer of leaves on top works; the key is to let it break down until it is dark, crumbly, and earthy-smelling, then fold that finished compost into the beds. You get the nutrients from the scraps without the pests and the rot. The only scraps I ever bury directly are finished compost and, occasionally, a thin layer of grounds — everything else earns its place by decomposing first.
 Photos provided by Pixabay
What to Keep Out of the Garden (Pet Safety First)
The scraps that can harm pets
This section is the one I care about most, because the garden is also my dogs’ favorite nap spot. Used coffee grounds still contain caffeine, and caffeine is toxic to dogs and cats if they eat enough of it — a curious pup that licks a fresh pile of wet grounds can end up at the emergency clinic. Onions, garlic, chives and leeks (allium family) are toxic to pets too, and people compost those constantly without thinking. Even raw potato peels and fruit pits can cause trouble. None of this means you cannot use these scraps — it means keep them out of reach until they are fully composted and out of the beds where pets dig.
I now treat wet coffee grounds like a cleaning product: apply them, work them in, and never leave a pile sitting on the soil surface where a nose can find it. The ASPCA toxic and non-toxic plant list is my go-to check before anything new goes near the garden, and I keep the page bookmarked. If a scrap comes from something I would not want a dog to eat raw, it goes into the sealed compost bin, not a shallow scrape in the bed.
The non-veterinary rule I follow
One boundary I state plainly: this article is general gardening information, not veterinary advice. I am not a vet, and no plant list — including the ASPCA database — is a complete medical reference. If you think a pet has actually eaten coffee grounds, allium scraps, or anything questionable from the kitchen, call your veterinarian or the ASPCA Animal Poison Control Center at (888) 426-4435 rather than waiting to see what happens. Keeping scraps out of paws is easy; guessing about a real ingestion is not something any of us should do. A sealed lid on the compost and a quick rake-in of any grounds is all it takes to stay on the safe side.
Building a Simple Kitchen-Scrap System
A counter bin that doesn’t smell
The reason most people give up on kitchen scraps is the smell, and the smell comes from a sealed, airless container full of wet material. My fix is boring but effective: a small counter caddy with a charcoal filter lid, emptied every two days into the outdoor bin, plus a handful of shredded newspaper at the bottom to absorb moisture. That single change took my scrap routine from “ugh, the kitchen reeks” to “I barely notice it.” No special equipment required — a lidded yogurt tub with a paper towel works in a pinch.
I also keep a bowl of “browns” by the caddy: shredded mail, torn cardboard, dead leaves in fall. Every time I add wet scraps, I toss a little brown on top, which keeps things from going anaerobic and stinky. The Illinois Extension guide frames this as the green-to-brown balance, and it is the difference between a compost pile that works and one that offends the neighbors. Spend one weekend setting up the system and the daily habit becomes automatic.
Balancing greens and browns
Compost is just managed decomposition, and decomposition wants a ratio of roughly two to three parts “brown” (carbon) to one part “green” (nitrogen) by volume. Coffee grounds and vegetable scraps are greens; leaves, paper and cardboard are browns. When I started, I dumped all greens and got a slimy, smelly mess; once I aimed for that brown-heavy ratio, the pile heated up and broke down in weeks instead of months. A simple visual cue: if it smells, add browns; if it is dry and stalled, add greens and a little water.
For a small garden this does not need to be precise. I keep a leaf bag in the garage and a paper-shredder basket in the office, and between the two I almost always have browns on hand. The payoff is finished compost I can fold into beds every spring, which is where the real nutrient return from kitchen scraps shows up. The EPA notes that home composting keeps food waste out of landfills and returns it to soil — a rare win that is both cheaper and better than the trash.
Common Mistakes That Undo the Good
Dumping everything in one pile
The most common mistake I see — and the one I made — is treating the garden as a single dumping ground for anything organic. Coffee grounds by the cup, whole eggshells, raw peels, citrus, cooked rice: all in one bed. The result is an imbalanced, sometimes toxic, sometimes pest-friendly mess. Different scraps have different jobs, and piling them together hides which ones are actually helping. I now have three habits: grounds go light and rotated, shells go crushed and in fall, and everything else gets composted first. Separation is the whole game.
Raw scraps on top of beds
The second mistake is leaving raw scraps on the surface of a bed. It looks tidy for a day, then it smells, mats down, and becomes a buffet for pests. I did this with a layer of grounds once and watched seedlings fail to emerge through the crust. The fix is always to work scraps in or to compost them first; never leave a wet, raw layer exposed. If you are short on time, a thin scatter of grounds raked into the top inch is fine, but a thick raw mat is not. Think “folded in,” not “piled on,” and the soil stays healthy instead of stressed.
How Long Before You See a Difference
The timeline I actually measured
People want a number, so here is mine from two seasons of notes. Coffee grounds showed a visible texture improvement in my clay beds after about one season of light monthly applications — the top two inches held moisture better and dug easier. Eggshells I could not measure in a single year at all; the calcium was a multi-year project, which is why I no longer expect them to “work” quickly. Finished compost from kitchen scraps, by contrast, paid off fastest: a spring top-dressing of last year’s compost noticeably improved growth within four to six weeks of planting. The lesson is that composted scraps beat raw scraps on speed every time.
What “better soil” looks like
“Better soil” is not a dramatic event; it is a set of small signals. My beds now stay damp a day longer after rain, crumble instead of clodding when I squeeze them, and grow weeds I can pull in one piece because the structure is looser. Earthworms show up uninvited, which I take as the highest compliment. None of that came from one heroic scrape-dumping; it came from a year of light, consistent inputs. If you are expecting a before-and-after photo after one weekend, you will be disappointed — but if you keep at it, the soil quietly becomes the kind that grows things.
Coffee Grounds as a Slug Deterrent: Fact or Fiction
You will see the claim everywhere: a ring of coffee grounds repels slugs. My honest test — a ring around one basil pot, none around its twin — showed maybe a slight reduction, but slugs crossed the ring on damp mornings without hesitation. The grit may bother them a little when dry, but it is not a fence. I would not rely on grounds for slug control; a shallow beer trap or a nighttime hand-pick does more. The grounds are still worth using for soil, just not as a pest wall. Treat this myth the way I now treat most kitchen-scrap folklore: nice idea, weak results, keep doing it only for the real benefit.
Eggshells for Blossom-End Rot: the Calcium Myth
Blossom-end rot on tomatoes is a calcium-distribution problem, not usually a soil-calcium shortage — plants often have enough calcium but cannot move it to the fruit when watering is uneven. So burying eggshells next to a tomato rarely fixes it, because the shell calcium is not available fast enough and the real issue is water stress. I stopped expecting shells to cure it. Instead I keep watering steady and, if a soil test shows a true deficiency, I use a soluble calcium source. Eggshells remain a fine long-term soil amendment; they are just not the emergency room for blossom-end rot. The NC State handbook is a solid reference for the actual causes if you want the detail.
When Kitchen Scraps Aren’t Enough
There is a limit, and pretending otherwise wastes a season. Kitchen scraps alone will not meet the full nutrient demands of heavy feeders like tomatoes, corn or squash, and they will not correct a genuinely depleted or compacted soil on their own. When my beds tested low in phosphorus and potassium, no amount of grounds and shells closed the gap — I needed a balanced organic fertilizer and a cover crop. Use scraps as the steady baseline, then fill the gaps a soil test reveals. The Oregon State gardening resources are helpful for matching amendments to what your specific soil actually lacks. Scraps are the habit; they are not the whole diet.
Troubleshooting: Symptoms, Causes and Fixes
Most kitchen-scrap problems show up within a few weeks and trace back to one of six causes. This is the table I keep by the compost bin.
| Symptom | Likely cause | Fix |
|---|---|---|
| Gray crust on top of soil | Too many coffee grounds left as a dry surface layer | Rake grounds into the top inch; stop surface crusting; water in |
| Sour or rotten smell from the bed | Raw scraps buried or pile too wet with no browns | Remove raw scraps; add shredded leaves/cardboard; turn the pile |
| Seedlings fail to emerge | Thick grounds mat blocking sprouts | Lighten application to a half-inch, worked in, not layered |
| Pests digging in beds | Food scraps accessible to pets or wildlife | Compost in a sealed bin; never bury raw scraps in open beds |
| No change in plant health | Expecting instant results from slow amendments | Switch to finished compost top-dressing; allow a season |
| Pet interest in the soil | Wet coffee grounds or allium scraps left exposed | Rake in immediately; keep compost lid sealed; call vet if ingested |
FAQs
Do coffee grounds really fertilize plants?
Only modestly. Used grounds are about 2% nitrogen and act more as a soil conditioner than a complete fertilizer. They improve texture, help worms, and add a little nitrogen, but they will not replace a balanced feed for heavy feeders like tomatoes or roses. I use them as a light, regular top-dressing and still fertilize normally. The Oregon State Extension is clear that spent grounds are a minor amendment, not a standalone fertilizer, so treat them as a bonus, not the main event.
How should I prepare eggshells so they actually help?
Dry the shells, then crush them as finely as you can — a rolling pin or a dedicated coffee grinder works — and work the powder into the top few inches of soil in fall so it has months to break down. Whole shells barely decompose in a single season and will not deliver calcium in time to fix a current deficiency. Think of eggshells as a slow, multi-year soil builder rather than a quick remedy, and save them in a rinsed, dried jar so they are ready when you need them.
Can I just bury vegetable scraps in the garden?
I would not. Raw buried scraps rot slowly, smell, and attract pests, and they rarely break down fast enough to feed plants this season. Composting them first — letting them become dark, crumbly humus — returns the nutrients without the drawbacks. A few scraps like green-onion bottoms and lettuce hearts are worth regrowing on a windowsill, but the bulk should be composted, not buried. Finished compost folded into beds is where the real benefit shows up.
Are coffee grounds safe around pets?
Used grounds still contain caffeine, which is toxic to dogs and cats if eaten in quantity, so do not leave wet piles where pets can reach them — work them into the soil right after applying. Onions, garlic, chives and raw potato peels are also pet hazards and belong in a sealed compost bin. This is general information, not veterinary advice: if a pet actually eats coffee grounds or allium scraps, call your vet or the ASPCA Animal Poison Control Center at (888) 426-4435 rather than waiting to see what happens.
How long until kitchen scraps improve my soil?
It depends on the form. Finished compost from kitchen scraps improves growth within four to six weeks of a spring top-dressing. Light coffee-ground applications improve clay texture after about one season. Crushed eggshells are a multi-year calcium project and will not show a quick change. The consistent theme is that composted scraps work faster than raw or slow amendments, so build the compost habit first and treat grounds and shells as the steady background.
Sources and Further Reading
- ASPCA — Toxic and Non-Toxic Plants List
- ASPCA — Animal Poison Control Center
- EPA — Composting at Home
- University of Illinois Extension — Composting
- Oregon State University Extension — Gardening
- NC State Extension Gardener Handbook
- Missouri Botanical Garden — Plant Finder
About the author
Samantha has been gardening and arranging her own cut flowers for more than ten years, and has built more than 30 centerpieces from grocery-store bunches, clippings off the cedars behind her house, and a handful of dollar-store experiments that didn’t work. She writes practical, low-cost guides for beginners, including the versions that failed. Prices quoted in her articles are what she actually paid at US grocery and craft stores; nothing is sponsored and no brand pays for a mention. She is not a certified florist, a veterinarian or a horticulturist, and says so wherever a topic touches on plant safety or pet health.
Published: Nov 1, 2026 · Last updated: Nov 1, 2026.
{
“@context”: “https://schema.org”,
“@graph”: [
{
“@type”: “Article”,
“headline”: “Coffee Grounds, Eggshells and Kitchen Scraps: What Actually Helps”,
“description”: “Used coffee grounds are a light soil conditioner, not a fertilizer; eggshells are a slow calcium source; most vegetable scraps should be composted, not buried raw. Pet safety and a simple kitchen-scrap system included.”,
“image”: [
“images/coffee-hero-clean.jpg”,
“images/coffee-materials-clean.jpg”,
“images/coffee-process-clean.jpg”
],
“author”: { “@type”: “Person”, “name”: “Samantha” },
“publisher”: { “@type”: “Organization”, “name”: “REPLACE_WITH_SITE_NAME” },
“datePublished”: “2026-11-01”,
“dateModified”: “2026-11-01”,
“mainEntityOfPage”: {
“@type”: “WebPage”,
“@id”: “https://REPLACE_WITH_DOMAIN/coffee-grounds-eggshells-kitchen-scraps-what-helps”
}
},
{
“@type”: “FAQPage”,
“mainEntity”: [
{
“@type”: “Question”,
“name”: “Do coffee grounds really fertilize plants?”,
“acceptedAnswer”: {
“@type”: “Answer”,
“text”: “Only modestly. Used grounds are about 2% nitrogen and act more as a soil conditioner than a complete fertilizer. They improve texture, help worms, and add a little nitrogen, but will not replace a balanced feed for heavy feeders. Treat them as a light, regular top-dressing and still fertilize normally.”
}
},
{
“@type”: “Question”,
“name”: “How should I prepare eggshells so they actually help?”,
“acceptedAnswer”: {
“@type”: “Answer”,
“text”: “Dry the shells, then crush them as finely as you can and work the powder into the top few inches of soil in fall so it has months to break down. Whole shells barely decompose in a single season. Think of eggshells as a slow, multi-year soil builder rather than a quick remedy.”
}
},
{
“@type”: “Question”,
“name”: “Can I just bury vegetable scraps in the garden?”,
“acceptedAnswer”: {
“@type”: “Answer”,
“text”: “It is better to compost them first. Raw buried scraps rot slowly, smell, and attract pests, and they rarely break down fast enough to feed plants this season. Finished compost folded into beds is where the real benefit shows up. A few scraps like green-onion bottoms can be regrown on a windowsill.”
}
},
{
“@type”: “Question”,
“name”: “Are coffee grounds safe around pets?”,
“acceptedAnswer”: {
“@type”: “Answer”,
“text”: “Used grounds still contain caffeine, which is toxic to dogs and cats if eaten in quantity, so do not leave wet piles where pets can reach them. Onions, garlic, chives and raw potato peels are also pet hazards and belong in a sealed compost bin. This is general information, not veterinary advice: if a pet eats coffee grounds or allium scraps, call your vet or the ASPCA Animal Poison Control Center at (888) 426-4435.”
}
},
{
“@type”: “Question”,
“name”: “How long until kitchen scraps improve my soil?”,
“acceptedAnswer”: {
“@type”: “Answer”,
“text”: “Finished compost from kitchen scraps improves growth within four to six weeks of a spring top-dressing. Light coffee-ground applications improve clay texture after about one season. Crushed eggshells are a multi-year calcium project. Composted scraps work faster than raw or slow amendments, so build the compost habit first.”
}
}
]
}
]
}