
If you want a flower that pays you back all summer for almost no money, grow zinnias from seed and treat them as a cutting garden. A single $3 packet of seed gave me more bouquets last year than I could get into vases, and the blooms kept coming from late June until the first hard frost. But my first try was a flop: I sowed the seeds too deep, kept them cold and damp, and ended up with a tray of moldy nothing. If you’re starting out, you’re probably wondering exactly when to sow, how to keep the plants blooming instead of setting seed, and how to cut them so the vase life is worth the effort. In this guide I’ll walk you through the exact seed-to-vase routine I use now, including the mistakes I made so you don’t repeat them. Let’s get into it.
Quick answer: start zinnia seeds indoors about four to six weeks before your last spring frost, in warm soil (70-75°F / 21-24°C) barely covered, then harden the seedlings off for a week before planting them out after frost. Space them 9-12 inches apart in full sun, water at the base, and the two habits that actually extend the cutting season are deadheading (snipping spent blooms) and cutting stems for the house — both force the plant to push new flowers instead of seed. Do those things and one packet of seed will keep you in fresh bouquets for three or four months. Everything below explains the timing and the “why.”
- 1. Why Zinnias Are the Best Cut Flower for Beginners
- 2. Choosing Varieties for a Long Cutting Season
- 3. When to Start Seeds Indoors
- 4. How to Sow Zinnias So They Germinate
- 5. Transplanting and Spacing for More Stems
- 6. Watering, Feeding and Deadheading for Nonstop Blooms
- 7. Cutting the Flowers the Right Way
- 8. Common Zinnia Problems and How to Avoid Them
- 9. Troubleshooting: Symptoms, Causes and Fixes
- 10. FAQs
- 11. Sources and Further Reading
Why Zinnias Are the Best Cut Flower for Beginners
What makes zinnias such an easy cut flower?
Of all the flowers I’ve grown, zinnias are the one I hand to a first-time gardener without a second thought. They germinate fast, they shrug off heat that wilts other annuals, and a single plant gives you dozens of cuts over a season. For someone who wants cut flowers without a degree in horticulture, that combination is hard to beat.
I keep coming back to zinnias because they’re forgiving in the ways beginners get wrong. They don’t need pinching to look good, they don’t need staking if you space them right, and they bloom in about six to eight weeks from seed. My first summer with them I expected to baby them; instead they out-grew everything else in the bed and asked for almost nothing. The one caveat is air flow — zinnias hate crowded, humid conditions, and that’s the thing I’ll come back to in the problems section. Get the spacing and the watering right and a $3 packet will supply your kitchen table from July to October.
Start from seed, not transplants
The cheapest and most reliable way to grow zinnias is to start them from seed yourself, either indoors ahead of frost or sown straight into the ground once it’s warm. Nursery transplants cost several times more per plant and often arrive root-bound or leggy.
Here’s the thing I wish someone had told me: zinnias hate having their roots disturbed. Every transplant I bought in a six-pack sulked for two weeks and never caught up to the ones I grew from seed in the same bed. So I now sow my own, and when I do buy starts I look for short, stocky cells with no circling roots. Sowing from seed also lets you pick exactly the colors and forms you want — the cut-flower varieties you actually want are rarely on a garden-center bench. If you want a long cutting season, seed is the move, and the rest of this guide is built around that.
There’s also the option of sowing zinnia seeds directly into the garden once the soil has warmed to about 70°F, which skips the indoor step entirely. I do this for my second succession sowing in late May: I rake a shallow drill, drop seeds two inches apart, and thin them once they’re a few inches tall. Direct-sown plants never suffer transplant shock, so they often catch up to the indoor-started ones within a month. The downside is a later first bloom and the risk that a late cold snap or a slug feast takes the seedlings before they’re up. For a beginner I still recommend starting the first batch indoors for reliability, then trying a direct-sown row for the succession. Either route gets you to the same armload of cuts by midsummer.
Choosing Varieties for a Long Cutting Season
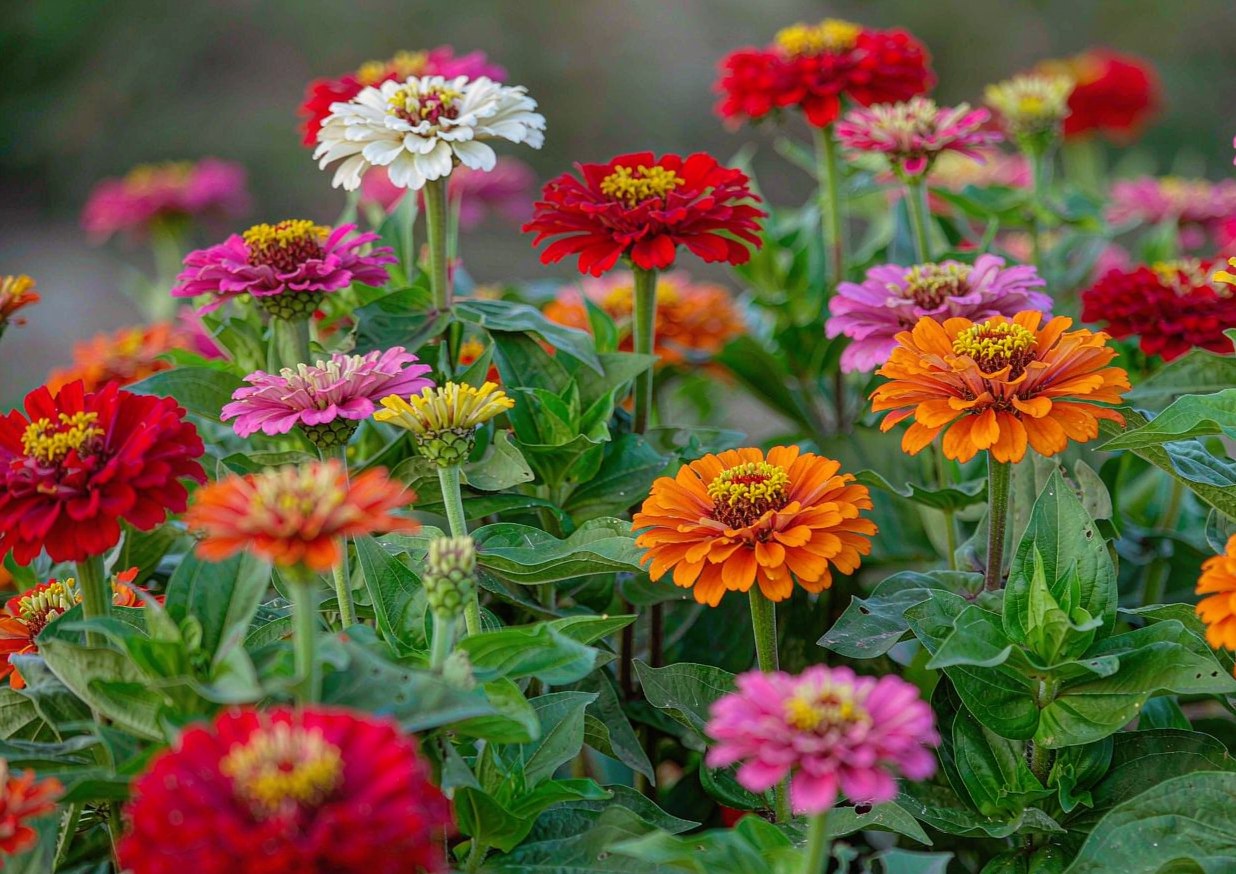 Photo generated for this article
Dahlia-flowered, cactus, and globe forms
Not all zinnia varieties are equal as cut flowers. The ones bred for the vase — dahlia-flowered, cactus-flowered, and the rounded globe types (often sold as ‘Queen’, ‘State Fair’, or ‘Benary’s Giant’) — give you big, long-stemmed blooms that hold up in water for a week or more.
When I’m filling a cutting bed, I lean on ‘Benary’s Giant’ series because the stems are thick and the heads are dinner-plate sized, which means one flower fills a jam jar. The cactus types have rolled, spiky petals that read as more “designer” in a bouquet, and the dahlia-flowered doubles look lush without being fussy. Skip the tiny bedding mixes if cutting is your goal — they’re fine for edging but the stems are too short to use. Pick two or three forms in a coordinated palette (I like hot pink, coral and cream) and you’ll have arrangements that look intentional rather than random.
Mixing heights and colors for continuous cuts
A long cutting season isn’t only about one plant blooming forever — it’s about staggering so something is always ready. Mixing tall varieties (3-4 ft) with shorter ones (18-24 in) means you can cut the tall stems for the middle of an arrangement and the short ones for the edges, without stripping any single plant bare.
My own bed runs about 60% tall ‘Giant’ types and 40% shorter ‘Lilliput’ or ‘Thumbelina’ zinnias, and that split keeps me cutting from both ends of the season. Color-wise, I used to plant every shade separately, but mixing them in the row actually looks better in the vase and hides the gaps when one color finishes. One year I went all-white and all-yellow and the yellow finished two weeks before the white, leaving me with a bed of green — so now I mix and I cut continuously instead of waiting for a whole block to peak. Stagger your sowing by two weeks as well and you’ll smooth out the waves even more.
One more reason I mix forms is the value to pollinators. The flat, open zinnia blooms are landing pads that butterflies and bees use heavily in late summer when little else is flowering, and I’ve counted more than a dozen species on a single bed in August. The fully double ‘Benary’s Giant’ types are gorgeous but can be too tight for insects to reach the center, so I always include some single or semi-double forms for the pollinators. If you want a cutting garden that also supports wildlife, that mix does double duty — you get bouquets and you get a late-season nectar source. It’s one of the few garden choices where what’s best for the bees is also best for the vase.
When to Start Seeds Indoors
Timing by your last frost date
The single number that drives your whole zinnia seed schedule is your last spring frost date. Count back four to six weeks from it to find your indoor-sowing date, because zinnias are tender and will rot or stall in cold soil outdoors.
I keep a note of my area’s average last frost (mid-April where I am) and sow the first tray around the first week of March. That gets sturdy seedlings ready to go out in late April or early May once nights stay above about 50°F (10°C). If you don’t know your frost date, your state extension service publishes one, and the Illinois Extension and similar state sites are a good place to check regional averages. The penalty for sowing too early is leggy, pot-bound seedlings; too late and you lose the early part of the season. Four to six weeks is the sweet spot, and I’d rather be a touch late than a touch early.
The mistake I made with timing
The year I got this wrong, I started seeds in early February because I was impatient. By the time frost passed, those seedlings had been under grow lights for ten weeks, were root-bound in their cells, and flopped the moment I planted them out. Lesson learned: zinnias grow fast and hate waiting.
So now I set a phone reminder for the sowing window and nothing earlier. A seedling that’s been sitting in a tray for two months is not “ahead” — it’s stressed, and stressed zinnias are the ones that get mildew later. If you’re tempted to start early, remember you can always succession sow a second tray two weeks after the first to extend the season without pushing the first one too early. That second sowing is what gives me cuts deep into September, and it’s a far better tool than starting everything in February and hoping.
How to Sow Zinnias So They Germinate
Seed depth and warmth
Zinnia seeds are chunky and reliable, but they fail most often because they’re planted too deep or kept too cold. Sow them on the surface of a moist seed-starting mix and press them in so they sit about quarter-inch deep, then barely cover with mix or vermiculite.
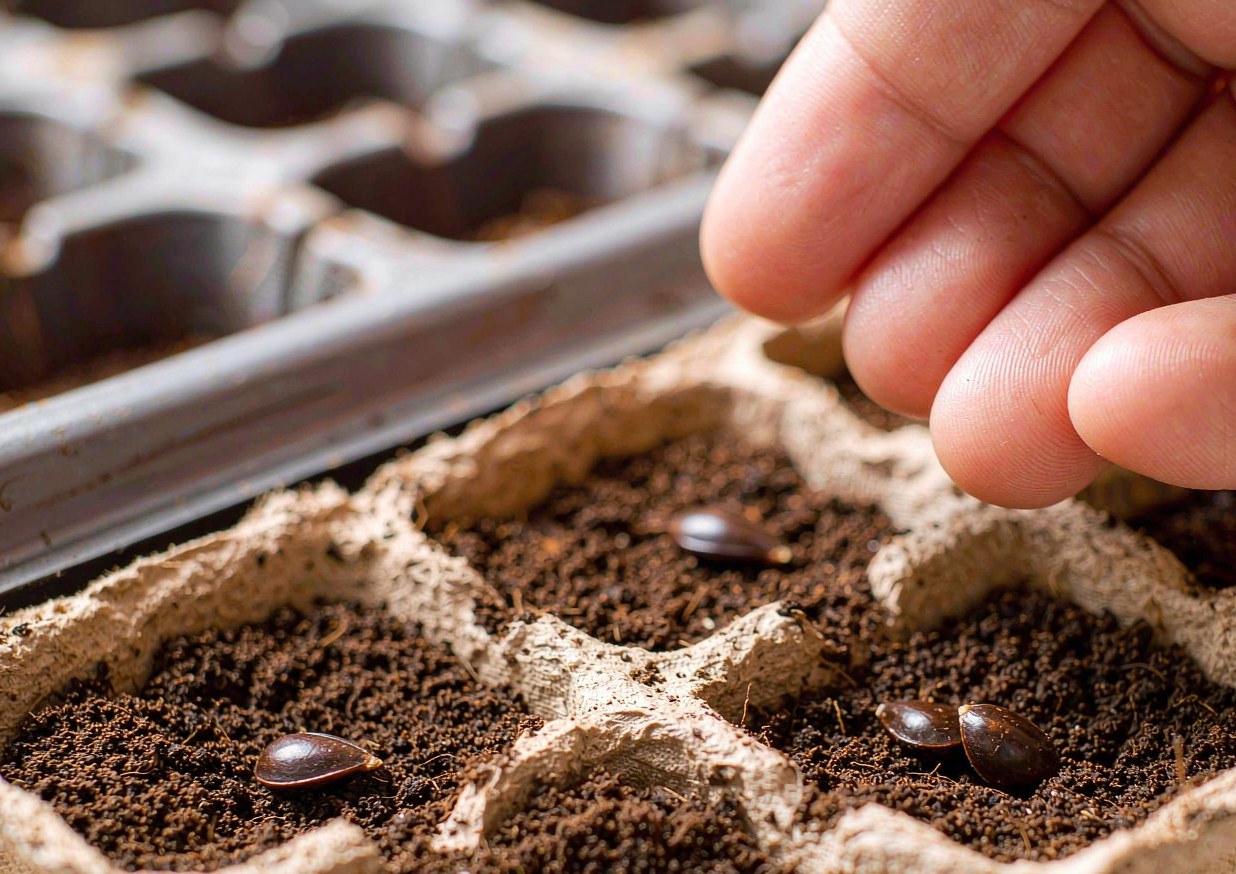 Photo generated for this article
Warmth is the real secret. Zinnias want soil around 70-75°F (21-24°C) to sprout in 5-7 days; below 65°F they sit and rot. My first tray sat on a cold basement shelf and did nothing for three weeks, then molded. Now I use a heat mat under the tray and a clear dome to hold humidity, and I get near-100% germination in under a week. Bottom water so the mix stays evenly moist but never soggy, and the moment the seedlings pop, pull the dome and put them under bright light — leggy zinnias start the day they don’t get enough light. Keep the mix damp, not wet, and you’ll avoid the damping-off that killed my first attempt.
The medium itself matters more than people think. I use a fine, sterile seed-starting mix rather than garden soil, because garden soil is heavy, can carry damping-off fungi, and crusts over so seedlings can’t push through. A simple recipe is equal parts coco coir, fine vermiculite, and perlite, which holds moisture yet drains. I also avoid over-fertilizing at this stage — a gentle starter feed once the first true leaves appear is enough, since too much nitrogen makes soft, disease-prone seedlings. Keep the tray out of direct hot sun while the seeds are still underground, then move it into bright light the instant they sprout. Getting the medium and the light right is what turns uncertain germination into something reliable.
Hardening off without shock
Before any zinnia seedling goes in the ground, it needs hardening off — a gradual week of outdoor exposure so it doesn’t crisp in the sun or snap in the wind on day one.
I move the tray to a shaded, sheltered spot for two hours the first day, then add an hour or two each day, working up to full sun and a breezy spot by day seven. The mistake beginners make is skipping this and planting straight from the grow-light shelf; the leaves sunburn and the plant stalls for weeks. One spring I was impatient, set them out after three days, and watched half of them wilt to nothing by noon. A week of gentle acclimation costs you almost nothing and saves the whole crop. After the last frost and a full week outside, they’re ready to go in the bed.
Transplanting and Spacing for More Stems
Space for stems, not bushes
How far apart you plant decides whether you get long cutting stems or a squat, bushy clump. For cut flowers, give each zinnia 9 to 12 inches of space so the stems stretch upward reaching for light instead of shading each other into shortness.
I plant mine in a dedicated row at about 10 inches on center, and the extra room does two jobs: it gives me longer, straighter stems (better for vases) and it opens up air flow (which fights mildew). The instinct to plant densely “for a fuller look” backfires with zinnias — crowded plants are the ones that flop and rot. If you’re short on space, accept fewer but better stems rather than more but unusable ones. The difference between a 6-inch stub and an 18-inch cut is mostly spacing and light, not variety.
Pinching for branching
If you want more stems per plant, pinch the top of each seedling when it’s about 8-10 inches tall, just above a leaf node. That forces two or three side shoots to take over, doubling your potential cuts from the same spot in the bed.
I was skeptical of pinching at first — cutting a healthy tip felt like sabotage — but the math won me over. A pinched plant gives me four or five flowering stems where an unpinched one gives one or two, and the stems are often straighter because they’re not competing with a dominant central leader. The trade-off is the first bloom arrives a week or two later, which is fine in a cutting bed where season length matters more than a single early flower. I pinch about half my plants and leave the other half unpinched, so I get an early flush from the unpinched ones and a bigger later flush from the pinched ones.
Pinched plants sometimes need a little support, because the multiple side stems can splay in wind or rain, and I’ll run a single stake or a grow-through hoop through the tall clumps by midsummer. The unpinched plants stand on their own single stem and rarely need it. If you’re growing in a windy spot, leaning toward pinching less and staking more is the calmer route. Either way, the goal is straight, usable stems, and a little support beats a tangle you can’t cut cleanly. I’d rather spend two minutes staking than lose a third of the stems to flopping after a storm.
Watering, Feeding and Deadheading for Nonstop Blooms
Water at the base, not the leaves
The watering rule that keeps zinnias healthy is simple: water the soil, not the foliage. Wet leaves in warm weather are an open invitation to powdery mildew, the one disease that wrecks a zinnia bed.
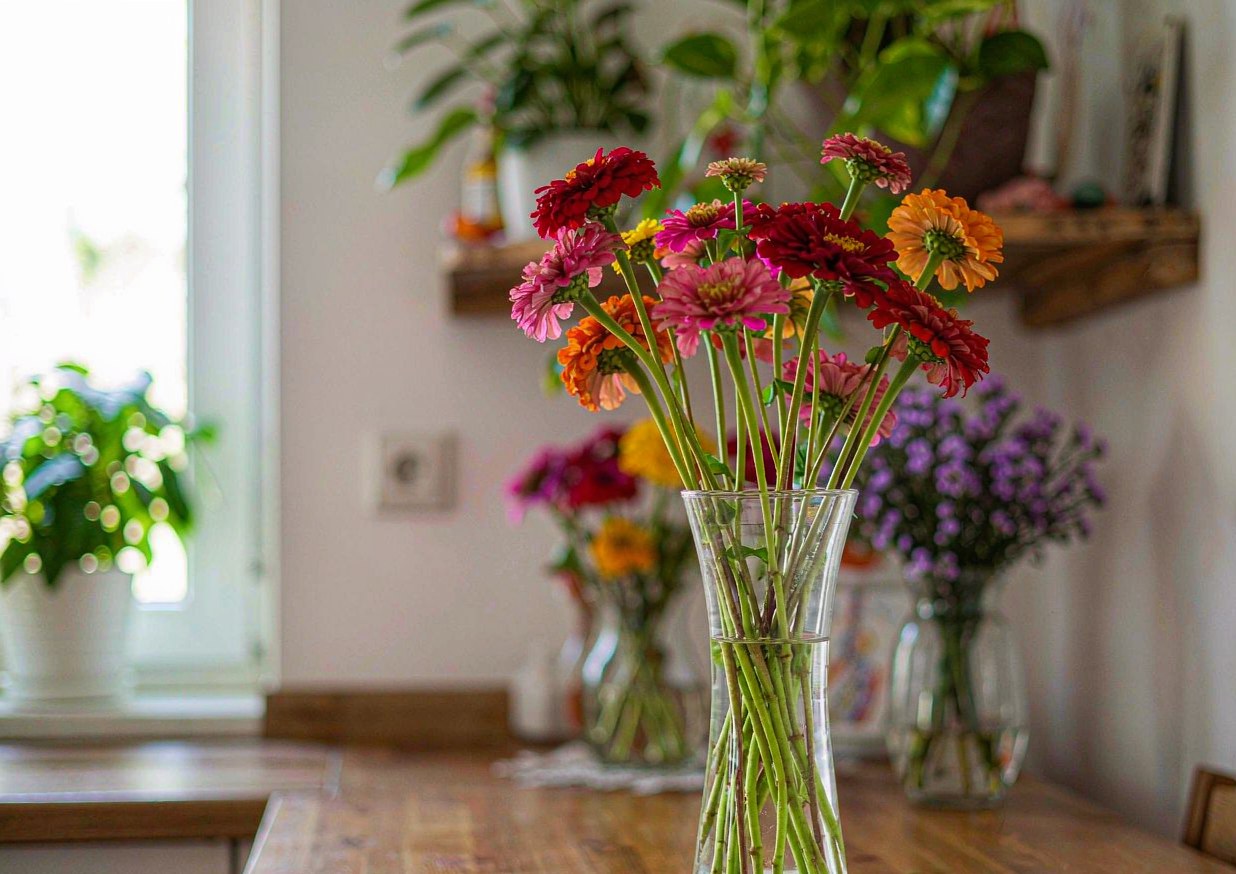 Photo generated for this article
I run a soaker hose or water by hand at the base in the morning so any splash dries fast, and I never use a sprinkler that wets the whole plant. Zinnias are drought-tolerant once established, but for maximum cutting they want about an inch of water a week, more in heat. The other half of the bloom equation is feeding: a monthly scoop of a balanced bloom fertilizer (something like 5-10-5) keeps the flowers coming, because a plant that’s busy making seed stops making blooms. Which brings me to the habit that matters most.
Mulch helps here too, though I keep it light around zinnias so air can still move. A thin layer of straw or shredded leaves between the rows holds soil moisture so I water less often, and it keeps the inevitable mud splash from reaching the lower leaves. I pull the mulch an inch or two back from the stems so it doesn’t trap humidity against the crown. Combined with base watering, this setup lets me go from daily watering in a heat wave to every few days in normal weather. Moisture consistency — not volume — is what keeps zinnias flowering instead of stressing into seed.
The deadheading habit that doubles your cuts
Deadheading — snipping off spent flowers before they set seed — is the single biggest lever for a long cutting season. Every flower you leave to go to seed tells the plant its job is done; every one you cut tells it to try again.
I walk the bed every two or three days with snips and take anything past its prime, and I cut those stems for the house too, so deadheading and harvesting are the same motion. The summer I got lazy about this, the plants shut down by August and I had bare stalks by September. The summer I stayed on it, they bloomed until frost nipped them. Make it a routine rather than a rescue mission: a two-minute pass every few days beats a frantic overhaul. Combined with regular harvesting cuts, this one habit is what turns a packet of seed into months of bouquets.
Cutting the Flowers the Right Way
When and how to cut for vase life
To get the most from each zinnia cut, harvest in the cool of the morning after the dew dries, when the stems are full of water, and cut deep — take a long stem down to a set of leaves, because cutting low encourages new basal shoots.
I use sharp snips and cut just above a leaf node, then immediately drop the stems into a bucket of lukewarm water. The blooms I pick are ones where the center is just starting to show tiny petals (the “pencil tip” stage) rather than fully open flowers, because a slightly immature zinnia opens in the vase and lasts longer than one cut at full peak. Cutting in the heat of the afternoon, which I did once out of convenience, gave me stems that wilted within hours no matter how I conditioned them. Morning cuts, by contrast, stand up straight for a week. Time your cutting and you protect both the vase life and the next flush.
Conditioning cuts so they last
Conditioning is the step that turns a cut zinnia from a wilt-risk into a week-long arrangement. Strip the lower leaves that would sit below the waterline, re-cut the stem ends at an angle under water, and let the stems drink in a cool, shaded spot for a few hours before arranging.
Zinnias are prone to a bend at the neck (the stem kinks right under the head), and the fix is to condition them hard: I sometimes lay the bucket in a cool dark place for two hours so they take up water fully before they ever stand in a vase. A flower food packet or a drop of bleach in the vase water keeps bacteria down, which is what actually shortens vase life more than anything. I change the vase water every two days and re-cut the ends, and that routine gets me seven to nine days from most cuts. Skip the conditioning and you’ll wonder why your beautiful morning harvest flops by dinner.
Common Zinnia Problems and How to Avoid Them
Powdery mildew and how to stay ahead of it
The disease you’ll most likely meet on zinnias is powdery mildew — a white, dusty coating on the leaves that spreads in humid, crowded, overhead-watered conditions. It rarely kills the plant but it ruins the look and shortens blooming.
My defense is entirely cultural, because I’d rather not spray: I space for air flow, I water at the base, and I grow the mildew-resistant ‘Benary’s Giant’ series. The year I planted them shoulder-to-shoulder and used a sprinkler, the mildew arrived in July and I was pulling leaves by August. Now, if I see the first dusting, I remove the affected lower leaves and make sure the bed dries out between waterings. Good siting — full sun and a breeze — does most of the work. Stay ahead of it with spacing and morning watering and you may never need to treat at all.
If mildew does get a foothold despite all that, I’ll remove the worst leaves and, as a last resort, use a baking-soda spray (a tablespoon of baking soda and a drop of dish soap in a gallon of water) as a gentle, low-toxicity knock-back rather than reaching for sulfur or stronger fungicides. It won’t cure an established infection, but it slows the spread enough to get me to frost. The bigger lesson is that prevention through siting beats any spray, and a bed placed in full sun with a breeze rarely needs intervention at all. I’d estimate nine out of ten mildew problems I see are simply plants in the wrong, shady, still spot.
Floppy stems and Japanese beetles
Two more zinnia headaches are weak, flopping stems and Japanese beetles skeletonizing the flowers in midsummer. Both are manageable if you catch them early.
Floppy stems usually mean too much shade, too little spacing, or a plant that wasn’t pinched and grew a single tall, top-heavy leader. I stake or hoop the tall ones if they lean, and I keep the bed in at least six hours of sun so the stems toughen. Japanese beetles are the more annoying of the two: they show up in waves and can shred a bloom in a day. I hand-pick them into a soapy bucket in the early morning when they’re sluggish, which sounds tedious but takes five minutes and protects the cuts I actually want. The Wisconsin Horticulture pages cover general annual-flower care if you want more on siting and pest timing. Deal with both problems early and your cutting season stays clean.
Troubleshooting: Symptoms, Causes and Fixes
Most zinnia problems show up in the first month and trace back to one of six causes. This is the table I keep by the potting bench.
| Symptom | Likely cause | Fix |
|---|---|---|
| Seeds don’t sprout after 2 weeks | Soil too cold or too wet (rot) | Warm to 70-75°F with a heat mat; water from below, not on top |
| Seedlings tall and pale | Not enough light after germination | Move under bright grow lights; sow later so they don’t sit in trays |
| White dust on leaves | Powdery mildew from humidity/crowding | Space for air flow, water at base, remove lower affected leaves |
| Plants stop blooming in August | Spent blooms left to set seed | Deadhead and cut for the house every 2-3 days |
| Stems flop and kink | Too much shade or no pinching | Give 6+ hrs sun, pinch tips at 8-10 in, stake tall types |
| Flowers chewed to lace | Japanese beetles | Hand-pick into soapy water at dawn; cover prized beds with netting |
FAQs
When should I start zinnia seeds indoors?
Start zinnia seeds indoors four to six weeks before your last spring frost, in warm soil around 70-75°F. Sow them a quarter-inch deep, keep the mix moist but not soggy, and they’ll germinate in roughly five to seven days. Harden the seedlings off for a week, then plant them outside only after the danger of frost has passed and nights stay above about 50°F. Starting too early is the common mistake — leggy, root-bound seedlings underperform, so aim for that four-to-six-week window rather than rushing.
Do zinnias come back every year?
No — zinnias are annuals, so a given plant lives one season and won’t return from the same roots next year. The reason they feel “everlasting” in a cutting garden is that they produce wave after wave of blooms from one sowing, and you can re-sow the same variety each spring from saved or bought seed. In warm climates with no frost they can sometimes self-seed, but don’t count on it. For a reliable show, treat them as an annual you replant every year, and stagger your sowings two weeks apart to extend the season.
How do I make zinnias bloom all summer?
The habit that keeps zinnias blooming is constant removal of spent flowers — deadhead every few days and cut stems for arrangements at the same time, because both stop the plant from putting energy into seed. Add a monthly bloom fertilizer and water at the base (not the leaves) to avoid mildew, and give them full sun. The summer I stayed on top of deadheading, my plants bloomed until the first hard frost; the summer I let flowers go to seed, they quit by August. Cutting is the single biggest lever.
Are zinnias safe around pets?
Yes — zinnias are not on the lists of plants toxic to dogs or cats, which makes them a worry-free cut flower for a house with pets. I still keep any vase out of reach of a curious pet that might knock it over, but the plant itself isn’t a poisoning risk the way lilies or certain holiday plants are. If you want to double-check a specific plant before bringing it indoors, the ASPCA toxic and non-toxic plant list is the reference I use. To be clear, this is general gardening information and not veterinary advice — if a pet actually eats a large amount of any plant and acts ill, call your vet or the ASPCA Animal Poison Control Center at (888) 426-4435.
Why are my zinnia stems so short for cutting?
Short cutting stems almost always come from three things: planting too close together, too little sun, or picking the wrong variety. Space plants 9-12 inches apart so they reach upward for light, give them at least six hours of direct sun, and choose tall cutting types like ‘Benary’s Giant’ rather than low bedding mixes. Pinching the tip at 8-10 inches also encourages longer side shoots. The year I crowded mine, I got pretty but stubby stems; the year I spaced and picked tall varieties, I got armloads of 18-inch cuts.
Sources and Further Reading
- Missouri Botanical Garden — Plant Finder
- Royal Horticultural Society (RHS) — Plants
- Oregon State University Extension — Gardening
- ASPCA — Toxic and Non-Toxic Plants List
- University of Illinois Extension
About the author
Samantha has been gardening and arranging her own cut flowers for more than ten years, and has built more than 30 centerpieces from grocery-store bunches, clippings off the cedars behind her house, and a handful of dollar-store experiments that didn’t work. She writes practical, low-cost guides for beginners, including the versions that failed. Prices quoted in her articles are what she actually paid at US grocery and craft stores; nothing is sponsored and no brand pays for a mention. She is not a certified florist, a veterinarian or a horticulturist, and says so wherever a topic touches on plant safety or pet health.
Published: Oct 24, 2026 · Last updated: Oct 24, 2026.
{
“@context”: “https://schema.org”,
“@graph”: [
{
“@type”: “Article”,
“headline”: “How to Grow Zinnias From Seed for a Long Cutting Season”,
“description”: “Start zinnia seeds indoors 4-6 weeks before last frost, harden them off, then deadhead and cut all season for armloads of blooms. A beginner’s cut-flower plan that actually works.”,
“image”: [
“images/zinnias-hero-clean.jpg”,
“images/zinnias-seeds-clean.jpg”,
“images/zinnias-cutting-clean.jpg”
],
“author”: { “@type”: “Person”, “name”: “Samantha” },
“publisher”: { “@type”: “Organization”, “name”: “gmmur.com” },
“datePublished”: “2026-10-24”,
“dateModified”: “2026-10-24”,
“mainEntityOfPage”: {
“@type”: “WebPage”,
“@id”: “https://gmmur.com/grow-zinnias-from-seed-cutting-season”
}
},
{
“@type”: “FAQPage”,
“mainEntity”: [
{
“@type”: “Question”,
“name”: “When should I start zinnia seeds indoors?”,
“acceptedAnswer”: {
“@type”: “Answer”,
“text”: “Start zinnia seeds indoors four to six weeks before your last spring frost, in warm soil around 70-75°F. Sow them a quarter-inch deep, keep the mix moist but not soggy, and they germinate in about five to seven days. Harden the seedlings off for a week, then plant outside only after frost danger has passed and nights stay above about 50°F.”
}
},
{
“@type”: “Question”,
“name”: “Do zinnias come back every year?”,
“acceptedAnswer”: {
“@type”: “Answer”,
“text”: “No, zinnias are annuals, so a given plant lives one season and will not return from the same roots next year. They feel everlasting in a cutting garden because one sowing produces wave after wave of blooms, and you can re-sow the same variety each spring. Treat them as an annual you replant every year, and stagger sowings two weeks apart to extend the season.”
}
},
{
“@type”: “Question”,
“name”: “How do I make zinnias bloom all summer?”,
“acceptedAnswer”: {
“@type”: “Answer”,
“text”: “The habit that keeps zinnias blooming is constant removal of spent flowers. Deadhead every few days and cut stems for arrangements at the same time, because both stop the plant from putting energy into seed. Add a monthly bloom fertilizer, water at the base rather than the leaves to avoid mildew, and give full sun. Cutting is the single biggest lever for a long cutting season.”
}
},
{
“@type”: “Question”,
“name”: “Are zinnias safe around pets?”,
“acceptedAnswer”: {
“@type”: “Answer”,
“text”: “Yes, zinnias are not listed as toxic to dogs or cats, which makes them a worry-free cut flower for a house with pets. Keep any vase out of reach of a pet that might knock it over, but the plant itself is not a poisoning risk. This is general gardening information, not veterinary advice: if a pet eats a large amount of any plant and acts ill, call your vet or the ASPCA Animal Poison Control Center at (888) 426-4435.”
}
},
{
“@type”: “Question”,
“name”: “Why are my zinnia stems so short for cutting?”,
“acceptedAnswer”: {
“@type”: “Answer”,
“text”: “Short cutting stems almost always come from planting too close together, too little sun, or the wrong variety. Space plants 9-12 inches apart so they reach upward, give at least six hours of direct sun, and choose tall cutting types like Benary’s Giant rather than low bedding mixes. Pinching the tip at 8-10 inches also encourages longer side shoots.”
}
}
]
}
]
}