
If you’ve ever watched a crisp garden bed slowly blur into the lawn until you can’t tell where one ends and the other begins, you already know why edging matters. My first “edged” bed wasn’t edged at all — I just dug a shallow trench with a spade and called it done. A single rainy week later the trench had slumped, the grass crept in, and by midsummer the bed looked like a rumpled lawn with flowers. I’d saved maybe $30 and lost the whole point. So when I say edging is the difference between a yard that looks maintained and one that looks forgotten, I mean it from experience. Below are the five options I’ve actually installed, what each one cost me, and how to pick without repeating my slumpy first attempt. Let’s go through it together.
Quick answer: you have five realistic edging options — (1) a spade-cut trench (almost free, redo yearly), (2) metal landscape edging ($3–$6 per foot installed, lasts 20+ years), (3) stone or brick ($8–$20 per foot, permanent), (4) plastic or composite bender board ($1–$3 per foot, 5–10 years), and (5) wood timber ($2–$5 per foot, 7–15 years before rot). The choice comes down to three things: bed shape (curves need flexible edging), budget now vs. later, and how permanent you want it. A straight bed against a walkway? Brick or metal. A curvy island bed? metal or bender board. A temporary veg bed? just trench it. Details below.
 Photos provided by Pixabay
- 1. Why Edging a Garden Bed Changes the Whole Yard
- 2. Option 1: Trench or Spade-Cut Edge (Almost Free)
- 3. Option 2: Metal Landscape Edging
- 4. Option 3: Stone or Brick Edging
- 5. Option 4: Plastic or Composite Bender Board
- 6. Option 5: Wood (Timber or Landscape Ties)
- 7. Choosing the Right Edge for Your Bed
- 8. A Checklist Before You Start Digging
- 9. Troubleshooting: Symptoms, Causes and Fixes
- 10. FAQs
- 11. Sources and Further Reading
Why Edging a Garden Bed Changes the Whole Yard
What edging actually does (and what it doesn’t)
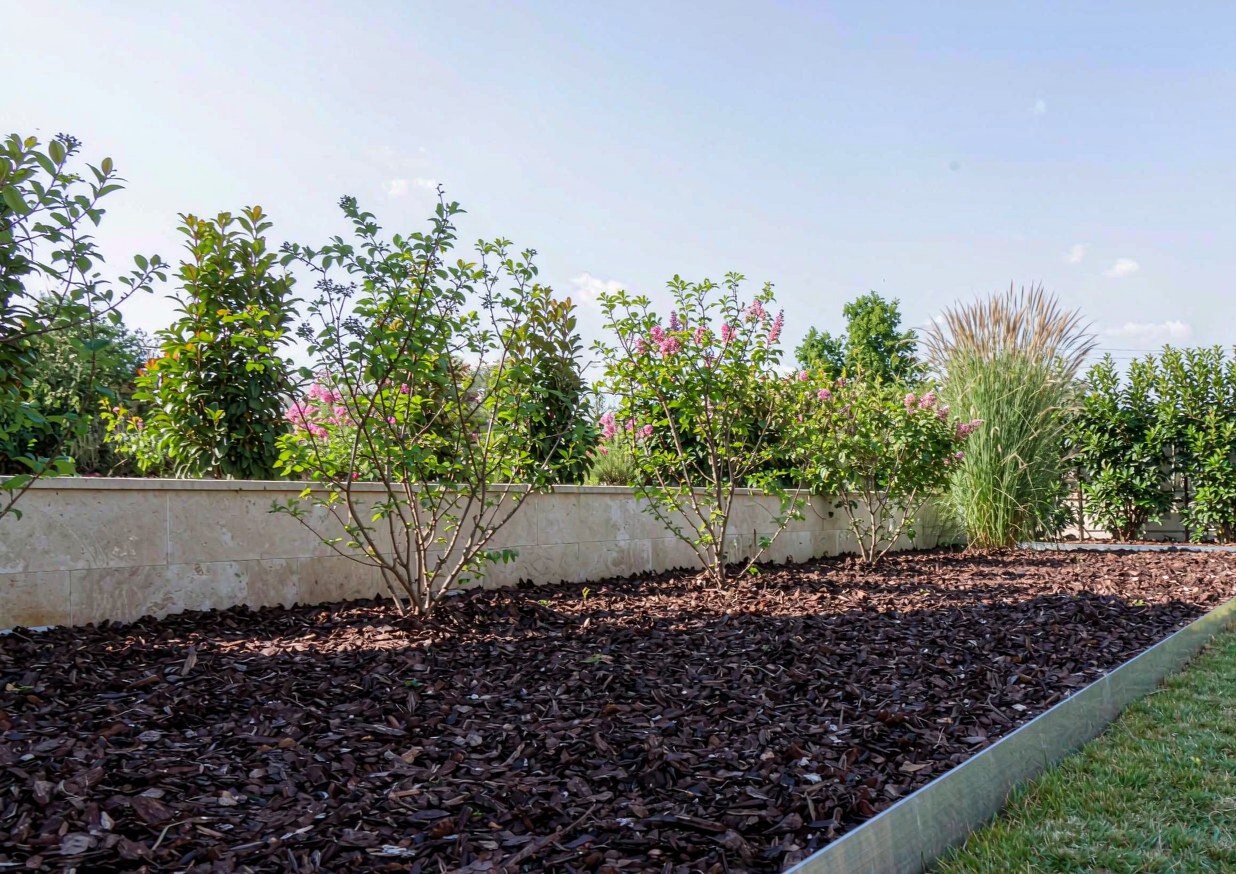
Edging does one main job: it creates a physical and visual boundary between the bed and the lawn so grass rhizomes can’t sneak in and the mower has a clean line to follow. Done well, it also means you can mulch right up to the edge without the mulch washing onto the grass, and you can mow along it without a string trimmer. What it does not do is stop weeds from seeding in from above or fix a bed that’s in the wrong place — it’s a finishing tool, not a cure-all.
The first bed I edged properly was a straight 12-foot strip along a fence. I used a simple spade-cut trench, and the difference was immediate: the lawn stopped invading, the bed read as intentional, and my weekend weeding dropped by maybe half. The Royal Horticultural Society describes edging as one of the highest-impact, lowest-cost improvements you can make to a border, and in my yard that’s been exactly true. A $0 trench bought a noticeably tidier garden.
The everyday payoff shows up in two chores you already do: mowing and mulching. With a defined edge, the mower wheel rides the line and you skip the string trimmer entirely along that bed — for me that’s a few minutes saved on every single cut, all season. And because the boundary is physical, you can pile mulch right up to it without it slumping onto the grass, which means fewer touch-ups after rain. I didn’t appreciate how much time a clean edge saves until I had one bed edged and one not; the edged bed needed maybe a quarter of the trimming and re-mulching of the open one. That quiet, repeated saving is the real reason edging earns its keep, far more than the look alone.
The first bed I edged that washed out
My failure story is the slumpy trench I opened with. I dug it maybe 4 inches deep and 3 inches wide with a square spade, no compaction, no restraint, and walked away feeling clever. After a week of rain the loose soil collapsed, the edge became a shallow V, and grass runners bridged it within the month. The lesson, which I’ll repeat: a trench edge only holds if you pack the soil on the lawn side and re-cut it every spring. Without that maintenance it’s the least durable option on this list — but also the cheapest to try, so it’s where most people (including me) should start.
I eventually replaced that washed-out trench with steel edging and haven’t touched it since. The contrast taught me the real trade-off of this whole article: cheap-to-start means work-later; pay-upfront means forget-it. Knowing which you prefer is half the decision. The NC State Extension Gardener Handbook covers bed construction basics that reinforce this — a defined edge is what keeps a bed’s shape through weather and time.
Option 1: Trench or Spade-Cut Edge (Almost Free)
The spade-cut trench is the beginner move and the right call for any bed you might relocate. You carve a narrow V or L-shaped channel between lawn and bed with an edging shovel, and that’s the whole install.
How to cut a clean trench edge
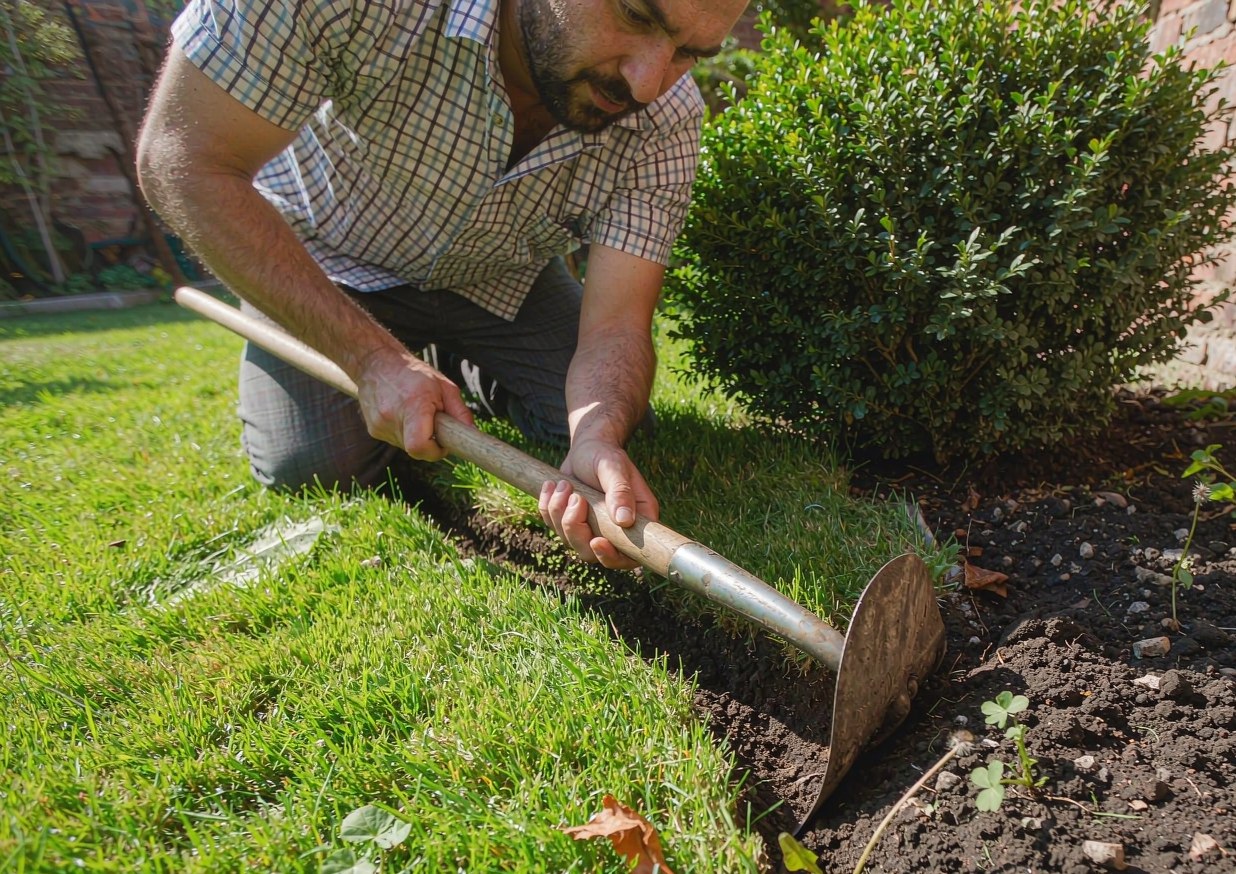
Stand on the lawn side, push a half-moon edger or a square spade straight down at the bed’s edge, then angle the cut back toward the lawn at about 45 degrees to remove a wedge of turf. The result is a clean V that the mower wheel can ride along. The trick I learned the hard way: pack the soil on the lawn side with the back of the spade so the edge doesn’t slump, and keep the bed side vertical. A crisp 90-degree bed face is what makes it look professional rather than accidental.
Do this in spring or fall when soil is moist but not soggy — bone-dry soil resists the cut, and wet soil smears. After the first cut, run the mower’s wheel in the trench each time you mow; the repeated pressure keeps it sharp. The Michigan State extension on defining your landscape edge notes that a clean cut edge is the foundation everything else builds on, which matches what I’ve seen across every bed I maintain.
 Photos provided by Pixabay
Why it needs redoing every season
The honest downside: a trench is temporary. Rain, foot traffic, and grass pressure refill it within a year, so you re-cut annually. That’s the cost you pay for spending nothing. I keep a trench on one veg bed I reshape every spring anyway, so the yearly redo is free labor I’d spend regardless. For a permanent ornamental bed, though, you’ll want something that holds.
If you like the trench look but hate the upkeep, the next step up is metal edging, which holds that same crisp line for decades. I think of the trench as the “rent” version and metal as the “buy” version of the same visual. Choose rent when the bed is experimental, buy when it’s final.
Option 2: Metal Landscape Edging
Metal edging — usually powder-coated steel or aluminum — is the quiet hero of modern landscapes. It’s a thin strip that sinks into the ground and holds a razor-straight or gently curved line.
Steel vs. aluminum
Steel is heavier, holds a tighter line, and develops a benign rust patina if uncoated (or stays black/green if powder-coated); it’s the choice for crisp modern beds. Aluminum is lighter, won’t rust, and is easier to hand-bend for tight curves, but it can flex under a riding mower’s weight. For a straight bed against a walkway I use steel; for a curvy island I use aluminum because it bends without kinking.
Cost runs about $2–$4 per linear foot for the material and another $1–$2 per foot if you pay someone to set it, so installed roughly $3–$6 per foot. My 40-foot steel install cost me around $160 in materials plus a Saturday. The Oregon State Extension gardening pages and other extension sources consistently list metal as a durable, low-profile option that disappears visually while doing real work — exactly why I like it.
Installed cost and how long it lasts
Properly set, metal edging lasts 20 years or more with essentially no maintenance beyond the occasional weed pull. You stake it with included spikes every 18–24 inches, backfill soil against it, and forget it. The one catch is install quality: if you leave the top edge proud of the soil, a mower deck can catch it, so I set the lip about half an inch below grade.
Is it worth 10x the trench? For me, yes — the bed I edged in steel is the only one I’ve never re-touched, and it still looks like the day I set it. If budget is tight, do steel only on the beds visitors see and trench the hidden ones. That mix is what I’d recommend to any beginner who wants the look without the full outlay.
Option 3: Stone or Brick Edging
Stone and brick give the most “permanent landscape” look — a solid band of material that reads as architecture. This is the highest-cost, highest-impact option.
Dry-laid vs. mortared
Dry-laid stone or brick sits on a sand or gravel base with no glue; it’s easier to adjust, drains naturally, and survives freeze-thaw by shifting slightly. Mortared sets the units in concrete for a rigid line, which looks formal but can crack when the ground heaves in winter. For most home beds I recommend dry-laid — it’s reversible and forgiving, and a slightly uneven dry-laid line looks charming rather than broken.
I dry-laid a 20-foot curved border of flat fieldstone along a perennial bed; the total was about $220 in stone plus a weekend of fitting. The NC State handbook treats stone edging as a long-term structural choice, and that matches my experience: once it’s down, it’s down. Set it on a compacted base or it will settle unevenly and trip you in year two.
Material and labor cost ranges
Expect $8–$20 per linear foot installed depending on stone choice and whether you DIY. Reclaimed brick can drop the low end; cut flagstone pushes the top. Labor dominates if you hire, often doubling material cost. My rule: if the bed is straight and I have time, I DIY brick; if it’s a long curve, I either accept the time cost or step down to metal, because hand-fitting stone on a curve is slow, patient work.
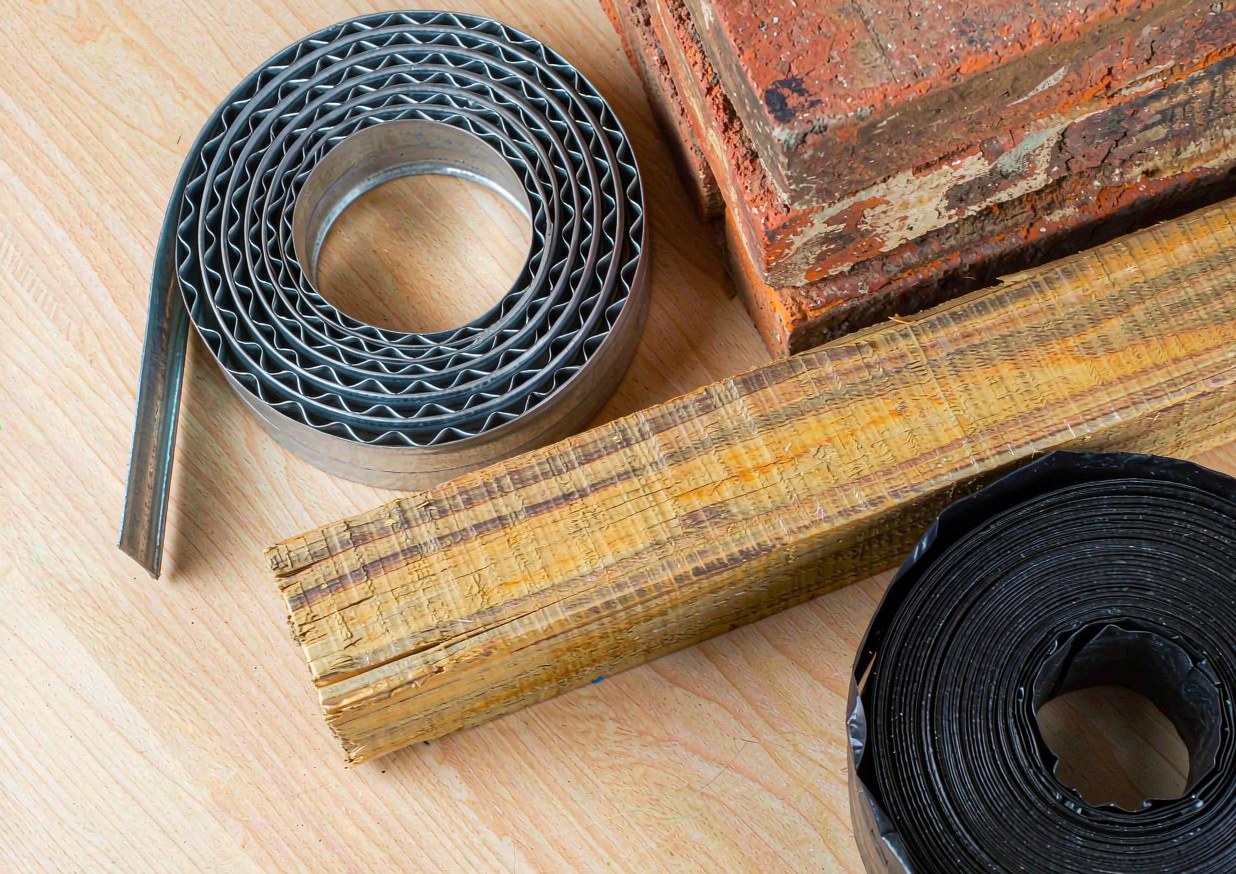
One money-saving angle worth knowing: reclaimed brick and salvaged stone can cut material cost dramatically and often look better than new, because weathered edges read as established rather than installed-yesterday. I sourced a pallet of old pavers from a demolition listing for about a third of retail, and the faded, slightly chipped faces suited my cottage-style bed perfectly. The catch is consistency — salvaged units vary in size, so dry-laid layouts need more fiddling to keep a level top. If you enjoy the puzzle, it’s a great deal; if you want fast, buy uniform new brick and accept the higher bill.
 Photos provided by Pixabay
The payoff is real, though. A stone edge makes even a weedy bed look deliberate, and it’s the only edging here that doubles as a low retaining lip for raised soil. For a front-yard show bed I’d spend here first; for a back-yard veg bed I’d never justify it.
Option 4: Plastic or Composite Bender Board
Bender board is the flexible, budget cousin of metal — a thin strip of recycled plastic or composite that curves easily and costs a fraction of steel.
Flexible edging for curves
The selling point is exactly what the name says: it bends. Where metal needs careful scoring to curve and wood can’t curve at all, bender board follows any swoopy island bed you draw. You stake it every foot or so and backfill. I used it on a kidney-shaped bed where steel would have fought me, and the smooth curve it held was genuinely pretty.
Material runs about $0.75–$2 per linear foot, so installed it’s usually $1–$3 per foot — the cheapest “permanent-ish” option. The University of Illinois LawnTalk and similar extension resources mention flexible borders as a practical low-cost choice for informal beds, which fits how I’ve used it.
Cheap but short-lived
The catch is lifespan. Sun breaks down plastic over 5–10 years, and cheap versions get brittle and pop their stakes. Composite lasts longer but costs more, nearing metal. I treat bender board as a medium-term solution: great for a bed whose shape I might still tweak, not for a forever border. When mine eventually fatigued, replacing a section was quick and cheap — another point in its favor for experimental layouts.
If you want the curve without the fragility, step up to aluminum; if you want the lowest cost and can accept a decade of life, bender board earns its place. Just don’t bury the top edge or the mower will shred it — keep it flush and staked tight.
Option 5: Wood (Timber or Landscape Ties)
Wood edging — landscape timbers or railroad-style ties — gives a chunky, rustic border that also acts as a low retaining wall for raised beds.
Treated vs. natural
Pressure-treated timber resists rot and insects and is the standard for ground contact; modern treatments are far safer than the old arsenic ones, but I still avoid it where edibles touch the soil and use it only for ornamental borders. Natural rot-resistant woods like cedar or redwood look better and are food-safe, but they cost more and still fade to silver within a few years. For a veg bed I use cedar; for a decorative border, treated pine timber is fine.
Cost is roughly $2–$5 per linear foot for timber, installed often $3–$6 with stakes and labor. I built a 16-foot treated-pine edge around a raised veg bed for about $70. The MSU edge guidance frames wood as a functional, mid-cost border, and that’s been my experience — solid, useful, but not forever.
Cost and rot risk
Wood’s enemy is moisture. Even “treated” timber in constant ground contact lasts maybe 7–15 years before it softens, and untreated stakes rot faster. I learned this when a corner timber I’d set without gravel beneath it sank and rotted at the base in year six. The fix: set timbers on a thin gravel base and slope the top so water runs off, not pools. Done right, wood is the best edging-and-retainer combo here; done lazily, it’s the first to fail.
For a straight, rustic, slightly raised border — especially around vegetables — wood is my default. For a crisp modern line, it’s the wrong look. Match the material’s personality to the bed’s style and you won’t fight it later.
Choosing the Right Edge for Your Bed
With five options on the table, the decision is just three questions. Answer them and the pick is obvious.
Matching material to the bed shape
Straight beds (against a walk, fence, or house) suit anything: brick, steel, timber, even a trench. Curved beds need flexible material — metal (aluminum), bender board, or dry-laid small stone; timber and brick fight curves. My curved island got bender board; my straight fence bed got steel. Shape decides before budget does, so draw the bed outline first and let that rule out half the list.
A subtle point: the tighter the curve, the more you need true flexibility. A gentle sweep tolerates brick; a tight kidney shape will make you hate brick by hour three. Be honest about your bed’s geometry before you buy material you’ll struggle to lay.
The cost-per-foot reality check
Here’s the full range side by side, installed, per linear foot: trench ~$0 (labor only), bender board $1–$3, wood $3–$6, metal $3–$6, stone/brick $8–$20. Notice metal and wood overlap in price but differ in lifespan — metal wins on durability, wood wins on retaining height. The Oregon State gardening pages and other extension sources consistently point to metal and stone as the long-term low-maintenance choices, which lines up with what I’d spend my own money on for a visible bed.
My practical formula: visible bed + straight = steel; visible bed + curve = aluminum; hidden/temporary = trench; rustic/raised = wood; showpiece front = stone. Write those five rules on a sticky note and the trip to the garden center gets simple.
Don’t forget the hidden costs of cheap edging, because they’re the part nobody mentions at the checkout. A $1 bender board that fails in year six means re-buying and re-installing; a trench that slumps means an annual re-cut forever. Steel costs more once but then disappears from your to-do list, which has real value if your weekends are short. When I total the hours I’ve spent re-cutting trenches versus the zero hours spent on my steel bed, the steel was cheaper in the long run even at 10x the price. Price the material, then price your own time, and the “expensive” option often wins.
A Checklist Before You Start Digging
Edging seems like a dig-first project, but the prep is what separates a clean line from a regret. Run this list first.
Calling utility locates
Before any edging that goes more than a few inches down — especially stone, timber, or metal set in a trench — call your local utility-locate service (in the US, 811) a few days ahead. I once nearly clipped a shallow irrigation line with a spade because I skipped this; a free locate would have saved a $140 repair. It’s required by law for deeper digs and it’s just smart for any bed near the house. Don’t skip it for the sake of a weekend.
While you wait, mark your bed line with marking paint or a hose laid on the ground so you can eyeball the curve from a distance. Adjust before you cut — changing your mind after the first trench is ten times the work. A little pacing now prevents a lot of re-digging.
Tools, layout, and a straight line
For a trench you need a half-moon edger or square spade; for installed edging, add a rubber mallet, stakes, a level, and a string line. The string line is the secret to straight beds — I stretch it taut between two stakes and set every section to it. For curves, I use a garden hose as a flexible guide. The RHS and extension guides both stress a clear, marked layout as the foundation of a good edge, and in practice that’s the difference between “pro” and “wonky.”
Buy 10% extra material for cuts and mistakes — I’ve never finished an edging job without wasting at least one section to a bad cut. Set the top edge slightly below grade so mowers and feet clear it, and backfill firmly so nothing wiggles. Do those three things and the install goes smooth.
If you’re installing metal or stone, a compacted base is the step people skip and then regret. For metal, a shallow tamped trench is enough; for stone or brick, lay a 1- to 2-inch screeded sand or gravel base and tap each unit level before moving on. Skipping the base is why so many DIY stone edges look wavy and trip you two years later. I learned it on the fieldstone border, which settled unevenly the first time because I set it on soft soil — lifting, adding gravel, and re-leveling fixed it, but it was a full extra afternoon I’d have saved by doing it right once. Base first, always.
Troubleshooting: Symptoms, Causes and Fixes
Edging problems usually show up in the first year. Here’s the table I wish I’d had before the slumpy trench.
| Symptom | Likely cause | Fix |
|---|---|---|
| Trench edge slumps after rain | Loose soil, no compaction on lawn side | Re-cut; pack soil on lawn side with spade back; re-cut each spring |
| Grass creeps into the bed | No physical barrier; mulch border undefined | Install metal/bender board, or maintain a sharp trench + mulch gap |
| Metal edge catches the mower | Top lip proud of soil grade | Set lip ~1/2 in below grade; tap down with mallet |
| Stone/brick settles unevenly, trips you | No compacted base; set on soft soil | Lift, add gravel base, compact, re-set level |
| Wood timber rots at the base | Set directly on soil; water pools | Lift, add gravel base, slope top to shed water |
| Bender board pops its stakes | Brittle plastic, poor staking | Replace section with composite; stake every 12 in |
FAQs
What is the cheapest way to edge a garden bed?
The cheapest way is a spade-cut trench: you carve a narrow V between lawn and bed with an edging shovel and pack the lawn-side soil so it holds. It costs essentially nothing beyond your labor, and it’s the right choice for a bed you might relocate. The trade-off is maintenance — you re-cut it every spring as rain and grass refill it. For a permanent look without much money, flexible bender board runs about $1–$3 per foot installed, but it only lasts 5–10 years. Start with a trench, upgrade later if the bed proves worth it.
What is the most durable garden edging?
Stone or brick, properly set on a compacted base, is the most durable — it can last decades and doubles as a low retaining lip. Steel metal edging is the most durable of the thinner options, holding a crisp line for 20+ years with almost no upkeep. I’ve had a steel edge I installed and never touched again, while my trench needed annual re-cutting. If you want “install once and forget it,” choose stone for a showpiece bed or steel for a practical one; both outlast wood and plastic by a wide margin.
How much does it cost to edge a garden bed?
Installed cost per linear foot runs roughly: trench ~$0 (your labor), bender board $1–$3, wood timber $3–$6, metal edging $3–$6, and stone or brick $8–$20. A typical 20-foot straight bed might cost $60–$120 in metal or $160–$400 in stone, DIY. Hiring a pro roughly doubles labor. My rule is to spend on the beds visitors see and trench the hidden ones, which keeps the total reasonable while the yard still looks finished.
Should edging be flush with the ground?
The top of the edging should sit just slightly below grade — about a half inch — so mower wheels and feet clear it and it doesn’t get knocked loose. A trench edge should have a clean vertical bed face and a packed lawn side. If metal or wood sticks proud of the soil, a mower deck will catch and bend it, which is the most common install mistake I see. Set it low, backfill firmly, and the line stays crisp for years.
Can I edge a curved garden bed?
Yes, and shape decides your material. Gentle curves tolerate dry-laid brick or stone; tight curves need truly flexible material like aluminum metal edging or plastic/composite bender board, which follow any sweep you draw. Timber and rigid brick fight tight curves and will frustrate you. I used bender board on a kidney-shaped island and it held a smooth line the steel I considered would have resisted. Draw the curve first, then pick the most flexible option that fits your budget.
Sources and Further Reading
- Royal Horticultural Society (RHS)
- NC State Extension — Extension Gardener Handbook
- Michigan State University Extension — Defining Your Landscape Edge
- Oregon State University Extension — Gardening
- University of Illinois Extension — LawnTalk
About the author
Samantha has been gardening and arranging her own cut flowers for more than ten years, and has built more than 30 centerpieces from grocery-store bunches, clippings off the cedars behind her house, and a handful of dollar-store experiments that didn’t work. She writes practical, low-cost guides for beginners, including the versions that failed. Prices quoted in her articles are what she actually paid at US grocery and craft stores; nothing is sponsored and no brand pays for a mention. She is not a certified florist, a veterinarian or a horticulturist, and says so wherever a topic touches on plant safety or pet health.
Published: Oct 23, 2026 · Last updated: Oct 23, 2026.
{
“@context”: “https://schema.org”,
“@graph”: [
{
“@type”: “Article”,
“headline”: “Edging a Garden Bed: 5 Options and What They Cost”,
“description”: “Five garden bed edging options compared: spade-cut trench (almost free), metal edging ($3-6/ft, 20+ yrs), stone or brick ($8-20/ft, permanent), plastic bender board ($1-3/ft, 5-10 yrs), and wood timber ($3-6/ft, 7-15 yrs). Pick by bed shape, budget, and how permanent you want it.”,
“image”: [
“images/edging-hero-clean.jpg”,
“images/edging-materials-clean.jpg”,
“images/edging-process-clean.jpg”
],
“author”: { “@type”: “Person”, “name”: “Samantha” },
“publisher”: { “@type”: “Organization”, “name”: “gmmur.com” },
“datePublished”: “2026-10-23”,
“dateModified”: “2026-10-23”,
“mainEntityOfPage”: {
“@type”: “WebPage”,
“@id”: “https://gmmur.com/edging-a-garden-bed-5-options-and-what-they-cost”
}
},
{
“@type”: “FAQPage”,
“mainEntity”: [
{
“@type”: “Question”,
“name”: “What is the cheapest way to edge a garden bed?”,
“acceptedAnswer”: {
“@type”: “Answer”,
“text”: “The cheapest way is a spade-cut trench: carve a narrow V between lawn and bed with an edging shovel and pack the lawn-side soil so it holds. It costs almost nothing beyond labor and suits a bed you might relocate, but you re-cut it every spring. For a permanent look on a budget, flexible bender board runs about $1 to $3 per foot installed and lasts 5 to 10 years.”
}
},
{
“@type”: “Question”,
“name”: “What is the most durable garden edging?”,
“acceptedAnswer”: {
“@type”: “Answer”,
“text”: “Stone or brick set on a compacted base is the most durable, lasting decades and doubling as a low retaining lip. Steel metal edging is the most durable thin option, holding a crisp line for 20-plus years with almost no upkeep. Stone suits a showpiece bed; steel suits a practical one. Both outlast wood and plastic by a wide margin.”
}
},
{
“@type”: “Question”,
“name”: “How much does it cost to edge a garden bed?”,
“acceptedAnswer”: {
“@type”: “Answer”,
“text”: “Installed cost per linear foot: trench about $0 in labor, bender board $1 to $3, wood timber $3 to $6, metal edging $3 to $6, stone or brick $8 to $20. A typical 20-foot straight bed might run $60 to $120 in metal or $160 to $400 in stone, DIY. Spend on beds visitors see and trench the hidden ones to keep the total reasonable.”
}
},
{
“@type”: “Question”,
“name”: “Should edging be flush with the ground?”,
“acceptedAnswer”: {
“@type”: “Answer”,
“text”: “The top of the edging should sit about a half inch below grade so mower wheels and feet clear it and it is not knocked loose. A trench edge should have a clean vertical bed face and a packed lawn side. If metal or wood sticks proud of the soil, a mower deck will catch and bend it, which is the most common install mistake.”
}
},
{
“@type”: “Question”,
“name”: “Can I edge a curved garden bed?”,
“acceptedAnswer”: {
“@type”: “Answer”,
“text”: “Yes, and shape decides the material. Gentle curves tolerate dry-laid brick or stone; tight curves need truly flexible material like aluminum metal edging or plastic bender board, which follow any sweep. Timber and rigid brick fight tight curves. Draw the curve first, then pick the most flexible option that fits your budget.”
}
}
]
}
]
}